An art portfolio PDF is a essential tool for artists to showcase their creative work professionally. It allows artists to present their best pieces in a organized, visually appealing format, making it easy to share with galleries, schools, or potential employers. PDF portfolios are widely used due to their universality and high-quality display. They can include various types of artwork, from paintings and photographs to fashion designs and mixed media. By using tools like Adobe InDesign or Canva, artists can create polished, cohesive portfolios that highlight their skills and style. A well-crafted PDF portfolio is crucial for standing out in the competitive art world.
1.1 What is an Art Portfolio and Its Importance
An art portfolio is a curated compilation of an artist’s best works, showcasing their skills, creativity, and personal style. It typically includes paintings, photographs, designs, or other artistic pieces that highlight the artist’s versatility and expertise. The importance of an art portfolio lies in its ability to open doors to opportunities such as exhibitions, educational programs, and professional collaborations. It serves as a visual representation of an artist’s journey, allowing galleries, schools, and potential employers to assess their talent and suitability for specific roles. A well-crafted portfolio not only demonstrates technical proficiency but also communicates the artist’s unique vision and creative approach. It is an essential tool for artists aiming to stand out in the competitive art world.
1.2 Why PDF Format is Popular for Art Portfolios
The PDF format has become the preferred choice for art portfolios due to its versatility and reliability. It ensures that the layout, colors, and overall design remain consistent across different devices and platforms, preserving the artist’s intent. Unlike other formats, PDFs are universally accessible and do not require specialized software, making them easy to share via email or online platforms. Additionally, PDFs allow for high-quality image compression, maintaining the integrity of artwork while keeping file sizes manageable. This makes them ideal for submitting to galleries, schools, or employers. The ability to password-protect PDFs also adds a layer of security, safeguarding sensitive content. Overall, PDFs strike the perfect balance between professionalism, accessibility, and practicality for artists.

Types of Art Portfolios

Art portfolios vary widely, encompassing fine arts, fashion design, graphic art, photography, and mixed media. Each type highlights specific artistic skills and creative expressions.
2.1 Fine Arts and Painting Portfolios
Fine arts and painting portfolios showcase an artist’s technical skills and creative expression through various mediums like oil, acrylic, or mixed media. These portfolios often highlight a range of styles, from realistic to abstract, and may include sketches, finished pieces, and conceptual works. Artists use PDF formats to present their paintings in high-resolution, ensuring vibrant colors and precise details. Many portfolios also provide context, such as the inspiration behind the work or the artistic process. This format allows for easy sharing and professional presentation, making it ideal for galleries, exhibitions, or educational applications. A strong fine arts portfolio demonstrates an artist’s versatility and mastery of their craft.
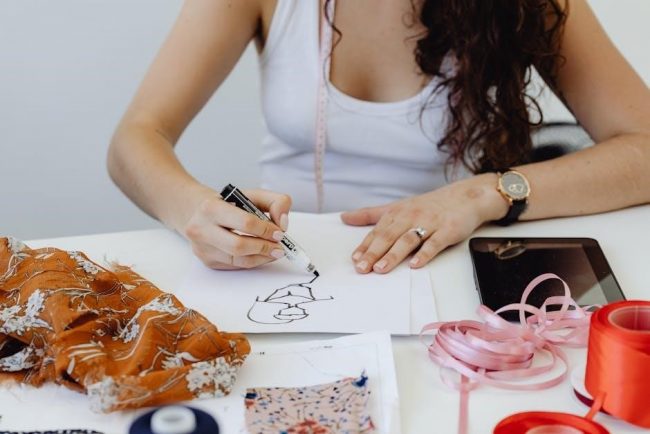
2.2 Fashion Design and Graphic Art Portfolios
Fashion design and graphic art portfolios in PDF format are essential for showcasing creativity and technical skills. These portfolios typically include sketches, mood boards, and final designs, demonstrating an artist’s ability to translate ideas into tangible creations. High-quality images and minimal text allow the artwork to speak for itself. Graphic art portfolios often feature branding elements, typography, and digital illustrations, while fashion portfolios highlight textiles, patterns, and garment designs. Tools like Canva or Adobe InDesign are commonly used to create these portfolios, ensuring a professional and cohesive presentation. A well-organized PDF portfolio helps fashion and graphic artists attract clients, employers, or collaborators by presenting their work in a polished and accessible format. It’s a vital tool for standing out in competitive industries.
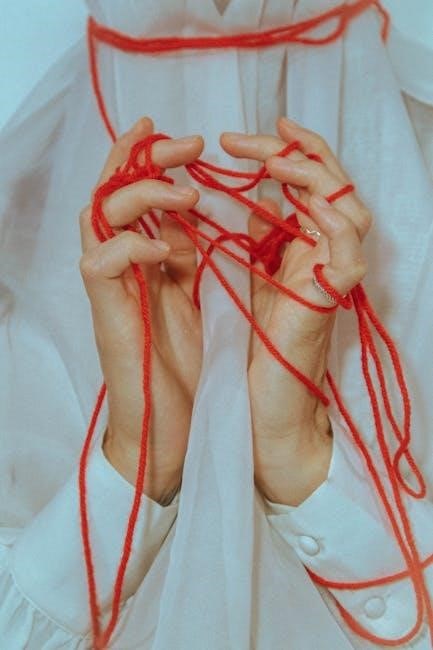
2.3 Photography and Mixed Media Portfolios
Photography and mixed media portfolios in PDF format are ideal for showcasing visual storytelling and creative experimentation. Photographers often include high-quality images that demonstrate their mastery of lighting, composition, and subject matter. Mixed media portfolios, on the other hand, combine photography with elements like paint, textiles, or digital art, creating unique and layered pieces. These portfolios highlight an artist’s ability to blend techniques and push boundaries. PDFs are particularly effective for presenting these works, as they maintain image quality and allow for seamless navigation. Whether focusing on documentary, fine art, or experimental styles, a photography and mixed media portfolio in PDF format offers a professional and engaging way to share artistic vision and versatility.
How to Create an Art Portfolio PDF
Creating an art portfolio PDF involves selecting your best work, organizing it logically, and designing it with professional tools like Adobe InDesign or Canva. Ensure high-quality images, consistent layout, and clear navigation for a polished presentation that showcases your artistic skills and style effectively.
3.1 Steps to Design a Professional Art Portfolio
Designing a professional art portfolio involves several key steps. First, curate your best and most relevant work, ensuring it aligns with your artistic goals. Next, organize the content logically, starting with a cover page and table of contents. Use design tools like Adobe InDesign or Canva to create a cohesive layout. Include high-quality images, with captions for context. Optimize the PDF for different devices, ensuring fast loading times. Finally, proofread and test the portfolio before sharing. These steps ensure your portfolio is polished, professional, and showcases your artistic talent effectively.
3.2 Tips for Organizing and Presenting Your Work
Organizing and presenting your work effectively is crucial for a professional art portfolio. Start by selecting your strongest pieces that showcase your artistic range and style. Use consistent layouts, fonts, and colors to maintain a cohesive look. Include high-quality images optimized for digital viewing, ensuring they are clear and well-lit. Add captions or descriptions to provide context for each piece, such as inspiration, medium, or date. Consider starting with your most impactful work to grab attention. Use a contents page for easy navigation and ensure the PDF is mobile-friendly. Regularly update your portfolio to reflect your artistic growth and tailor it to the audience or opportunity you’re targeting.
Tools for Designing an Art Portfolio PDF
Popular tools include Adobe InDesign for professional layouts, Canva for templates, and Microsoft Word for simple designs. These tools support PDF exports and offer customization options.
They also provide drag-and-drop features and compatibility with various file formats like PDF, DOCX, and INDD, making portfolio creation efficient and accessible for artists.
4.1 Adobe InDesign and Canva for Portfolio Creation
Adobe InDesign and Canva are top choices for creating art portfolio PDFs. InDesign offers advanced layout control, perfect for professionals needing precise design customization. Canva provides user-friendly templates and drag-and-drop functionality, ideal for those with less design experience. Both tools support high-quality image imports and allow artists to organize their work cohesively. InDesign’s compatibility with PDF exports ensures professional-grade output, while Canva’s intuitive interface makes it accessible for quick portfolio assembly. These platforms cater to different skill levels, enabling artists to present their work in a polished, visually appealing manner. They are widely recommended for portfolio creation due to their versatility and ease of use.
4.2 Using Microsoft Word for Simple PDF Portfolios
Microsoft Word is a practical tool for creating simple art portfolio PDFs. Its user-friendly interface allows artists to easily arrange text and images. While it may not offer the advanced design features of InDesign, Word is ideal for those seeking a straightforward approach. Artists can insert high-quality images, format text, and organize pages efficiently. Word’s compatibility with PDF conversion ensures that portfolios are exported in a professional format. It’s a cost-effective solution, especially for students or emerging artists, providing a clean and professional presentation of their work without requiring specialized design skills. This makes Word a viable option for artists looking to create a simple yet effective portfolio quickly.
Best Practices for an Art Portfolio PDF
Ensure consistency in layout and design throughout your portfolio. Optimize image quality while keeping file sizes manageable for smooth viewing. Organize work logically, with clear headings and captions. Use high-resolution images and maintain a professional appearance. Keep the portfolio concise, focusing on your best pieces. Include a contents page for easy navigation. Proofread thoroughly to avoid errors. Ensure compatibility across devices and platforms. Regularly update your portfolio to reflect new work and artistic growth.
5.1 Consistency in Layout and Design
Consistency is key to a professional art portfolio. Use a uniform layout, font style, and color scheme throughout the document. Ensure margins and spacing are uniform across pages. Maintain a cohesive visual flow by aligning images and text consistently. Use page numbers or a table of contents for easy navigation. Apply consistent formatting to headings and captions. Avoid overly elaborate designs that distract from the artwork. Instead, focus on a clean, minimalist aesthetic that allows your art to shine. Consistency reinforces your brand and professionalism, making your portfolio more engaging and polished for reviewers.
5.2 Optimizing Image Quality and File Size
Optimizing image quality and file size is crucial for a professional art portfolio. Use high-resolution images to showcase details, but compress them to keep the PDF file size manageable. Aim for a balance between quality and file size, ensuring fast loading times without compromising visual clarity. Use tools like Adobe Acrobat or Canva to optimize images and reduce file size. Convert images to appropriate formats like JPEG or PNG and adjust resolutions based on digital viewing needs. Avoid overly large files that may be difficult to share or download. Ensure your portfolio is accessible and efficient while maintaining professional image standards. Proper optimization enhances both aesthetics and usability, making your portfolio more appealing to reviewers.