Open post

pilates ring exercises pdf

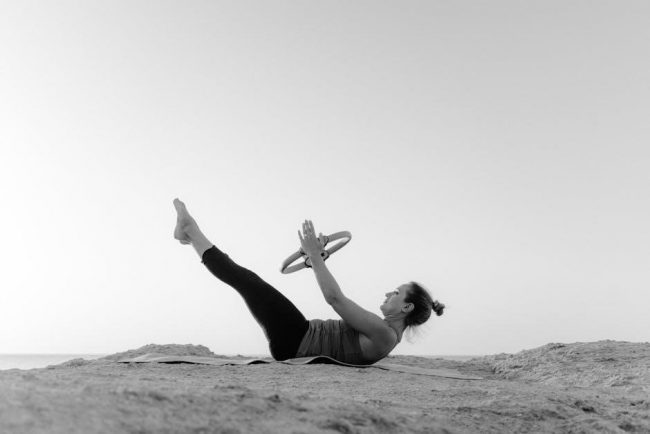
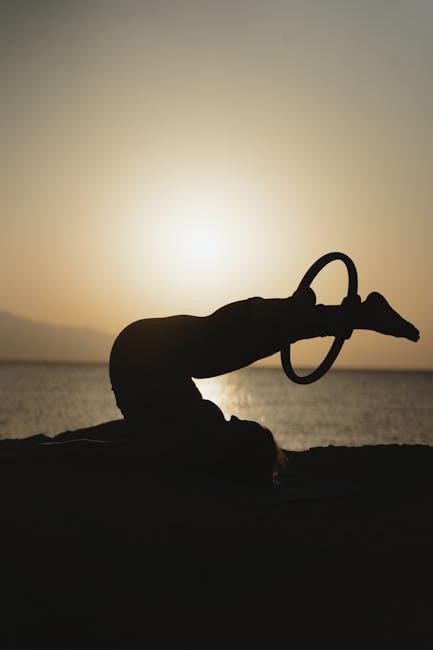
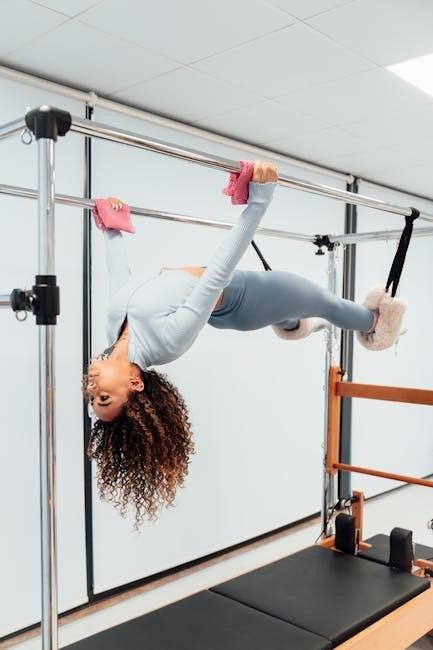
The Pilates Ring, also known as the Magic Circle, is a versatile exercise tool designed to enhance strength, flexibility, and posture. Its lightweight, flexible design makes it portable and ideal for home workouts. Available in various sizes, the ring provides gentle to moderate resistance, making it suitable for all fitness levels. Popular among Pilates enthusiasts, it is widely used for full-body workouts, with exercises like seated torso stretches and gluteal squeezes. Many users appreciate the availability of downloadable PDF guides, which offer detailed routines and tips for maximizing the ring’s benefits. This tool is a great addition to any fitness routine, promoting core engagement and muscle tone effectively.

What is the Pilates Ring?

The Pilates Ring, often referred to as the Magic Circle, is a lightweight, flexible exercise prop designed to add resistance to Pilates workouts. Typically made of durable, rubber-like material, it features two foam-padded handles for comfortable grip. Used between the hands, thighs, or other body parts, the ring provides gentle to moderate resistance when compressed, engaging the muscles and improving strength and flexibility. Its compact design makes it portable and ideal for home or studio use. Available in various sizes, the Pilates Ring is a versatile tool for enhancing core strength, posture, and overall physical fitness. It is widely recommended for both beginners and advanced practitioners.

Benefits of Using the Pilates Ring

The Pilates Ring offers numerous benefits, including enhanced strength, improved posture, and increased flexibility. Its resistance-based design targets multiple muscle groups simultaneously, promoting efficient workouts. By engaging the core and stabilizing muscles, it helps improve overall body alignment and balance. The ring is particularly effective for toning the arms, legs, and glutes while providing a low-impact, full-body workout. Its portability and versatility make it ideal for home or travel use. Additionally, the Pilates Ring is suitable for all fitness levels, allowing users to modify exercises according to their strength and goals. Regular use can lead to better muscle engagement and a stronger, more balanced physique.

Key Benefits of Pilates Ring Exercises

The Pilates Ring enhances posture, boosts flexibility, and strengthens core muscles. It improves muscle engagement and provides resistance for a full-body workout, suitable for all fitness levels.

Improving Posture and Core Strength

The Pilates Ring is an excellent tool for enhancing posture and core strength. By engaging the muscles in your back, shoulders, and abdominals, it helps maintain proper alignment. Exercises like the seated torso stretch and rolling improve spinal flexibility and stability. The ring’s resistance challenges the core, promoting better posture and reducing the risk of back pain. Regular use strengthens the pelvic floor and deep abdominal muscles, which are essential for a strong, stable core. This makes it ideal for individuals seeking to improve their overall posture and foundational strength through targeted, low-impact movements.

Enhancing Muscle Engagement and Flexibility

The Pilates Ring is a powerful tool for enhancing muscle engagement and flexibility. Its resistance challenges muscles, promoting deeper activation and strength. Exercises like leg lifts and seated torso stretches target specific muscle groups, improving flexibility and range of motion. The ring’s gentle pressure encourages proper form, ensuring muscles work efficiently without strain. Regular use can lead to improved muscle tone and better overall mobility. By incorporating the Pilates Ring into your routine, you can experience enhanced muscle engagement and flexibility, making it easier to perform daily activities and maintain a healthy, active lifestyle with consistent practice.

Essential Pilates Ring Exercises

The Pilates Ring offers a variety of effective exercises to enhance strength and flexibility. Key exercises include the Seated Torso Stretch, Rolling, Overhead Reaches, Bridge, and Gluteal Squeeze. These movements target multiple muscle groups, improving posture, core stability, and overall muscle engagement. Each exercise can be modified to suit different fitness levels, making the Pilates Ring a versatile tool for a full-body workout. Regular practice with these exercises can lead to noticeable improvements in strength, flexibility, and body alignment.

Seated Torso Stretch

The Seated Torso Stretch is a fundamental Pilates Ring exercise that enhances flexibility and posture. Sit with legs extended, hold the ring with hands shoulder-width apart. Inhale deeply, then exhale as you press the ring outward, stretching your chest and shoulders. Hold for 5-10 breaths, maintaining a straight spine. This exercise targets the upper back, shoulders, and chest muscles, promoting relaxation and improved alignment. Regular practice can reduce tension and enhance overall mobility. Detailed instructions and variations are often included in downloadable Pilates Ring exercise PDF guides, making it easy to incorporate into your routine.

Rolling

Rolling is a dynamic Pilates Ring exercise that engages the core and improves spinal mobility. Lie supine with knees bent and feet flat, placing the ring between your knees or ankles. Inhale to prepare, then exhale as you press the ring inward, lifting your head and shoulders off the mat. Roll forward, maintaining control, and slowly return to the starting position. This exercise strengthens the abdominals, enhances posture, and promotes fluid movement. For beginners, smaller movements are recommended to build strength and coordination. Detailed instructions and variations can be found in Pilates Ring exercise PDF guides for a comprehensive workout.

Overhead Reaches

Overhead Reaches with the Pilates Ring are an excellent way to enhance posture, flexibility, and upper body strength. Hold the ring by the handles and press it overhead, engaging your core for stability. Slowly lower the ring behind your head, stretching your shoulders and chest, then press it back to the starting position. This exercise targets the shoulder muscles, improves spinal alignment, and promotes deep breathing. For proper form, keep your arms straight and avoid arching your back. Detailed instructions and variations can be found in Pilates Ring exercise PDF guides, making it easy to incorporate into your routine for a full-body workout.

Bridge

The Bridge exercise, performed with the Pilates Ring, strengthens the glutes, hamstrings, and core while improving pelvic alignment. Lie on your back with knees bent and feet flat, placing the ring between your knees. Engage your core, squeeze the ring gently, and lift your hips toward the ceiling, forming a straight line from shoulders to knees. Hold briefly at the top, then slowly lower to the starting position. This exercise enhances posterior chain activation and promotes proper spinal movement. For added challenge, maintain constant pressure on the ring throughout the movement. Detailed instructions are available in Pilates Ring exercise PDF guides.

Gluteal Squeeze

The Gluteal Squeeze is a Pilates Ring exercise that targets the glutes and inner thighs, improving muscle tone and posture. Sit on the floor with legs straight, placing the ring around your thighs just above the knees. Engage your core, press your thighs outward against the ring, and hold for a few seconds. Release slowly and repeat for 10-15 repetitions; This exercise strengthens the glutes, enhances hip stability, and can be modified for different fitness levels. PDF guides often include variations, such as alternating squeezes or combining with other movements for a full lower-body workout.

Incorporating the Pilates Ring into Your Workout Routine

The Pilates Ring enhances workouts by adding resistance and intensity. Portable and affordable, it’s ideal for home use, offering a variety of exercises to strengthen the core and full body.

Warm-Up Exercises with the Pilates Ring

Warm-up exercises with the Pilates Ring are essential to prepare the body for more intense workouts. Start with gentle movements like seated torso stretches, rolling, and overhead reaches to improve flexibility and mobility. Leg exercises, such as squeezing the ring between the thighs, can activate the inner thigh muscles and enhance circulation. These exercises also engage the core, promoting stability and proper posture. Printable PDF guides often include detailed warm-up routines, making it easy to follow structured sequences. Incorporating these exercises into your routine ensures a safe and effective transition into more challenging movements, maximizing the benefits of your workout.

Full-Body Sequences Using the Pilates Ring

Full-body sequences with the Pilates Ring offer a comprehensive workout, targeting multiple muscle groups simultaneously. Begin with seated torso stretches to engage the core and improve posture. Transition into rolling exercises to activate the arms and shoulders. Overhead reaches and bridges can strengthen the upper body and glutes, while inner thigh squeezes and leg lifts enhance lower body toning. These sequences promote balanced strength, flexibility, and coordination. Printable PDF guides provide structured routines, making it easy to follow progressive workouts. By incorporating the Pilates Ring into your routine, you can achieve a full-body transformation with minimal equipment, perfect for home or studio use.

Safety and Precautions

Always consult your doctor before starting new exercises. Focus on proper activation techniques to avoid injury. Ensure controlled movements and avoid overexertion, especially for beginners.

Proper Activation Techniques

Proper activation techniques are essential for safe and effective Pilates Ring exercises. Always engage your core and maintain a neutral spine to support your movements. Activate your pelvic floor muscles to enhance stability and control. Focus on controlled breathing to synchronize with each exercise, ensuring proper muscle engagement. Avoid using momentum or forcing the ring beyond a comfortable range. Start with gentle resistance and gradually increase as your strength improves; Keep movements slow and precise to target the correct muscles without strain. Prioritize proper form to prevent injury and maximize results. Consult a certified instructor for personalized guidance.

Common Mistakes to Avoid

When using the Pilates Ring, avoid common mistakes that can reduce effectiveness or cause injury. Overreliance on momentum or excessive force can strain muscles and joints. Ensure proper core engagement to maintain control and stability. Neglecting to activate the pelvic floor or losing neutral spine alignment can lead to poor form. Avoid holding your breath; synchronize breathing with movements for better focus. Do not arch your back or let the ring sag, as this can compromise technique. Keep movements slow and controlled to target the correct muscles. Always warm up before exercises and cool down afterward to prevent stiffness.

Additional Resources

Find Pilates Ring exercise guides online, including free PDF downloads like the “Pilates Ring Exercise Guide” and “Core Balance Pilates Ring Exercise Guide.” Visit websites like art-of-motion.com for detailed tutorials and printable charts to enhance your workout routine with the Pilates Ring.

Where to Find Pilates Ring Exercise Guides

Pilates Ring exercise guides are widely available online, with many websites offering free downloadable PDFs. Popular resources include the “Pilates Ring Exercise Guide” and “Core Balance Pilates Ring Exercise Guide,” which provide detailed routines and instructions. Websites like art-of-motion.com and pilates.com offer comprehensive tutorials, printable charts, and exercise sequences. Additionally, platforms like Pinterest and fitness blogs share creative workout ideas using the Pilates Ring. These guides are perfect for both beginners and advanced users, ensuring you can maximize the benefits of your Pilates Ring workouts from the comfort of your home.

Online Tutorials and Printable PDFs

Online tutorials and printable PDFs are excellent resources for mastering Pilates Ring exercises. Websites like pilates.com and art-of-motion.com offer detailed guides, including exercise charts and step-by-step instructions. Many PDFs, such as the “Pilates Ring Exercise Guide” and “Core Balance Pilates Ring Exercise Guide,” are available for free download. These resources often include visual aids and routines tailored for different fitness levels. Printable charts make it easy to follow along at home, while online tutorials provide demonstrations to ensure proper form. Whether you’re a beginner or advanced, these tools help you maximize the benefits of your Pilates Ring workouts.

Open post

schedule o form 1120 instructions

Schedule O (Form 1120) is an IRS form used by corporations to report income apportionment within controlled groups, ensuring accurate tax liability calculations․

Overview of Schedule O and Its Purpose

Schedule O (Form 1120) is a critical component of corporate tax reporting, designed to facilitate the apportionment of taxable income among members of a controlled group․ It ensures that corporations operating within such groups accurately allocate income, deductions, and credits according to IRS regulations․ This form is essential for maintaining compliance with federal tax laws and preventing double taxation․ By providing detailed financial data, Schedule O helps corporations meet their tax obligations efficiently․ It also plays a role in reporting foreign operations and assets, making it indispensable for multinational corporations․ The form’s structured format ensures clarity and precision in tax calculations, aiding both the corporation and the IRS in assessing tax liability accurately․

What is Schedule O (Form 1120)?

Schedule O (Form 1120) is an IRS form used by corporations to report and apportion taxable income within controlled groups, ensuring accurate tax liability calculations․

Definition and Scope of the Form

Schedule O (Form 1120) is a critical component of the IRS tax framework, specifically designed for corporations operating within controlled groups․ Its primary purpose is to allocate and report taxable income among group members, ensuring compliance with federal tax regulations․ The form requires detailed financial information, including income, deductions, and credits, to accurately apportion tax liabilities․ It is essential for corporations with interrelated business operations or shared ownership structures․ Schedule O ensures that each entity within the group is fairly assessed for tax purposes, preventing double taxation and promoting transparency․ Proper completion of this form is vital for maintaining compliance and avoiding penalties, making it a cornerstone of corporate tax filings for affected entities․

Who Needs to File Schedule O (Form 1120)?

Corporations that are part of a controlled group, defined by common ownership or control, must file Schedule O to allocate taxable income among group members․

Eligibility Criteria for Corporations

Corporations must file Schedule O if they belong to a controlled group, defined by common ownership or control exceeding IRS thresholds․ This ensures proper income allocation within the group․

Structure of Schedule O (Form 1120)

Schedule O is divided into sections for reporting income apportionment, assets, and tax computations, ensuring clarity in controlled group filings and compliance with IRS requirements․

Breaking Down the Form into Sections

Schedule O (Form 1120) is structured to facilitate detailed reporting․ It includes sections for income apportionment, asset reporting, and tax computations․ Each part is designed to capture specific data, ensuring accurate representation of a corporation’s financial activities within a controlled group․ The form begins with income allocation across different jurisdictions, followed by detailed asset listings․ Subsequent sections focus on tax liability calculations, incorporating necessary adjustments and credits․ This segmented approach ensures compliance with IRS regulations and streamlines the filing process for corporations․ By organizing information into clear sections, Schedule O enhances transparency and simplifies the complex task of reporting intercompany transactions and shared tax responsibilities․

Filing Requirements for Schedule O (Form 1120)

Corporations in controlled groups must file Schedule O annually with their tax return, amended return, or refund claim to meet IRS requirements․

Deadlines and Submission Guidelines

Corporations required to file Schedule O must submit it with their income tax return, amended return, or refund claim․ The deadline aligns with the corporation’s income tax return, typically April 15th, or October 15th if an extension is filed․ Electronic filing is mandatory for most corporations, ensuring timely and accurate submissions․ Late filings may result in penalties, so adherence to deadlines is crucial․ Schedule O must be filed for each tax year the corporation is part of a controlled group․ Proper submission ensures compliance with IRS regulations and avoids delays in processing․ Corporations should consult the IRS website or professional tax advisors for specific guidance on filing requirements and deadlines․

How to Complete Schedule O (Form 1120)

Enter the required information for each section, ensuring accuracy in reporting controlled group data and apportioning taxable income according to IRS guidelines․

Step-by-Step Instructions for Accurate Filing

To accurately file Schedule O, start by identifying the corporation’s status as part of a controlled group․ Gather all relevant financial data and prior tax returns․ Begin with Part I, providing details about the common parent corporation․ In Part II, list each subsidiary, including their Employer Identification Numbers (EINs) and ownership percentages․ For Part III, calculate the total income, deductions, and credits apportioned across the group․ Ensure all figures align with Form 1120․ Review each section for accuracy and completeness before submission to avoid delays or penalties․ Finally, attach Schedule O to the primary tax return and submit by the designated deadline․

Common Errors to Avoid When Filing Schedule O

  • Ensure accurate EINs for all subsidiaries․
  • Verify income apportionment calculations․
  • Avoid missing deadlines for submission․
  • Double-check all mathematical entries․
  • Confirm proper attachment to Form 1120․

Tips for Ensuring Compliance and Accuracy

  • Always thoroughly review the IRS instructions for Schedule O before filing․
  • Consult a tax professional to ensure compliance with complex rules․
  • Double-check all calculations and ensure accurate EIN entries․
  • Attach Schedule O correctly to Form 1120 to avoid processing delays․
  • Use IRS resources or software to verify mathematical accuracy․
  • File electronically to reduce errors and ensure timely submission․
  • Maintain detailed records of apportionment and income calculations․
  • Stay updated on IRS changes to avoid penalties or missed deadlines․

Schedule O (Form 1120) is essential for accurate tax reporting, ensuring corporations meet IRS requirements and maintain compliance with federal tax regulations effectively․

Final Thoughts on Schedule O (Form 1120)

Open post

cub cadet xt2 error codes pdf

Understanding Cub Cadet XT2 error codes is crucial for diagnosing and resolving issues with your tractor. These codes help identify problems, ensuring proper maintenance and optimal performance. Referencing the official PDF guide provides detailed insights and troubleshooting steps, empowering users to address errors effectively and keep their equipment running smoothly.

1.1 Overview of Cub Cadet XT2 Series

The Cub Cadet XT2 Series is a line of durable and high-performance lawn tractors designed for homeowners seeking reliability and power. Known for their rugged construction and advanced features, these tractors are ideal for managing large properties. The series includes various models, each offering unique capabilities such as zero-turn maneuverability, robust engines, and versatile attachments. MTD Products, the parent company, ensures quality and innovation, making the XT2 Series a trusted choice for yard maintenance. With a focus on user-friendly design and strong customer support, the XT2 Series stands out as a dependable solution for lawn care needs.

1.2 Importance of Understanding Error Codes

Understanding Cub Cadet XT2 error codes is essential for maintaining your tractor’s performance and longevity. These codes serve as a diagnostic tool, helping users identify issues promptly and accurately. By referencing the error code guide, owners can address problems before they escalate, preventing costly repairs and downtime. Proper interpretation ensures safety, optimizes maintenance routines, and maximizes the efficiency of your equipment. Regular troubleshooting and timely interventions enhance overall functionality, making it crucial to familiarize yourself with these codes for a seamless ownership experience.

Common Cub Cadet XT2 Error Codes

The Cub Cadet XT2 often displays error codes like “E” codes, indicating issues such as ignition problems or system malfunctions. These codes help identify specific faults, enabling quick diagnosis and resolution to ensure optimal performance and minimize downtime.

2.1 List of Frequently Encountered Error Codes

The Cub Cadet XT2 error codes include E01, E02, and E03, which often relate to ignition coil issues, sensor malfunctions, or communication errors. Codes like E04 and E05 may indicate problems with the push start/display module or throttle position sensors. Additionally, E06 and E07 can signify issues with the mower’s PTO engagement or brake systems. These codes are essential for pinpointing specific problems, allowing users to address them effectively and maintain their tractor’s performance. Always consult the official PDF guide for accurate interpretations.

2.2 Meaning and Interpretation of Each Code

Each Cub Cadet XT2 error code corresponds to specific issues, such as ignition coil faults (E01), sensor malfunctions (E02), or communication errors (E03). The PDF guide provides detailed explanations, enabling users to diagnose problems accurately. For instance, E04 may indicate a faulty push start/display module, while E05 could signal a throttle position sensor issue. Understanding these codes allows for targeted repairs, ensuring the tractor operates efficiently. Always reference the official guide for precise interpretations and step-by-step solutions to maintain optimal performance and address errors effectively.

Troubleshooting Steps for Cub Cadet XT2

Identify symptoms, consult the PDF guide for error code meanings, and apply step-by-step solutions to resolve issues efficiently, ensuring your tractor operates smoothly and reliably.

3.1 Identifying Symptoms of Errors

Identifying symptoms of errors in your Cub Cadet XT2 is the first step in effective troubleshooting. Common indicators include unusual noises, reduced performance, or the illumination of dashboard warning lights. Error codes displayed on the tractor’s control panel provide specific clues about the issue. For instance, excessive vibration may point to loose or damaged blades, while difficulty starting the engine could indicate problems with the ignition system or fuel supply. By carefully observing these symptoms and cross-referencing them with the official PDF guide, you can pinpoint the root cause and take appropriate corrective actions. This systematic approach ensures that your tractor receives the right attention, minimizing downtime and prolonging its lifespan. Regular monitoring of your Cub Cadet XT2’s behavior helps in early detection of potential issues, allowing for timely interventions and preventing minor problems from escalating into major repairs.

3.2 Using the PDF Guide for Diagnosis

The official Cub Cadet XT2 error codes PDF guide is an essential tool for diagnosing issues. This comprehensive manual lists error codes, their meanings, and step-by-step solutions. By referencing the guide, users can quickly identify problems such as faulty sensors, ignition issues, or system malfunctions. The guide also outlines maintenance schedules and troubleshooting procedures, ensuring users can address errors effectively. Its clear instructions and detailed diagrams make it easier to understand and resolve issues, helping to restore your tractor’s performance efficiently. Regular use of the PDF guide enables proactive maintenance, reducing the risk of unexpected breakdowns and extending the lifespan of your Cub Cadet XT2.

3;3 Step-by-Step Solutions for Common Issues

Addressing Cub Cadet XT2 errors requires a systematic approach. Start by identifying the error code displayed and cross-referencing it with the PDF guide. Once the issue is diagnosed, follow the guide’s recommended steps, such as checking sensor connections or replacing faulty components. For example, an ignition coil failure may require replacing the coil, while a PTO engagement issue might need adjusting or cleaning the switch. Always refer to the manual for specific instructions, ensuring safety and proper repair. This methodical process helps resolve issues efficiently and prevents further damage to your tractor.

Maintenance Tips to Prevent Errors

Regular maintenance is essential to prevent errors in your Cub Cadet XT2. Check engine oil, air filters, and battery terminals regularly. Ensure blades are sharp and balanced, and lubricate all moving parts. Refer to the Cub Cadet XT2 error codes PDF for a detailed schedule and guidelines to keep your tractor running smoothly.

4.1 Routine Maintenance Schedule

Regular maintenance is key to preventing errors in your Cub Cadet XT2. Follow a routine schedule to ensure optimal performance. Daily, check engine oil levels, air filter cleanliness, and battery terminals. Weekly, inspect tire pressure, deck wheels, and blade sharpness. Monthly, clean the engine cooling fans, grease all lubrication points, and replace the air filter if necessary. Every 50 hours, change the engine oil and filter. Seasonally, winterize the tractor by draining fuel and applying a stabilizer. Refer to the Cub Cadet XT2 error codes PDF for detailed guidelines and intervals to maintain your tractor effectively.

4.2 Best Practices for Machine Upkeep

Proper upkeep ensures your Cub Cadet XT2 runs efficiently and lasts longer. Store the tractor in a dry, protected area to prevent rust and damage. Regularly clean the mower deck and underside to remove debris, which can cause corrosion or interference. After each use, inspect for worn or damaged parts, such as blades or belts, and replace them promptly; Use genuine Cub Cadet parts to maintain performance and reliability. Keep the engine and surrounding areas clean to prevent overheating and ensure proper airflow. Lubricate moving parts and check hydraulic fluid levels regularly. Proper upkeep not only prevents errors but also enhances overall functionality and longevity.

Accessing the Cub Cadet XT2 Error Codes PDF

To access the Cub Cadet XT2 error codes PDF, visit the official Cub Cadet website or trusted sources like ManualsLib. This guide provides detailed error code explanations and troubleshooting steps to help diagnose and resolve issues efficiently.

5.1 Where to Find the Official PDF Guide

The official Cub Cadet XT2 error codes PDF can be found on the Cub Cadet website or trusted third-party platforms like ManualsLib. Visit the official site, navigate to the support section, and search for your specific model. You can also contact Cub Cadet dealers for a direct link. The guide is free to download and provides comprehensive error code explanations and troubleshooting steps.

5.2 How to Interpret the Error Code Information

The Cub Cadet XT2 error codes PDF provides a structured guide to understanding and resolving issues. Begin by locating your specific error code in the guide, which is typically listed alphabetically or numerically. Each code is accompanied by a detailed explanation, including the probable cause and recommended solutions. Follow the step-by-step instructions to diagnose and repair the problem. The guide may also include diagrams or troubleshooting flowcharts for complex issues, ensuring you can address errors efficiently and effectively. Always refer to the official guide for accurate and reliable information.

Contacting Cub Cadet Support

For unresolved issues, contact Cub Cadet support at 1-877-428-2349 or visit their official website for dealer locations. Ensure your model and serial numbers are ready for efficient assistance.

6.1 When to Contact Customer Service

Contact Cub Cadet customer service when encountering unresolved issues, complex error codes, or if DIY troubleshooting fails. Additionally, reach out for warranty-related inquiries, missing parts, or post-service concerns. Their team is available at 1-877-428-2349 to assist with technical support, repair scheduling, or guidance on specific error codes. Having your model and serial number ready ensures faster resolution. Don’t hesitate to contact them for expert help in restoring your tractor’s functionality and performance.

6.2 How to Reach Cub Cadet Dealers and Support

To reach Cub Cadet dealers and support, visit their official website or call their customer service at 1-877-428-2349. You can also locate your nearest dealer using the dealer locator tool on their website. For technical assistance, contact their support team directly or refer to the PDF guide for troubleshooting. Additionally, Cub Cadet Service Centers are available for expert help. Ensure you have your model and serial number ready for efficient service. Their support team is dedicated to resolving issues and providing guidance for optimal tractor performance.

Open post

squishmallow coloring pages pdf

Squishmallow coloring pages are free downloadable PDFs featuring adorable Squishmallow characters, allowing fans to bring their favorite plush toys to life through creative coloring. These printables, perfect for all ages, offer a fun and artistic way to enjoy the charm of Squishmallows, from unicorns to dragons, sparking imagination and joy for kids and adults alike.

What Are Squishmallows?

Squishmallows are soft, cuddly, and irresistibly adorable plush toys that have captured the hearts of millions worldwide. These squishy friends come in a variety of shapes, sizes, and animal designs, ranging from unicorns and dragons to cats and foxes. Known for their ultra-soft texture and endearing expressions, Squishmallows have become a beloved companion for both children and adults. They are often collected, gifted, and even used as pillows due to their comforting design. The popularity of these plush toys has inspired a range of creative activities, including coloring pages, allowing fans to bring their favorite characters to life in a new and artistic way. Squishmallows embody warmth, comfort, and joy, making them a delightful subject for coloring enthusiasts of all ages.

Why Squishmallow Coloring Pages Are Popular

Squishmallow coloring pages have gained immense popularity due to their charming and recognizable designs, which resonate with fans of all ages. These pages allow individuals to creatively engage with their favorite Squishmallow characters, transforming them into personalized artworks. The soft, cuddly, and endearing nature of Squishmallows translates beautifully into coloring designs, making them a delightful activity for both kids and adults. Additionally, the therapeutic benefits of coloring, such as stress relief and mindfulness, contribute to their appeal. The availability of free, downloadable PDFs has further boosted their popularity, enabling fans to easily access and print these pages. With a wide variety of characters and themes to choose from, Squishmallow coloring pages offer a fun, artistic way to celebrate these beloved plush toys.

Benefits of Squishmallow Coloring Pages

Squishmallow coloring pages offer creative relaxation, sparking imagination and mindfulness. They enhance focus, provide stress relief, and serve as a fun, artistic activity for families and groups.

How Coloring Pages Spark Creativity

Squishmallow coloring pages are an excellent way to unlock creativity, allowing users to personalize their favorite characters with vibrant colors and unique designs. By providing outlines of beloved Squishmallow friends, these pages inspire artists to experiment with color combinations and patterns, fostering self-expression and imagination. The variety of characters, from unicorns to dragons, offers endless possibilities, encouraging users to think outside the box and bring their vision to life. This creative process not only enhances artistic skills but also provides a sense of accomplishment as each page transforms into a personalized masterpiece. Whether for children or adults, Squishmallow coloring pages serve as a delightful tool to spark creativity and joy.

Stress Relief and Relaxation for All Ages

Squishmallow coloring pages offer a therapeutic escape, providing stress relief and relaxation for people of all ages. The calming act of coloring allows individuals to focus on the present moment, fostering mindfulness and reducing anxiety. The adorable designs of Squishmallow characters, such as unicorns, dragons, and cute animals, create a soothing experience that appeals to both children and adults. By immersing themselves in the creative process, users can unwind and express their emotions through color. The availability of free, printable PDFs makes it easy to access this relaxing activity anytime, anywhere. Whether it’s a quiet moment for oneself or a fun family bonding experience, Squishmallow coloring pages are a delightful way to de-stress and find calm in a busy world.

Where to Find Free Squishmallow Coloring Pages PDF

Find free Squishmallow coloring pages PDFs on top websites like ColoringPagesOnly.com, offering a variety of adorable characters and themes for easy download and printing at home.

Top Websites Offering Free Downloads

ColoringPagesOnly.com stands out as a premier destination for free Squishmallow coloring pages, offering a vast collection of characters like Astrid the unicorn and Cam the cat. Pinterest provides inspirational ideas and direct links to downloadable PDFs, while SquishmallowFanClub.com specializes in exclusive and rare designs. Additionally, sites like ColoringFun.net and SquishmallowColoringPages.com offer themed sets, including seasonal and limited-edition characters. These platforms ensure high-quality printables, making it easy for fans to find and download their favorite Squishmallow characters. With just a few clicks, users can access these free resources and start their creative journey, bringing the Squishmallow world to life in vibrant colors.

How to Search for Specific Squishmallow Characters

Searching for specific Squishmallow characters in coloring pages is straightforward. Start by visiting websites like ColoringPagesOnly.com or Pinterest, which offer extensive collections. Use keywords such as “Astrid the unicorn coloring page PDF” or “Cam the cat Squishmallow printable” to find exact matches. Many sites categorize pages by character, making it easy to browse. For rare or limited-edition designs, check official Squishmallow fan sites or forums. You can also filter search results by popularity or recency to discover new releases. Additionally, Google searches with terms like “free Squishmallow [character name] coloring page PDF” often yield direct links to downloadable files. This method ensures you can find and print your favorite Squishmallow characters quickly and efficiently.

How to Download and Print Squishmallow Coloring Pages

Visit websites like ColoringPagesOnly.com, browse collections, and select your preferred Squishmallow design. Download the PDF, ensure your printer is set to the correct paper size, and print your favorite coloring page to enjoy.

Step-by-Step Guide to Printing PDFs

Visit a reliable website like ColoringPagesOnly.com and browse the Squishmallow coloring page collection.

Select your preferred design and download the PDF file to your device.

Open the PDF using a compatible viewer like Adobe Acrobat.

Choose the print option and select your printer from the list.

Adjust settings to ensure the page size matches your paper dimensions.

Load high-quality paper into your printer for the best results.

Print the coloring page and let it dry completely.

Gather your favorite coloring tools and enjoy bringing your Squishmallow character to life!

Tips for Choosing the Best Paper and Printers

For optimal results when printing Squishmallow coloring pages, choose high-quality paper designed for vibrant color output. Cardstock or premium matte paper works well, ensuring colors pop and details remain crisp. Inkjet printers are ideal for PDFs, as they produce rich, vibrant hues. Consider models like Canon PIXMA or HP Envy for excellent print quality. Always use genuine ink cartridges to avoid faded or blurry images. Adjust printer settings to “high quality” or “photo” mode for the best output. For brighter colors, select “vivid” or “color enhancement” options. Lastly, ensure your printer is calibrated and maintained regularly to achieve professional-looking results. Experiment with different paper types and settings to find your perfect combination!

Popular Squishmallow Characters for Coloring

Squishmallow coloring pages feature a wide variety of beloved characters, including unicorns, dragons, cats, and foxes. Each design captures the unique charm of these soft, cuddly friends, from gentle Dexter the dragon to playful Cam the cat. With seasonal and limited-edition options, there’s always something new to discover and color. These characters inspire creativity and bring joy to fans of all ages, making them perfect for artistic expression.

Meet the Most Beloved Squishmallow Friends

Among the most cherished Squishmallow characters are Astrid the unicorn, Cam the cat, Dexter the dragon, and Fifi the fox. Each character boasts unique traits that captivate fans. Astrid, with her dreamy demeanor, and Cam, with his mischievous charm, are fan favorites. Dexter, the gentle dragon, and Fifi, the lovingly sweet fox, also delight coloring enthusiasts. These characters, known for their soft, cuddly designs and vibrant personalities, inspire creativity and joy. Their popularity extends across ages, making them perfect for coloring pages. Fans can bring these beloved friends to life by adding their own colorful twists, creating personalized masterpieces. The variety of characters ensures there’s something for everyone, fostering a sense of connection and artistic expression.

Seasonal and Limited Edition Designs

Squishmallow coloring pages also feature seasonal and limited edition designs, adding a unique twist to the classic characters. These special prints capture the spirit of holidays like Christmas, Halloween, and Easter, with festive themes and exclusive artwork. Limited edition designs often include rare characters or special collaborations, making them highly sought after by fans. For instance, spooky Squishmallow characters like Ronnie the Cow or special seasonal plush toys inspire creative coloring. These designs allow artists to celebrate different occasions while enjoying their favorite Squishmallow friends. The variety of seasonal and limited edition coloring pages ensures there’s always something new and exciting to discover, keeping the coloring experience fresh and engaging for fans of all ages.

Open post

weber spirit e 210 grill manual

The Weber Spirit E-210 is a high-quality propane gas grill offering 360 square inches of cooking space and two stainless steel burners for versatile grilling experiences.

Overview of the Weber Spirit E-210 Model

The Weber Spirit E-210 is a sleek, propane-powered gas grill designed for versatility and durability. It features 360 square inches of cooking space, two stainless steel burners, and the innovative GS4 grilling system. With a compact design and robust construction, this grill is ideal for backyard cooking. Its user-friendly interface and high-quality components ensure consistent performance. The Spirit E-210 also comes with a 10-year warranty, reflecting Weber’s commitment to reliability and customer satisfaction.

Key Features and Benefits

The Weber Spirit E-210 boasts a GS4 grilling system, ensuring even heat distribution and reliable ignition. Its two stainless steel burners deliver 26,500 BTUs, offering precise temperature control. The grill features a primary cooking area of 360 square inches and a warming rack for added versatility. Durable porcelain-enameled grates prevent rust and make cleanup easier. With a 10-year warranty, this grill promises long-lasting performance and is perfect for both direct and indirect grilling techniques.

Assembly and Initial Setup

Follow the provided assembly instructions carefully to ensure proper setup. Step-by-step guides and diagrams help you assemble the grill safely and efficiently before its first use.

Step-by-Step Assembly Instructions

Begin by carefully unpacking and inventorying all components. Follow the manual to attach the cart, install the burners, and connect the gas line. Ensure all parts are securely tightened. Attach the cooking grates and heat deflectors according to the diagrams. Connect the propane tank and test for leaks using soap water. Finally, test the ignition system to ensure proper function. Refer to the assembly guide for detailed visuals and safety precautions to avoid errors.

Preparation for First Use

Before first use, wash the cooking grates with soap and water, then season them lightly with oil. Inspect all connections for leaks using a soap-water solution. Preheat the grill on high for 30 minutes to burn off any residue. Ensure the propane tank is fully connected and the regulator is securely attached. Familiarize yourself with the ignition system and control knobs. Always follow the manual for proper startup procedures to ensure safety and optimal performance.

Safety Guidelines and Precautions

Always prioritize safety when using the Weber Spirit E-210 grill. Keep children away, ensure proper ventilation, and never store flammable liquids nearby. Regularly inspect hoses and connections for leaks using a soap-water solution. If you smell gas, immediately turn off the supply and follow emergency procedures outlined in the manual. Never operate the grill indoors or on unstable surfaces.

Important Safety Warnings

  • Never allow children to operate or be near the grill while in use.
  • Always inspect the gas hose and connections for leaks using a soap-water solution before each use.
  • Do not store or use flammable liquids or vapors near the grill;
  • Ensure proper ventilation and never operate the grill in enclosed spaces.
  • If you smell gas, immediately shut off the supply and follow emergency procedures outlined in the manual.
  • Always turn off the grill and let it cool before covering or storing it.

Proper Handling and Storage

After use, allow the grill to cool completely before covering or storing. Store the grill in a dry, protected area to prevent rust. Keep the propane tank upright and secure, away from direct sunlight and heat sources. Regularly inspect all components for wear and tear. Always follow the user manual guidelines for maintenance and storage to ensure longevity and safety. Proper handling ensures optimal performance and extends the life of your Weber Spirit E-210 grill.

Operating the Grill

Preheat the grill to desired temperature, ensuring all burners are lit. Adjust control knobs for precise heat management. Use the GS4 system for consistent grilling results, ensuring even cooking across 360 square inches of space. Always monitor settings for optimal performance and safety.

Understanding the Control Knobs and Burners

The Weber Spirit E-210 features two stainless steel burners and intuitive control knobs, part of the GS4 grilling system. Each burner can be independently adjusted, allowing for precise temperature control. The control knobs operate smoothly, enabling you to customize heat settings for direct or indirect grilling. Always ensure the grill is preheated with the lid closed for optimal performance. Regularly clean the burners and knobs to maintain functionality. Follow the manual for safe ignition and operation procedures to avoid gas leaks or ignition issues.

Preheating and Cooking Techniques

Preheat the Weber Spirit E-210 by turning the control knobs to high, igniting the burners, and closing the lid for 10-15 minutes. Ensure the temperature reaches 500-550°F for optimal grilling. For direct grilling, place food over the flames, while indirect grilling uses the sides for slower cooking. Adjust the burners to maintain consistent heat and prevent flare-ups. Use the vent to control airflow and achieve desired temperatures. Always follow the manual for safe ignition and cooking practices to ensure delicious results every time.

Maintenance and Cleaning

Regularly clean grates and burners to ensure optimal performance. Protect the grill from rust by seasoning and using a cover. Refer to the manual for detailed cleaning instructions.

Regular Cleaning Procedures

Regular cleaning is essential for maintaining the Weber Spirit E-210 grill’s performance. After each use, brush the grates with a grill brush to remove food residue. Clean the burners and flame tamers with a soft brush or cloth to prevent clogging. Wipe the drip tray and grease pan with paper towels or a mild detergent. Avoid using abrasive cleaners or scourers, as they may damage the surfaces. For tougher stains, mix baking soda and water to create a paste, apply it, and rinse thoroughly. Always refer to the manual for detailed cleaning instructions to ensure longevity and safety.

Deep Cleaning and Grill Care

For deep cleaning, remove the grates, burners, and flavorizer bars, soaking them in warm soapy water. Scrub thoroughly with a non-abrasive brush and rinse. Clean the grill lid and exterior with a mild detergent and water. Regularly inspect and replace worn-out parts like grates or igniter batteries. Store the grill in a dry, covered area during off-season to protect from rust. Follow the manual’s guidelines to maintain your Weber Spirit E-210’s optimal condition and extend its lifespan.

Troubleshooting Common Issues

Identify and address issues like no gas flow or ignition problems. Check burner functionality and ensure proper gas supply. Refer to the manual for detailed solutions.

Diagnosing and Solving Gas Flow Problems

Check the gas tank and regulator for proper connection and ensure the tank is not empty. Inspect hoses for kinks or damage. If issues persist, clean the burner ports or replace the regulator. Refer to the manual for detailed troubleshooting steps. Ensure all controls are in the “off” position before investigating further. If problems remain unresolved, contact Weber customer support or consult a professional for assistance.

Addressing Ignition and Flame Issues

If the grill fails to ignite, ensure the propane tank is full and the regulator is properly connected. Clean the burner ports and igniter with a soft brush. Press the igniter button firmly while turning the control knob to “light.” If issues persist, check for blockages or damage to the ignition system. Refer to the manual for detailed instructions or contact Weber customer support for further assistance. Always ensure safety when troubleshooting ignition problems.

Warranty and Support

The Weber Spirit E-210 is backed by a 10-year warranty on parts and workmanship. For support, refer to the manual or visit Weber’s official website for assistance.

Understanding the Weber Warranty Program

Weber offers a comprehensive 10-year warranty for the Spirit E-210, covering parts and workmanship. This warranty ensures protection against defects, providing peace of mind for your investment. The program includes coverage for burners, cooking grates, and other components. For warranty claims, refer to the user manual or contact Weber’s customer support. This program reflects Weber’s commitment to quality and customer satisfaction, ensuring durability and performance for years to come. Proper registration and maintenance are recommended to uphold warranty terms effectively.

Contacting Customer Support

For assistance with your Weber Spirit E-210, visit the official Weber website or refer to the user manual. Weber offers customer support through phone, email, and live chat. The support team is available to address warranty claims, troubleshooting, and general inquiries. Additionally, the website provides downloadable resources, including PDF manuals and exploded views for parts identification. Ensure you have your grill’s model number ready for efficient service. Weber’s customer support is dedicated to resolving issues promptly and ensuring a smooth grilling experience.

Advanced Grilling Techniques

Master direct and indirect grilling for perfect sears and even cooking. Explore smoking and low-and-slow methods to enhance flavor on your Weber Spirit E-210 grill.

Mastering Direct and Indirect Grilling

Direct grilling on the Weber Spirit E-210 sears food quickly over high heat, ideal for steaks and burgers. Indirect grilling uses the grill as an oven, perfect for roasts and fish. Preheat the grill, place food away from burners, and close the lid for even cooking. Use the two burners to create zones for versatile cooking techniques, ensuring delicious results every time with precise temperature control.

Using the Grill for Smoking and Low-and-Slow Cooking

The Weber Spirit E-210 excels at smoking and low-and-slow cooking. Use one burner for indirect heat, creating a smoker-like environment. Close the lid to trap heat and smoke from wood chips. Maintain low temperatures (225-250°F) for tender results. Monitor and adjust burners as needed. Preheat thoroughly before starting. This method is perfect for brisket, ribs, or pulled pork, ensuring rich, smoky flavors and fall-apart texture with minimal effort and precise control.

Accessories and Upgrades

Enhance your grilling experience with Weber-approved accessories like griddle plates, smoker boxes, and rotisserie attachments. Upgrade parts include durable cooking grates and additional storage shelves for convenience.

Recommended Accessories for Enhanced Grilling

Elevate your grilling experience with Weber’s range of accessories. A griddle plate allows for perfect searing of vegetables and pancakes, while a smoker box infuses meals with rich, smoky flavors. The rotisserie attachment is ideal for slow-roasting meats to perfection. Additional cookware like pizza stones and wok pans expand your culinary possibilities. Durable cover solutions protect your grill from the elements, and storage baskets keep utensils and supplies organized. These accessories are designed to complement the Weber Spirit E-210’s performance and versatility, ensuring endless grilling creativity.

Upgrading Parts for Improved Performance

Enhance your Weber Spirit E-210’s efficiency with strategic upgrades. Consider replacing the ignition system for consistent lighting or upgrading to high-performance burners for better heat distribution. Stainless steel or cast iron grill grates improve heat retention and searing capabilities. Additionally, upgrading the ventilation system can optimize airflow for smoother cooking. These modifications ensure your grill performs at its best, delivering exceptional results for years to come. Always use genuine Weber parts to maintain warranty and quality standards.

Regular cleaning and proper maintenance ensure your Weber Spirit E-210 performs optimally. Follow the manual for care tips and explore advanced grilling techniques to enhance your cooking experience.

Best Practices for Long-Term Use

Regularly clean grates and burners to prevent food residue buildup. Store the grill in a dry, protected area during off-seasons. Check gas lines for blockages and ensure tight connections. Follow the manual’s maintenance schedule to uphold performance. Always adhere to safety guidelines to avoid accidents. Refer to the Weber warranty program for coverage details. Proper care ensures longevity and consistent grilling results, making your Weber Spirit E-210 a reliable cooking companion for years.

Staying Updated with Weber Resources

Stay informed about your Weber Spirit E-210 by visiting the official Weber website for the latest manuals, guides, and updates. Download the user manual or assembly guide in PDF format for detailed instructions. Explore Weber’s customer support resources for troubleshooting and maintenance tips. Regularly check for firmware updates or accessory recommendations to enhance your grilling experience. Weber’s online community and forums also offer valuable insights and advice from experienced users, ensuring you get the most out of your grill.

Open post

v2 traction snow chains size guide

V2 Traction Snow Chains are reliable and widely used, offering excellent grip in snowy conditions․ Their diamond pattern design ensures maximum traction, while anti-rust features enhance durability․

1․1 Overview of V2 Traction Snow Chains

V2 Traction Snow Chains are renowned for their durability and ease of use․ Featuring a diamond-pattern design, they provide exceptional grip on snowy and icy surfaces․ These chains are TÜV/GS and ÖNORM certified, ensuring high-quality performance․ Designed with side tension springs and auto-locking levers, they offer a secure fit without requiring vehicle movement․ Popular in Australia, V2 chains are a reliable choice for drivers seeking traction and safety in harsh winter conditions․

1․2 Importance of Proper Sizing for Snow Chains

Proper sizing of V2 Traction Snow Chains is crucial for safety and performance․ Incorrectly fitted chains can damage tires or wheels and reduce traction․ Ensure chains match tire size precisely to avoid safety hazards․ Proper fit prevents loose chains, which can cause accidents or vehicle damage․ Always refer to your vehicle’s tire specifications for correct sizing․ Properly fitted chains enhance stability and control on snowy roads, ensuring optimal performance and compliance with regulations․

How to Measure Your Tires for Snow Chains

Measure your tires by locating the size designation on the sidewall or owner’s manual․ Accurately measure the diameter and width to ensure proper fitment for V2 Traction Snow Chains․

2․1 Understanding Tire Size Designations

Tire size designations are codes on the sidewall, such as 205/60R16, indicating width, aspect ratio, and rim diameter․ This information is crucial for selecting the correct V2 Traction Snow Chains, ensuring proper fitment and safety․ Always verify the size in your vehicle’s manual or on the tire itself to avoid mismatches and potential hazards while driving in snowy conditions․

2․2 Step-by-Step Guide to Measuring Tire Size

To measure your tire size accurately:

  1. Locate the tire information placard on the driver’s door or inside the fuel cap․
  2. Read the designation (e․g․, 205/60R16) which indicates width, aspect ratio, and rim size․
  3. If unknown, measure the tire’s width and diameter manually using a tape measure for precise fitment;

Accurate measurement ensures the correct V2 Traction Snow Chains are selected for optimal safety and performance in snowy conditions․

Factors Influencing Snow Chain Size Selection

Vehicle type, weight, and road conditions are crucial․ Larger vehicles require heavier-duty chains, while extreme weather demands specialized tread patterns for enhanced durability and grip․

3․1 Vehicle Type and Weight

Vehicle type and weight significantly impact snow chain size selection․ SUVs, trucks, and heavier vehicles require sturdier chains for better traction and durability․ Lighter vehicles, like sedans, need smaller chains․ Tire size, linked to vehicle weight, must align with chain dimensions for safe and effective performance․ Proper sizing ensures optimal grip and prevents potential damage to tires or chains․ Always consult your vehicle’s manual for specific recommendations․

3․2 Road Conditions and Intended Use

Road conditions and intended use greatly influence snow chain size selection․ Icy or steep roads require chains with aggressive tread patterns for maximum grip, while lighter snow conditions may suffice with standard chains․ Ensure chains are certified for your region’s conditions, such as TÜV/GS or ÖNORM, for reliability․ Easy-fit designs are ideal for frequent use, offering quick installation even in harsh weather․ Proper sizing ensures safety and optimal performance across varying terrains․

Choosing the Right V2 Traction Snow Chain Size

V2 Traction Snow Chains are designed for reliability and grip․ Proper sizing is crucial for safety and performance․ Match chains to tire size for a perfect fit․

4․1 Matching Chain Size to Tire Size

Matching V2 Traction Snow Chains to your tire size ensures optimal performance and safety․ Use your vehicle’s tire size designation to select the correct chain size․ Proper fitment prevents damage to both the chains and vehicle․ Always refer to the manufacturer’s sizing chart for accurate selection․ Improperly sized chains can compromise traction and safety, so double-check measurements before purchase and installation․

4․2 Adjusting for Different Vehicle Models

Different vehicle models require specific adjustments when fitting V2 Traction Snow Chains․ Larger vehicles or those with unique suspension systems may need longer chains․ Always consult the manufacturer’s guidelines for compatibility․ Ensure chains are snug but not overly tight, as this can damage the vehicle or affect performance․ Proper adjustment ensures even weight distribution and optimal traction, especially for trucks or SUVs with heavier loads․

Installation and Fitment Tips

Proper fitment is crucial for optimal traction․ Always follow manufacturer guidelines for installation, ensuring chains are snug but not overly tight to avoid damage or reduced performance․

5․1 Ensuring Proper Fitment for Optimal Traction

Proper fitment is essential for safety and performance․ Align chains correctly, ensuring they wrap tightly around the tire without over-tightening․ Use side tension springs and auto-locking levers for secure placement․ Avoid loose fitment, as it may cause damage or reduce traction․ Always test drive slowly after installation to ensure chains are functioning properly and adjust as needed for optimal grip on snowy surfaces․

5․2 Common Mistakes to Avoid

Common mistakes include improper sizing, over-tightening chains, and not following manufacturer instructions․ Ensure chains fit snugly without damaging rims or suspension․ Avoid using chains on unsuitable tires or vehicles․ Neglecting to test drive slowly after installation can lead to poor traction․ Additionally, ignoring local regulations regarding snow chain use is a frequent oversight that can result in fines or safety hazards․

Maintenance and Storage of Snow Chains

Regular maintenance ensures longevity․ Clean chains after use, lubricate metal parts, and store them in a dry place to prevent rust․ Use a heavy-duty bag to maintain performance and extend lifespan․

6․1 Cleaning and Lubricating Chains

After use, clean chains with mild detergent and water to remove dirt and ice residue․ Dry thoroughly and apply rust-inhibiting lubricant to metal parts․ Regular lubrication ensures smooth operation and prevents corrosion, extending chain lifespan․ Store chains in a dry, cool place to maintain performance and readiness for future use․

6․2 Proper Storage to Extend Lifespan

Store snow chains in a cool, dry place away from direct sunlight and moisture․ Use a heavy-duty carry bag to protect them from dust and damage․ Avoid folding or bending chains, as this can weaken links․ Ensure chains are completely dry before storage to prevent rust․ Proper storage maintains chain integrity and ensures they remain ready for use in future winter conditions․

Comparing V2 Traction Snow Chains to Other Brands

V2 Traction Snow Chains are known for their durability and ease of use, often preferred over other brands due to their anti-rust features and diamond grip design․

7․1 Key Features of V2 Traction Chains

V2 Traction Chains are renowned for their durability and reliability․ Key features include a diamond-pattern design for maximum grip, anti-rust coatings, and TÜV/GS certification․ They offer easy installation, side tension springs for a snug fit, and auto-locking levers for quick securing․ The chains are built to withstand harsh conditions, ensuring optimal performance in snow and ice․ Their heavy-duty carry bag adds convenience for storage and transport․

7․2 Performance in Snow and Ice Conditions

V2 Traction Chains excel in challenging winter conditions, providing exceptional grip on snow and ice; The diamond-pattern design maximizes surface contact, reducing slippage and enhancing stability․ Their hardened cross chains deliver durability, while side tension springs ensure a tight fit, preventing chain movement․ These features make V2 chains ideal for heavy-duty use, offering reliable performance in extreme weather conditions for both on-road and off-road vehicles․

Legal and Safety Considerations

Using V2 Traction Snow Chains requires adherence to local regulations, as their use may be restricted in certain areas․ Proper installation is critical to avoid damage or accidents․

8․1 Regulations on Snow Chain Use

Regulations for snow chain use vary by region, with some areas requiring chains during winter months․ Certain locations prohibit chains due to road surface damage․ Always check local laws before use․ Specific vehicle models, like Teslas, have approved chain lists․ Ensure compliance with regional rules to avoid penalties․ Proper sizing and installation are also mandated for safety and legal compliance․

8․2 Safety Precautions When Using Snow Chains

When using snow chains, ensure proper installation to avoid damage or accidents․ Drive slowly, as chains can affect handling․ Avoid exceeding 30-40 km/h to prevent chain failure․ Never use chains on dry roads, as they can wear out quickly․ Always follow manufacturer guidelines for sizing and fitting․ Regularly inspect chains for wear and damage․ Practice installation before snowy conditions to ensure readiness and safety on the road․

Choosing the right V2 Traction Snow Chains is crucial for safety and performance․ Ensure proper sizing, follow installation guides, and maintain chains regularly for optimal traction and durability․

9․1 Summary of Key Points

Proper sizing and vehicle compatibility are crucial for optimal performance․ Regular maintenance, including cleaning and storage, extends chain lifespan․ Always follow legal regulations and safety guidelines for secure use․ Ensuring proper fitment and avoiding common mistakes enhances traction and safety․ By adhering to these principles, drivers can confidently navigate snowy conditions with V2 Traction Snow Chains, achieving both reliability and performance․

9․2 Final Tips for Choosing the Right Size

Always measure your tires accurately and cross-reference with your vehicle’s specifications․ Consider your vehicle’s weight and intended use for optimal chain performance․ Check local regulations to ensure compliance․ Proper sizing ensures safety, traction, and durability․ Invest in high-quality chains like V2 Traction for reliability in snowy conditions․ Remember, the right size enhances performance and safety, making your winter drives secure and stress-free;

Open post

arc 914sbd manual

The ARC 914SBD manual serves as a comprehensive guide‚ providing essential information for setup‚ operation‚ and troubleshooting. It ensures users can optimize performance and maintain safety.

Overview of the Manual

The ARC 914SBD manual is a detailed guide designed to help users understand and utilize the device effectively. It covers installation‚ configuration‚ and troubleshooting‚ ensuring seamless operation. The manual is structured to be user-friendly‚ with clear instructions and visual aids to simplify complex tasks. It also includes safety guidelines and best practices for maintaining optimal performance and longevity of the system.

Importance of the Manual for Users

The ARC 914SBD manual is indispensable for users‚ providing crucial insights into device operation‚ safety‚ and troubleshooting. It ensures optimal performance by guiding proper installation and configuration. The manual also highlights essential maintenance routines‚ enhancing longevity and user experience. By following the guidelines‚ users can minimize risks and maximize efficiency‚ making it a vital resource for both beginners and experienced operators.

Key Features and Benefits of the ARC 914SBD

The ARC 914SBD offers advanced features like enhanced performance‚ improved efficiency‚ and user-friendly operation. Its robust design ensures reliability while delivering superior functionality‚ making it a top choice for users.

Primary Functions and Capabilities

The ARC 914SBD excels in real-time data processing‚ offering precise control and monitoring of operations. Its advanced algorithms ensure efficient task management‚ while its intuitive interface simplifies complex processes. Designed for adaptability‚ it supports multiple configurations to meet diverse user needs‚ ensuring optimal performance across various applications. With robust diagnostic tools‚ it enables quick issue resolution‚ making it a reliable solution for demanding environments.

Advantages Over Previous Models

The ARC 914SBD offers enhanced processing speed and improved compatibility with modern systems. It features advanced diagnostics and user-friendly updates‚ reducing setup time. With expanded customization options‚ it delivers superior performance compared to earlier models. Enhanced security and stability ensure reliable operation‚ making it a significant upgrade for users seeking advanced functionality and efficiency in their applications.

System Requirements for Optimal Performance

The ARC 914SBD requires a minimum of 2.0 GHz dual-core processor‚ 4GB RAM‚ and a 64-bit operating system. Ensure updated drivers and compatible software.

Minimum Technical Specifications

The ARC 914SBD requires a 2.0 GHz dual-core processor‚ 4GB RAM‚ and a 64-bit operating system. Ensure updated drivers and compatible software for optimal functionality.

Recommended Operating Environment

For optimal performance‚ operate the ARC 914SBD in a stable environment with temperatures between 15°C and 30°C and humidity levels of 40-60%. Use a reliable power source and ensure the device is placed on a flat‚ vibration-free surface. Avoid direct sunlight and ensure proper ventilation to prevent overheating. Install the latest software updates and drivers for compatibility and enhanced functionality.

Installation and Setup Guide

The ARC 914SBD manual provides a step-by-step installation guide‚ ensuring a smooth setup process. Follow the instructions carefully to connect and configure the device for optimal performance.

Step-by-Step Installation Process

Begin by carefully unboxing and inventorying all components. Connect the power cable to a stable outlet and link necessary peripherals. Follow on-screen prompts to install the ARC 914SBD software. Ensure proper alignment and secure all connections. Activate the device and complete the initial setup wizard. Test functionality to confirm successful installation. Refer to the manual for specific calibration instructions to optimize performance.

Initial Configuration After Installation

After installation‚ configure basic settings such as time‚ date‚ and language. Set up user accounts and permissions for secure access. Connect to your network and enable necessary features. Calibrate sensors and adjust default settings to meet your requirements. Run a diagnostic test to ensure all components function correctly. Review and save your configuration to finalize the setup process for optimal performance and user safety.

Configuration Options and Customization

The ARC 914SBD offers extensive customization options‚ allowing users to tailor settings to their preferences. Adjust advanced features‚ personalize interfaces‚ and optimize performance for enhanced user satisfaction.

Advanced Settings and Tweaks

The ARC 914SBD manual provides detailed guidance on advanced settings‚ enabling users to fine-tune parameters for optimal performance. Adjust calibration settings‚ optimize audio configurations‚ and explore expert modes to customize functionality. These tweaks allow for enhanced precision and tailored operation‚ ensuring the device meets specific user requirements and delivers superior results in various applications.

Personalizing the Device for User Preferences

The ARC 914SBD manual offers step-by-step guidance for tailoring the device to individual needs. Users can customize interface settings‚ display preferences‚ and functional adjustments to enhance usability. Personalization options ensure a seamless experience‚ allowing users to optimize the device for specific tasks and preferences‚ making it adaptable to diverse operational requirements and user lifestyles efficiently.

Troubleshooting Common Issues

The manual provides detailed solutions for resolving frequent issues‚ including error codes and connectivity problems. Diagnostic tools and step-by-step guides help users quickly restore optimal functionality.

Identifying and Resolving Technical Problems

The ARC 914SBD manual includes a detailed troubleshooting section‚ helping users identify and resolve technical issues efficiently. It covers common error codes‚ connectivity problems‚ and performance bottlenecks. Users can utilize diagnostic tools and step-by-step solutions to address malfunctions. The guide also provides preventive maintenance tips to minimize downtime and ensure smooth operation. By following the manual‚ users can quickly restore functionality and optimize their experience.

Diagnostic Tools and Techniques

The ARC 914SBD manual provides advanced diagnostic tools and techniques to help users identify system issues. It includes detailed error logging‚ system performance checks‚ and connectivity tests. Users can utilize these tools to pinpoint malfunctions and apply targeted solutions. The manual also offers guidance on interpreting diagnostic data‚ ensuring accurate troubleshooting and minimizing downtime. These features empower users to maintain optimal system health and functionality effectively.

Maintenance and Care Tips

Regularly clean the device‚ update software‚ and inspect connections to ensure optimal performance and longevity. Proper handling and storage prevent damage‚ maintaining reliability and efficiency over time.

Regular Maintenance Procedures

Perform routine checks and updates to ensure optimal functionality. Clean the device regularly‚ inspect for wear‚ and store it properly. Schedule professional servicing annually to maintain performance and extend lifespan. Always use original accessories to prevent damage and ensure compatibility. Regular software updates are crucial for security and feature enhancements. Proper care ensures reliable operation and longevity of the ARC 914SBD‚ keeping it in peak condition for years.

Best Practices for Longevity

To ensure the ARC 914SBD operates effectively long-term‚ use original accessories‚ avoid extreme temperatures‚ and handle with care. Store the device in a dry‚ cool place when not in use. Clean the exterior gently with a soft cloth and avoid exposure to corrosive substances. Regularly update software and follow manufacturer guidelines for optimal performance and durability. Proper care extends the lifespan and maintains reliability.

Safety Precautions and Guidelines

Always use original accessories and avoid exposure to water or extreme temperatures. Handle the device with care to prevent damage and ensure safe operation at all times.

Handling the Device Safely

Always use original accessories and avoid exposing the device to water or extreme temperatures. Ensure proper ventilation to prevent overheating. Handle the device with care to avoid physical damage. Keep it away from children and pets. Regularly inspect cables and connectors for wear. Follow all safety guidelines to prevent accidents and ensure optimal performance. Proper handling extends the lifespan of the ARC 914SBD and maintains its reliability.

Preventing Accidents and Damage

To prevent accidents and damage‚ use the ARC 914SBD as per the manual’s instructions. Avoid exposing the device to liquids or extreme temperatures. Use only original accessories to maintain compatibility and safety. Ensure the device is securely installed and regularly inspected for wear. Follow all safety guidelines to minimize risks and protect the device from potential hazards. Proper care ensures longevity and reliable performance.

Warranty and Support Information

Your ARC 914SBD is backed by a comprehensive warranty‚ ensuring coverage for manufacturing defects. Refer to the manual for detailed warranty terms and contact support for assistance.

Understanding Your Warranty Coverage

Your ARC 914SBD warranty provides protection against manufacturing defects‚ ensuring reliability and performance. Coverage typically lasts for a specified period‚ with terms outlined in the manual. Proper usage and maintenance are required to uphold warranty validity.

Damages due to misuse or unauthorized modifications may void coverage. Refer to the manual for detailed conditions and procedures to file warranty claims effectively.

Accessing Customer Support

For assistance with the ARC 914SBD‚ users can access customer support through various channels. Online portals‚ helpline numbers‚ and live chat options are available for prompt resolution of queries. The support team is equipped to address technical issues‚ provide troubleshooting guidance‚ and offer maintenance advice. Additionally‚ resources like FAQs and user forums are accessible to help users resolve common issues independently.

Frequently Asked Questions (FAQs)

Common inquiries include installation steps‚ troubleshooting tips‚ and maintenance procedures. This section addresses user concerns‚ ensuring smooth operation and optimal performance of the ARC 914SBD.

Common Inquiries and Solutions

Users often ask about installation steps‚ error messages‚ and performance optimization. Solutions include checking connections‚ updating software‚ and referring to diagnostic tools for quick troubleshooting. Additional inquiries focus on maintenance routines and resolving operational glitches‚ ensuring smooth functionality. This section provides clear‚ concise answers to address these concerns effectively‚ helping users achieve optimal results with the ARC 914SBD.

Clarifications on Usage and Functionality

The ARC 914SBD manual clarifies how to utilize advanced features‚ such as customizable settings and diagnostic tools‚ ensuring optimal performance. It explains the device’s primary functions‚ like data processing and connectivity options‚ while addressing common operational queries. This section also highlights compatibility with various systems and provides insights into maximizing the device’s capabilities for different applications‚ ensuring users understand its full potential and functionality.

Open post

powerbolt 250 manual

The Powerbolt 250 manual provides comprehensive guidance for installing, programming, and troubleshooting this advanced electronic deadbolt lock. Designed for convenience and security, it features a keypad for keyless entry and customizable user codes, ensuring superior protection for your home.

Key Features of the Powerbolt 250

The Powerbolt 250 offers a 10-button keypad for keyless entry, customizable user codes, an auto-locking mechanism, and SmartKey technology for enhanced security and convenience.

2.1. Keypad Functionality

The Powerbolt 250 features a 10-button keypad designed for convenient keyless entry. Users can input custom codes, ensuring secure access without the need for physical keys. The keypad is backlit for improved visibility in low-light conditions. It allows for the creation of multiple user codes, perfect for granting access to family members or guests. The keypad also supports one-time-use codes, adding an extra layer of security. Additionally, the system can be programmed to automatically lock the door after a set period, enhancing home security. The keypad’s responsive design ensures quick and reliable operation. Regular updates and maintenance can be performed via the keypad interface, making it user-friendly. Overall, the keypad functionality of the Powerbolt 250 combines ease of use with advanced security features, making it a reliable choice for modern homes.

2.2. Auto-Locking Mechanism

The Powerbolt 250 features an advanced auto-locking mechanism that enhances home security by automatically locking the door after a preset period. This feature ensures that your door remains secure even if you forget to lock it manually. The auto-locking time can be customized to suit your preferences, providing flexibility and convenience. This mechanism is particularly useful for busy households or those who want an added layer of security without constant manual intervention. The system is designed to operate seamlessly, offering peace of mind and reducing the risk of unauthorized access. By integrating this feature, the Powerbolt 250 combines modern technology with practical functionality, ensuring your home remains protected at all times. The auto-locking mechanism is a standout feature that sets the Powerbolt 250 apart from traditional locking systems.

Installation Guide for Powerbolt 250

Installing the Powerbolt 250 is a straightforward process that requires basic tools and attention to detail. Begin by preparing the door and ensuring all necessary components are included in the package. Follow the manual’s step-by-step instructions to attach the keypad and lock assembly to the door. Secure the components using the provided screws and ensure proper alignment. Next, connect the wiring to the control board, taking care to match the correct terminals. After assembling, test the lock to ensure it functions correctly. If needed, refer to the troubleshooting section for common issues. The installation process is designed to be user-friendly, allowing homeowners to complete it without professional assistance. Proper installation ensures optimal performance and security. Always double-check the connections and test the lock before finalizing the setup.

Programming User Codes and Customization

Programming user codes and customizing settings on the Powerbolt 250 is simple and intuitive. Start by entering the master code, then follow the manual’s instructions to add or delete user codes. The lock supports multiple user codes, allowing you to grant access to family members or guests. Customize settings like auto-locking, which automatically secures the door after a set period. Additional features include toggling the keypad sound and adjusting the lock’s sensitivity. Refer to the manual for detailed steps to program and customize your lock effectively, ensuring it meets your specific needs. The process is designed to be user-friendly, with clear instructions to help you manage access and settings effortlessly. Proper customization enhances both convenience and security, making the Powerbolt 250 a versatile and reliable locking solution for your home.

Troubleshooting Common Issues

Troubleshooting the Powerbolt 250 involves addressing common issues such as keypad responsiveness, code errors, and auto-locking malfunctions. If the keypad doesn’t respond, clean it with a soft cloth and ensure proper battery levels. For incorrect user codes, re-enter the master code and retry. If the auto-lock feature fails, check the door alignment and sensor functionality. Refer to the manual for step-by-step solutions and reset procedures. Regular maintenance, like updating firmware and replacing batteries, can prevent many issues. The manual also provides guidance on error codes, helping you identify and resolve problems quickly. By following these troubleshooting steps, you can ensure your Powerbolt 250 operates smoothly and maintains its security features. Always consult the manual for detailed instructions tailored to specific issues. This ensures your lock remains reliable and functional over time. Proper troubleshooting enhances both convenience and security, making the Powerbolt 250 a trusted choice for home security.

Safety and Security Features

The Powerbolt 250 offers enhanced security with keyless entry via a customizable keypad, an electronic deadbolt for robust protection, and a secure, long-lasting, durable design ensuring reliability and safety.

6.1. SmartKey Technology

SmartKey Technology in the Powerbolt 250 offers advanced security, allowing easy re-keying without removing the lock. It provides resistance to bumping and picking, enhancing home safety with superior protection.

6.2. Tamper-Resistant Design

The Powerbolt 250 features a tamper-resistant design, ensuring enhanced security against unauthorized access. Its robust construction and high-quality materials prevent tampering attempts, such as picking or forced entry. The lock’s exterior components are crafted from durable metal alloys, offering resistance to physical damage. Additionally, the electronic keypad is designed with weather-resistant coatings to withstand outdoor conditions. The tamper-resistant mechanism alerts users to potential breaches, providing an extra layer of security. This design ensures that the lock remains functional and secure, even in challenging environments. By combining strength and advanced engineering, the Powerbolt 250 delivers reliable protection for your home. Its tamper-resistant features are a testament to Kwikset’s commitment to superior security and durability in their products.

Design and Finish Options

The Powerbolt 250 offers a variety of stylish design and finish options to complement any home decor. Available in Satin Nickel and Venetian Bronze, these finishes provide a modern yet timeless appearance. The transitional design ensures compatibility with both traditional and contemporary settings. The lock’s sleek keypad and low-profile design enhance its aesthetic appeal without compromising functionality. For added convenience, the Powerbolt 250 can be paired with Kwikset’s range of hardware, allowing for a cohesive look throughout your home. Whether you prefer a polished or brushed finish, this lock seamlessly integrates style and security. With multiple design options, homeowners can choose the perfect fit to match their unique taste and decor preferences, ensuring both functionality and visual appeal.

Where to Find the Manual and Support Information

The Powerbolt 250 manual is readily available for download on platforms like ManualsLib and Kwikset’s official website. Users can search for “Kwikset Powerbolt 250 Manual” to access the PDF directly. Additionally, retailers such as The Home Depot provide access to the manual on their product pages. For further support, Kwikset offers customer service options, including phone, email, and live chat. The manual is concise, spanning 8 pages, and includes detailed installation and programming instructions. It is available in multiple languages, catering to a broad audience. To download, visit ManualsLib or Kwikset’s support page and enter the model number. This ensures you have all the necessary information to operate and maintain your Powerbolt 250 lock effectively. Kwikset also provides troubleshooting guides and FAQs online for added convenience.

The Powerbolt 250 manual serves as a complete guide to understanding and utilizing the lock’s advanced features. By following the instructions, users can ensure proper installation, programming, and maintenance. The lock’s keypad functionality, auto-locking mechanism, and customizable codes enhance security and convenience. Troubleshooting tips and safety features, such as SmartKey Technology, provide peace of mind. With design options to match various home styles, the Powerbolt 250 offers both functionality and aesthetic appeal. For any further assistance, Kwikset’s support resources, including downloadable manuals and customer service, are readily accessible. This manual equips users with the knowledge to maximize the benefits of their Powerbolt 250 lock, ensuring reliable performance and enhanced home security. Refer to the manual regularly to maintain optimal functionality and explore all available features.

Open post

refrigeration and air conditioning technology pdf

Refrigeration and air conditioning technology involves thermodynamic principles to control temperature and humidity, essential for industrial, residential, and commercial applications, ensuring energy efficiency and environmental sustainability.

1.1 Overview of Refrigeration and Air Conditioning Systems

Refrigeration and air conditioning systems are thermodynamic processes that control temperature and humidity. They involve compressors, condensers, evaporators, and expansion valves to transfer heat. These systems are essential for industrial cooling, food preservation, and climate control in residential and commercial spaces, ensuring energy efficiency and environmental sustainability while maintaining optimal performance across various applications.

1.2 Historical Development and Modern Applications

Refrigeration and air conditioning technology traces its roots to early innovations in thermodynamics, evolving from toxic gases to modern, eco-friendly refrigerants. Initially used for food preservation, these systems now play a vital role in industries, healthcare, and residential comfort. Modern applications include advanced HVAC systems, industrial cooling, and smart energy-efficient solutions, driving global advancements in sustainability and energy management.

Fundamentals of Cooling and Heat Transfer

Cooling and heat transfer are rooted in thermodynamic principles, involving conduction, convection, and radiation. These processes enable efficient energy transfer, crucial for refrigeration and air conditioning systems’ operation.

2.1 Thermodynamic Principles and Energy Balance

Thermodynamic principles, such as the first and second laws, govern energy interactions in cooling systems. Energy balance ensures efficient conversion and transfer, minimizing losses. These principles are fundamental to designing and optimizing refrigeration and air conditioning systems, enabling precise temperature control and maximizing overall system performance while maintaining environmental sustainability. Understanding these concepts is crucial for system efficiency and effectiveness.

2.2 Heat, Temperature, and Modes of Heat Transfer

Heat transfer occurs through conduction, convection, and radiation, essential for cooling systems. Temperature measures the thermal energy of particles, while heat is energy transfer due to temperature differences. Understanding these principles is critical for designing efficient refrigeration and air conditioning systems, as they directly impact system performance, energy consumption, and overall sustainability in various applications.

Key Components of Refrigeration Systems

Refrigeration systems rely on compressors, condensers, evaporators, and expansion valves. These components work together to facilitate the refrigeration cycle, enabling heat transfer and cooling efficiently.

3.1 Compressors, Condensers, and Evaporators

Compressors compress refrigerant, raising its temperature and pressure. Condensers transfer heat from the refrigerant to the environment, while evaporators absorb heat, cooling the surrounding air. Together, these components form the heart of refrigeration systems, ensuring efficient heat transfer and cooling processes across various applications.

3.2 Expansion Valves and Refrigerant Flow Control

Expansion valves reduce refrigerant pressure, regulating flow into the evaporator. They ensure the proper vapor-liquid mixture, optimizing heat absorption. Accurate control of refrigerant flow is critical for system efficiency and performance, preventing overcharging or undercharging, which can lead to reduced cooling capacity and increased energy consumption.

Refrigerants and Their Environmental Impact

Refrigerants play a crucial role in cooling systems but pose environmental risks like ozone depletion and global warming. Sustainable alternatives, such as CO2 and natural refrigerants, are increasingly adopted.

4.1 Types of Refrigerants and Their Properties

Refrigerants are categorized into natural and synthetic types. Natural refrigerants, such as CO2 and hydrocarbons, offer zero ozone depletion but require high-pressure systems. Synthetic refrigerants like R-32 provide improved performance with lower environmental impact compared to traditional options. Each type balances thermodynamic properties with environmental concerns, driving sustainable cooling solutions.

4.2 Environmental Concerns and Sustainable Alternatives

The phase-out of ozone-depleting refrigerants like CFCs and HCFCs has driven the adoption of eco-friendly alternatives. Natural refrigerants such as CO2 and ammonia are gaining popularity due to their zero ozone depletion potential. Additionally, synthetic blends like HFOs offer low global warming potential solutions. These sustainable options align with global efforts to reduce environmental impact while maintaining system efficiency and performance.

System Design and Optimization

System design and optimization focus on principles like benchmarking to enhance efficiency and performance in cooling applications, ensuring reliability and adaptability to various operational demands.

5.1 Design Principles for Efficient Cooling Systems

Efficient cooling systems rely on optimal component sizing, proper airflow management, and smart refrigerant flow control. Advanced technologies like variable-speed compressors and intelligent sensors enhance performance, reducing energy consumption and operational costs. These designs ensure consistent cooling while adhering to environmental standards, making them suitable for both industrial and residential applications.

5.2 Benchmarking and Performance Evaluation

Benchmarking evaluates cooling system efficiency by comparing performance metrics like energy consumption and cooling capacity. This process ensures systems meet sustainability standards and operational goals. Advanced diagnostic tools and performance metrics help identify inefficiencies and optimize system design. Regular benchmarking supports continuous improvement, ensuring systems remain energy-efficient and environmentally compliant, aligning with modern cooling technologies.

Applications in Industrial and Residential Settings

Industrial cooling systems, like chillers, are crucial for manufacturing and food storage. Residential solutions include air conditioning and smart refrigeration, enhancing comfort and energy efficiency in homes.

6.1 Industrial Cooling Systems and Chillers

Industrial cooling systems, including chillers, are vital for maintaining optimal temperatures in manufacturing processes and large-scale storage. They ensure precise control over cooling, preventing equipment overheating and maintaining product quality. Chillers, often water-cooled or air-cooled, are widely used in industries like food processing, pharmaceuticals, and chemicals. Their efficient operation is crucial for productivity, safety, and energy conservation in industrial settings.

6.2 Residential Air Conditioning and Refrigeration Solutions

Residential air conditioning and refrigeration systems are designed for comfort and food preservation in homes. These systems often include split units, window ACs, and refrigerators. Energy-efficient solutions, such as smart thermostats and eco-friendly refrigerants, are increasingly popular. Proper sizing and installation ensure optimal performance, reducing energy consumption while maintaining indoor air quality and temperature control for households.

Advanced Technologies and Innovations

Modern advancements include smart HVAC systems, inverter-driven compressors, and eco-friendly refrigerants, enhancing energy efficiency and sustainability in cooling technologies while reducing environmental impact significantly.

7.1 Heat Pumps and Their Role in Modern Systems

Heat pumps are increasingly popular, offering efficient heating and cooling by transferring heat between systems. They enhance energy efficiency, reduce emissions, and are versatile in various applications. Modern designs integrate advanced compressors and smart controls, optimizing performance. Their role in sustainable HVAC solutions is pivotal, aligning with global efforts to improve energy efficiency and reduce environmental impact significantly.

7.2 Smart and Energy-Efficient Cooling Solutions

Smart cooling technologies integrate IoT, AI, and machine learning to optimize energy use. Advanced systems monitor temperature, humidity, and airflow, adapting to demand. Inverter-driven compressors and smart thermostats enhance efficiency. These solutions reduce energy consumption and emissions, promoting sustainability. Benchmarking and performance tracking ensure optimal operation, aligning with global goals for energy efficiency and environmental conservation in modern HVAC systems.

Maintenance and Troubleshooting

Maintenance involves routine inspections, cleaning, and checking refrigerant levels. Common issues include leaks and compressor failures. Diagnostic tools and techniques ensure efficient system operation and longevity.

8.1 Best Practices for System Maintenance

Regular inspections and cleaning of components like condensers and evaporators ensure optimal performance. Checking refrigerant levels, electrical circuits, and lubrication systems prevents failures. Using diagnostic tools helps identify issues early, while benchmarking performance ensures energy efficiency. Proper maintenance extends equipment lifespan, reduces operational costs, and maintains reliability in cooling systems.

8.2 Common Issues and Diagnostic Techniques

Common issues include refrigerant leaks, compressor failures, and sensor malfunctions. Diagnostic techniques involve pressure-temperature analysis, flow meter testing, and electrical circuit checks. Advanced tools like thermodynamic analyzers and leak detectors help identify system inefficiencies. Early detection of these issues ensures reliable operation, reduces downtime, and prevents costly repairs in refrigeration and air conditioning systems.

Education and Training in HVAC Technology

Education and training in HVAC technology provide hands-on experience and real-world applications, preparing students for successful careers in heating, air conditioning, and refrigeration industries.

9.1 Course Offerings and Skill Development

Course offerings in HVAC technology cover thermodynamic principles, electrical circuits, and refrigeration systems. Students develop skills in system design, troubleshooting, and energy efficiency, preparing them for industry-recognized certifications and hands-on roles in heating, air conditioning, and refrigeration. Practical training ensures proficiency in installing, maintaining, and optimizing HVAC systems, aligning with modern industry standards and safety protocols.

9.2 Laboratory Training and Practical Applications

Laboratory training emphasizes hands-on experience with HVAC systems, allowing students to apply theoretical knowledge in real-world scenarios. Practical applications include diagnosing and troubleshooting systems, operating compressors, and designing efficient cooling solutions. Students engage in projects like sizing heating and cooling systems, ensuring compliance with industry standards and safety protocols, while gaining proficiency in using specialized tools and equipment.

Refrigeration and air conditioning technology continues to evolve, focusing on energy efficiency, sustainability, and innovation. Future trends include advanced heat pumps, smart systems, and eco-friendly refrigerants, driving global energy savings and environmental stewardship.

10.1 Emerging Technologies and Industry Growth

Emerging technologies like smart HVAC systems, eco-friendly refrigerants, and advanced heat pumps are revolutionizing the industry. These innovations enhance energy efficiency, reduce environmental impact, and meet growing demand for sustainable cooling solutions, driving industry growth and adoption of cleaner technologies globally.

10.2 The Role of Refrigeration in Global Energy Efficiency

Refrigeration plays a crucial role in global energy efficiency by optimizing cooling processes and reducing energy consumption. Advanced systems minimize environmental impact while maintaining performance, contributing to sustainable development and supporting industries worldwide. This ensures energy resources are used effectively, aligning with global efforts to reduce carbon emissions and promote eco-friendly technologies.

Posts navigation

1 2
Scroll to top