
Safety Precautions
Always avoid charging non-rechargeable batteries to prevent user harm or damage to components․ Ensure the controller remains clean‚ with connectors free from debris․ Avoid exposing the device to water or extreme temperatures․ Never overload the system‚ as this can cause overcurrent conditions․ Handle the controller with care during installation to prevent physical damage․ Keep flammable materials away from the device․ Follow all instructions carefully to ensure safe operation․
1․1․ General Safety Information
Always follow safety guidelines to avoid potential hazards․ Never charge non-rechargeable batteries‚ as this can cause damage or harm․ Ensure the controller is installed in a dry‚ well-ventilated area away from flammable materials․ Avoid overloading the system‚ as this can lead to overcurrent conditions․ Keep the device clean and free from debris to maintain proper functionality․ Adhere to all instructions to prevent risks associated with electrical components and ensure safe operation․
1․2․ Proper Handling and Installation Practices
Handle the controller with care to prevent damage․ Mount it in a well-ventilated area‚ away from direct sunlight and moisture․ Ensure all connections are secure and free from debris․ Avoid overloading the system‚ as this can cause overcurrent issues․ Follow the manual’s installation guidelines carefully and ensure compatibility with your solar panels and battery type․ Properly connect terminals to prevent short circuits and always use the provided accessories for safe installation․
1․3․ Avoiding Damage to the Controller and Connected Components
Prevent damage by ensuring all connections are secure and free from debris․ Avoid exposing the controller to water or extreme temperatures․ Never overload the system‚ as this can cause overcurrent conditions․ Regularly inspect connections for signs of wear or corrosion․ Use only compatible components to prevent voltage mismatches․ Keep the controller clean and avoid physical stress during installation․ This will ensure optimal performance and longevity of the device and connected components․
System Compatibility
Compatible with lead-acid‚ AGM‚ gel‚ and lithium batteries‚ the controller supports 12V‚ 24V‚ and 48V systems with a maximum solar input based on system voltage․
2․1․ Battery Types (Lead-Acid‚ AGM‚ Gel‚ Lithium)
The Adventure Kings Plus MPPT Solar Charge Controller supports various battery types‚ including lead-acid‚ AGM‚ gel‚ and lithium․ Each battery type requires specific charging parameters for optimal performance․ Lead-acid batteries are the most common‚ while AGM and gel batteries offer improved durability․ Lithium batteries‚ particularly LiFePO4‚ provide higher efficiency and longer lifespan but may need custom charging profiles․ Ensure settings match your battery type to maximize longevity and safety․
2․2․ Solar Panel Voltage and Power Requirements
The Adventure Kings Plus MPPT Solar Charge Controller is compatible with solar panels operating within a voltage range of 6V to 145V․ The maximum power input is 390W for 12V systems and 780W for 24V systems․ Ensure the solar panel’s voltage and power ratings match the controller’s specifications to avoid damage․ MPPT technology optimizes energy harvest from solar panels‚ maximizing charging efficiency․ Always verify panel specs align with the controller’s voltage and power limits for safe and efficient operation․
2․3․ System Voltage (12V‚ 24V‚ 48V)
The Adventure Kings Plus MPPT Solar Charge Controller supports 12V‚ 24V‚ and 48V systems‚ automatically detecting the system voltage for optimal performance․ It is designed to handle a maximum power of 390W at 12V‚ 780W at 24V‚ and 1170W at 48V․ Ensure the controller is configured to match your system’s voltage requirements․ Always verify compatibility with your solar panels and battery setup to maintain safe and efficient operation․
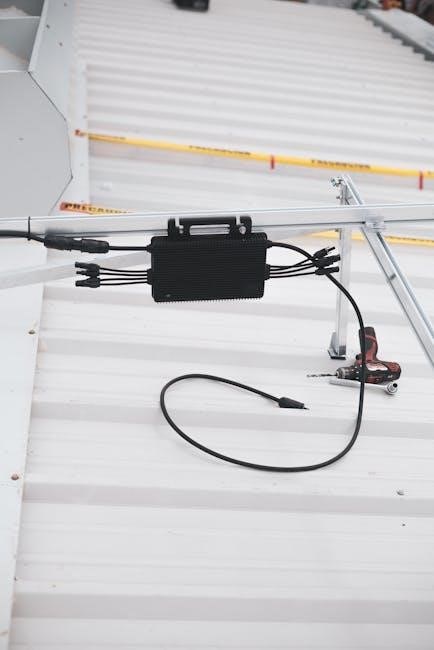
Installation Steps
Begin by connecting solar panels to the controller‚ ensuring correct polarity․ Next‚ attach the battery‚ followed by loads․ Always connect panels first‚ then battery‚ and finally loads․ Ensure proper grounding and configuration settings are applied to avoid system issues․ Follow the manual’s specific wiring guidelines for a safe and efficient setup․
3․1․ Connecting Solar Panels to the Controller
Connect solar panels to the controller by matching positive and negative terminals․ Ensure panel voltage and power ratings align with the controller’s specifications․ Secure connections tightly to prevent loose contacts․ Always refer to the manual for maximum input voltage and current limits․ Avoid overloading the controller‚ as this can damage the system․ Double-check polarity before connecting to prevent short circuits or irreversible damage․
3․2․ Connecting the Battery to the Controller
Connect the battery to the controller by matching positive and negative terminals․ Ensure compatibility with lead-acid‚ AGM‚ or lithium batteries as specified․ Tighten connections securely to prevent loosening․ Disconnect solar panels before connecting the battery to avoid power surges․ Double-check polarity to prevent short circuits․ Refer to the manual for specific battery type settings or configurations․ Ensure the area is clean and dry for safe operation․ Follow initialization steps if required for proper charging functionality․
3․3․ Connecting Loads to the Controller
To connect loads‚ ensure the battery is first properly connected․ Use the load terminals on the controller‚ matching positive and negative polarity․ Secure all connections tightly to prevent power loss․ Use appropriate fuses or circuit breakers for protection․ Monitor load levels to avoid overcurrent conditions․ Ensure the load operates within the controller’s rated specifications․ Refer to the manual for specific load compatibility and configuration guidelines․ Always disconnect loads before servicing the system to ensure safety․

Features and Benefits
The controller features MPPT technology for efficient charging‚ built-in protections against overcharge and short circuits‚ and an LCD display for real-time monitoring and parameter adjustments․
4․1․ MPPT Technology Advantages
MPPT (Maximum Power Point Tracking) technology optimizes energy harvest by dynamically adjusting the charge rate‚ ensuring maximum power extraction from solar panels‚ even under varying conditions․ This advanced algorithm reduces energy loss and increases battery charging efficiency by up to 30%․ It also allows higher voltage solar panels to charge lower voltage battery banks effectively‚ making it ideal for off-grid systems․
4․2․ Built-In Protections (Overcharge‚ Overcurrent‚ Short Circuit)
The controller features comprehensive protections to prevent overcharging‚ overcurrent‚ and short circuits․ Overcharge protection ensures batteries are not damaged by excessive voltage‚ while overcurrent and short circuit safeguards prevent system damage․ These protections maintain safe operating conditions‚ protecting the controller‚ battery‚ and solar panels from potential hazards․ They ensure reliable performance and extend the lifespan of connected components‚ providing peace of mind for users․
4․3․ LCD Display and Monitoring Capabilities
The LCD display provides real-time monitoring of system performance‚ including input voltage‚ output current‚ and battery temperature․ Users can track charging status‚ adjust settings‚ and view error codes․ The display offers a clear overview of energy production and storage‚ enabling precise control and optimization․ Monitoring capabilities ensure efficient operation‚ allowing users to maximize energy output and maintain system health effectively․
Troubleshooting Common Issues
Common issues include the controller not charging the battery or displaying error codes․ Check solar panel voltage and battery connections․ Ensure the battery is fully charged before restarting the controller․ Refer to the manual for specific troubleshooting steps and error code meanings to resolve issues effectively and safely․
5․1․ Controller Not Charging the Battery
If the controller isn’t charging the battery‚ first check the solar panel connections for cleanliness and tightness․ Ensure the battery terminals are secure and free from corrosion․ Verify that the solar panel voltage matches the controller’s input requirements․ Check for error codes on the LCD display and refer to the manual for their meanings․ Ensure the controller is properly configured for your battery type․ If issues persist‚ restart the controller and allow it to reset․ Always follow safety precautions when troubleshooting to avoid electrical hazards․ Regular maintenance can prevent such issues from arising․
5․2․ Error Codes and Their Meanings
The controller displays error codes to indicate specific issues․ Common codes include E01 (battery overvoltage)‚ E02 (solar panel overvoltage)‚ and E03 (overtemperature)․ Refer to the manual for a full list of codes and their meanings․ If an error occurs‚ check connections‚ ensure proper configuration‚ and verify system voltages․ Resetting the controller may resolve some issues․ Always address errors promptly to prevent damage to the system and ensure optimal performance․ Regular checks can help identify potential problems early․
5․3․ Resetting the Controller
To reset the controller‚ first‚ ensure the system is turned off․ Disconnect the battery and solar panels from the controller․ Wait for 30 seconds to allow any residual power to discharge․ Reconnect the battery and panels‚ then restart the system․ This process resets the controller to its default settings․ Note that resetting does not erase saved configurations․ If issues persist after resetting‚ contact customer support for further assistance․ Always follow proper safety precautions during this process․
Maintenance and Upkeep
Regularly clean the controller and connections to ensure optimal performance․ Check for debris or corrosion and address promptly․ Keep the device free from dust and moisture․ Always ensure proper airflow to prevent overheating․ Refer to the manual for specific maintenance recommendations․ Regular upkeep ensures longevity and reliable operation of the controller․
6․1․ Cleaning the Controller and Connections
Regularly clean the controller and connections using a soft‚ dry cloth to remove dust and debris․ Avoid harsh chemicals or abrasive materials that could damage surfaces․ Ensure all connectors are free from grit and corrosion before plugging them in․ Use compressed air gently to remove particles from vents or terminals․ Clean the LCD display with a mild screen cleaner․ Inspect connections for signs of wear or corrosion and address promptly․ Cleaning ensures reliable performance and prevents potential issues․ Perform this maintenance every 3-6 months or as needed․ Always disconnect power before cleaning to avoid electrical hazards․
6․2․ Updating Firmware (If Applicable)
Regularly check for firmware updates to ensure optimal performance and access new features․ To update‚ visit the manufacturer’s website and download the latest version․ Connect the controller to your computer using the provided cable or compatible interface․ Use the manufacturer’s software to upload the new firmware‚ following on-screen instructions carefully․ Avoid interrupting the update process to prevent device malfunction․ After completion‚ restart the controller and verify the new firmware version․ If issues arise‚ consult the manual or contact customer support for assistance․
6․3․ Regular Checks for Optimal Performance
Perform regular inspections of the controller and connections to ensure optimal functionality․ Check for dust‚ moisture‚ or corrosion on connectors and clean them as needed․ Monitor the LCD display for error codes or unusual readings․ Verify that all settings‚ such as battery type and charging parameters‚ are correctly configured․ Inspect solar panel and battery connections for tightness and integrity․ Periodically review performance data to identify trends or potential issues before they escalate․

Adventure Kings Plus MPPT Solar Charge Controller Specifics
The Adventure Kings Plus MPPT supports lead-acid‚ AGM‚ gel‚ and lithium batteries․ It offers a maximum power of 390W at 12V or 780W at 24V systems․
7․1․ Maximum Power and Voltage Ratings
The Adventure Kings Plus MPPT Solar Charge Controller is designed to handle a maximum power of 390W at 12V and 780W at 24V․ It supports a maximum solar panel voltage of 145V and a system voltage of 12V‚ 24V‚ or 48V․ These specifications ensure compatibility with a wide range of solar panel configurations and battery systems‚ making it suitable for various off-grid applications․
7․2․ Special Features of the Adventure Kings Plus Model
The Adventure Kings Plus MPPT Solar Charge Controller features advanced MPPT technology‚ maximizing energy harvest from solar panels․ It supports lithium‚ AGM‚ gel‚ and lead-acid batteries‚ offering flexibility for various systems․ Built-in protections against overcharge‚ overcurrent‚ and short circuits ensure safe operation․ The controller also includes an LCD display for real-time monitoring and easy parameter adjustments‚ enhancing user convenience and system performance․ These features make it ideal for off-grid applications‚ providing reliable and efficient solar charging solutions․
7․3․ Compatibility with Other Adventure Kings Products
The Adventure Kings Plus MPPT Solar Charge Controller is designed to seamlessly integrate with other Adventure Kings products‚ such as solar blankets and deep cycle batteries․ It supports a maximum power of 390W at 12V and 780W at 24V‚ ensuring compatibility with a wide range of system configurations․ Users are advised to consult the product manual for specific pairing guidelines to ensure optimal performance and reliability across all connected components․

Optimizing Solar Charging Performance
Ensure maximum efficiency by positioning panels south-facing at optimal angles․ Adjust charging parameters for your system’s specific needs․ Regularly monitor performance data to maintain peak output․
8․1․ Positioning Solar Panels for Maximum Efficiency
Position solar panels south-facing (north in the southern hemisphere) to maximize sunlight exposure․ Ensure panels are angled to match your location’s latitude for optimal seasonal performance․ Avoid shading by obstructions․ Use adjustable mounts to accommodate seasonal angle changes․ Regularly clean panels to maintain efficiency․ Check voltage output to confirm proper alignment and performance․ Proper positioning ensures maximum energy capture and efficient charging through the MPPT controller․
8․2․ Adjusting Charging Parameters
Adjust charging parameters to optimize energy harvest and battery health․ Set voltage and current limits according to battery type (lead-acid‚ AGM‚ gel‚ or lithium)․ Use the LCD display to monitor and modify settings․ Ensure bulk‚ absorption‚ and float stages are correctly configured․ Refer to the manual for specific parameter recommendations․ Proper adjustment ensures efficient charging and extends battery lifespan․ Regularly review and update settings to maintain optimal performance․
8․3․ Monitoring and Analyzing Performance Data
Use the LCD display to monitor real-time data‚ including voltage‚ current‚ and power output․ Analyze charging efficiency‚ battery status‚ and system performance regularly․ Check error codes to identify potential issues early․ Review data logs to track historical performance and optimize settings․ This helps ensure maximum energy harvest and system reliability․ Regular monitoring allows for timely adjustments‚ preventing inefficiencies and extending component lifespan․

Warranty and Support Information
Refer to the warranty terms for duration and conditions․ Contact customer support for assistance or repairs․ Keep the manual for future reference and support inquiries․
9․1․ Warranty Terms and Conditions
The Adventure Kings Plus MPPT Solar Charge Controller is covered by a limited warranty for a specified period‚ typically one to two years‚ depending on the model․ The warranty covers manufacturing defects under normal use and proper installation․ Damage caused by misuse‚ improper installation‚ or environmental factors is not covered․ For detailed terms‚ refer to the product manual or contact the manufacturer directly․ Warranty claims require proof of purchase and compliance with usage guidelines․
9․2․ Contacting Customer Support
For assistance with the Adventure Kings Plus MPPT Solar Charge Controller‚ contact customer support via phone‚ email‚ or through the official website․ Visit their website for specific contact details and support resources․ Ensure to provide your product serial number and a detailed description of your inquiry for efficient service․ They also offer online FAQs and troubleshooting guides to address common issues promptly․
9․3․ Repair and Replacement Options
Contact Adventure Kings support for repair or replacement of your MPPT solar charge controller․ If the unit is under warranty‚ return it to the supplier with proof of purchase․ Repairs must be performed by authorized personnel to avoid further damage․ Do not attempt to open or modify the controller‚ as this will void the warranty․ Ensure all issues are documented and provided when submitting your unit for service․