The Queens Guide to the Sands: A Comprehensive Overview
The Queens Guide to the Sands‚ or Kings Guide during male reigns‚ is a royally appointed position overseeing the treacherous Morecambe Bay crossing in England.
Historical Origins of the Queens Guide
Historically‚ guidance across the perilous sands of Morecambe Bay predates royal appointment. Initially‚ monks from Cartmel Priory skillfully navigated travelers‚ utilizing their intimate knowledge of the shifting tides and dangerous quicksand.
As the sands became a vital transport route in the 16th century‚ the need for a formally recognized guide arose‚ leading to royal appointments. This ensured safe passage for those traversing this ancient‚ yet hazardous‚ crossing. The role evolved‚ becoming a tradition deeply rooted in the region’s history.
The Role of Monks at Cartmel Priory
Before the formalized system of a royally appointed guide‚ the monks of Cartmel Priory were the original custodians of safe passage across Morecambe Bay’s treacherous sands. Their profound understanding of the complex tidal patterns and hidden dangers was crucial for travelers.
For centuries‚ these religious figures expertly guided people‚ preventing countless accidents. This early form of ‘guiding’ established a tradition of local expertise‚ eventually leading to the official appointment of the Kings/Queens Guide to the Sands.
Royal Appointment: From Kings to Queens
The title itself – Kings Guide to the Sands‚ shifting to Queens Guide during a female monarch’s reign – highlights the historical significance of royal patronage. Appointments began as early as the 16th century‚ recognizing the vital role of a skilled guide for this dangerous crossing.
This royal endorsement underscored the importance of safe passage across Morecambe Bay‚ transforming the role from a local service provided by monks into an officially sanctioned position with a direct link to the Crown.
The Significance of the Sands Crossing
Historically‚ the Morecambe Bay sands served as a crucial transport route before the arrival of the railway in 1857. This made the crossing vital for local communities and trade‚ necessitating a knowledgeable guide to navigate the treacherous tides and quicksand.
Even today‚ despite its decline as a primary route‚ the crossing retains symbolic importance‚ attracting charity walkers and highlighting the enduring tradition overseen by the Queens (or Kings) Guide.

The Modern Queens Guide: Responsibilities and Duties
Today’s Guide leads charity walks for up to 600 people across Morecambe Bay‚ ensuring their safety while navigating the complex tidal conditions and quicksand risks.
Leading Charity Walks Across Morecambe Bay
A significant modern duty of the Queens Guide involves leading numerous charity walks across the expansive and potentially hazardous Morecambe Bay. These popular events‚ typically occurring fortnightly from spring through autumn‚ draw substantial participation‚ often exceeding 600 individuals. The Guide expertly navigates groups from Arnside to Grange-over-Sands‚ carefully timing the crossings to coincide with safe tidal windows.
These walks frequently support various charitable organizations‚ blending tradition with fundraising efforts. The Guide’s expertise is paramount in ensuring the well-being of all participants during these challenging expeditions across the sands.
Ensuring Safety for Large Groups
The Queens Guide prioritizes the safety of often large groups – sometimes numbering over 600 people – undertaking the challenging Morecambe Bay crossing. This involves meticulous planning‚ constant monitoring of tidal conditions‚ and a deep understanding of the sands’ unpredictable nature.
The Guide’s expertise is crucial in identifying and mitigating potential hazards‚ including quicksand and rapidly changing weather. They maintain constant communication with the group‚ providing clear instructions and ensuring everyone remains aware of the risks involved throughout the journey.
Navigating the Tidal Challenges
Morecambe Bay’s tides are notoriously fast-moving and unpredictable‚ presenting a significant challenge for the Queens Guide. Safe passage relies on precise calculations of tide timings and levels‚ demanding extensive local knowledge and experience. The Guide must accurately predict “safe crossing windows‚” factoring in river levels‚ particularly the River Kent.
Misjudging the tides can lead to perilous situations‚ as the sands become submerged quickly. The Guide’s role is to expertly navigate these dynamic conditions‚ ensuring the group remains on a safe path throughout the crossing‚ avoiding potential entrapment.
Understanding the Dangers of the Quick Sand
Morecambe Bay’s sands conceal areas of quicksand‚ a serious hazard for those unfamiliar with the terrain. While not always immediately life-threatening‚ quicksand can trap individuals‚ causing panic and exhaustion. The Queens Guide possesses intimate knowledge of these dangerous zones‚ skillfully steering groups away from them.
The Guide’s expertise lies in recognizing subtle visual cues indicating quicksand presence and understanding how tidal flows affect its consistency. They educate walkers on appropriate responses if encountered‚ emphasizing remaining calm and distributing weight.

The Current Queens Guide: Michael Wilson
Michael Wilson‚ a local fisherman aged 46‚ succeeded Cedric Robinson as the Queens Guide in April 2019‚ continuing this historic tradition across Morecambe Bay.
Michael Wilson’s Background and Appointment
Michael Wilson assumed the role of Queens Guide in April 2019‚ following the lengthy tenure of Cedric Robinson. A local fisherman‚ Wilson brought practical experience of the bay’s unpredictable tides and shifting sands to the position. His appointment by the Guide Over Sands Trust ensured the continuation of this centuries-old tradition.
The selection process carefully considered candidates possessing both intimate knowledge of Morecambe Bay and the ability to safely lead large groups across its dangerous expanse. Wilson’s familiarity with the local environment proved crucial‚ solidifying his suitability for this vital role.
Succession from Cedric Robinson
Cedric Robinson served as the 25th Queens (and Kings) Guide to the Sands for an impressive period‚ concluding in 2019. His retirement after decades of service marked a significant transition for the role. The Guide Over Sands Trust initiated a search for his successor‚ recognizing the need for someone with comparable expertise and dedication.
Michael Wilson’s appointment represented a passing of the torch‚ ensuring the continuation of safe passage across Morecambe Bay. Robinson’s legacy of safeguarding walkers and preserving the tradition was entrusted to Wilson’s capable hands.
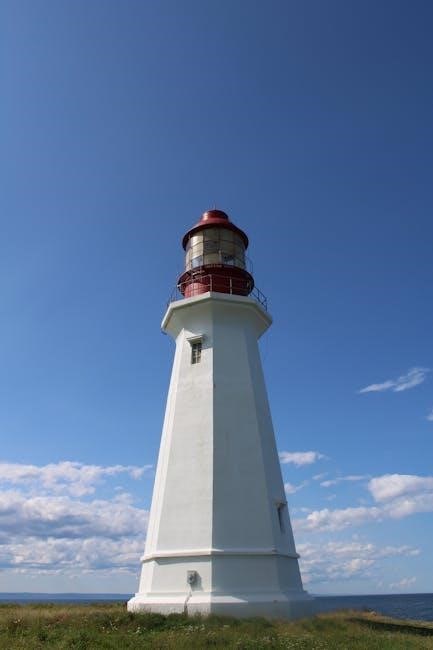
The Guide’s Cottage: A Historic Residence
The Guide’s Cottage‚ a 17th-century structure located at Silverdale‚ is a unique perk associated with the Queens (or Kings) Guide to the Sands position. Owned by the Crown‚ its management falls under the Duchy of Lancaster. This historic residence isn’t merely a home; it’s intrinsically linked to the role’s heritage.
The Guide enjoys the use of the cottage‚ a tangible connection to centuries of tradition. It symbolizes the enduring importance of the sands crossing and the responsibility entrusted to the appointed Guide.

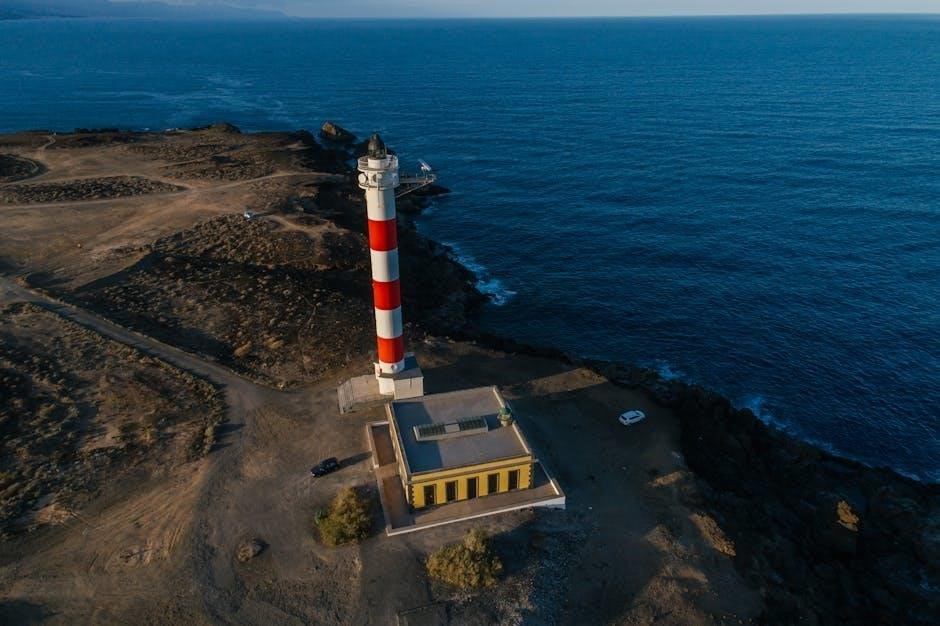
The Sands Crossing Route: A Detailed Look
The traditional route spans from Arnside to Grange-over-Sands‚ requiring a crossing of the River Kent and is officially designated—and notoriously dangerous—highway.
The Traditional Route from Arnside to Grange-over-Sands
The most frequently traversed path for a sands crossing begins at Arnside and concludes in Grange-over-Sands. This route‚ steeped in history‚ demands careful navigation due to the ever-shifting tides and concealed channels. The Guide expertly leads groups‚ often numbering in the hundreds‚ across the expansive bay. Successful completion hinges on precise timing‚ aligning with favorable tidal conditions and safe river levels. Charity walks frequently utilize this route‚ offering participants a unique and challenging experience‚ while relying on the Guide’s expertise for a secure passage. It’s a testament to enduring tradition.
Crossing the River Kent
A critical element of the sands crossing involves navigating the River Kent‚ a significant obstacle along the Arnside to Grange-over-Sands route. The Guide meticulously assesses the river’s depth and flow‚ ensuring a safe wading point for the group. Timing is paramount; attempting the crossing during an incoming tide or after heavy rainfall presents substantial danger. The Guide’s intimate knowledge of the riverbed and currents is crucial‚ preventing participants from becoming stranded or swept away. This river passage exemplifies the inherent risks and demands precise judgement.
The Route as a Designated Highway
Remarkably‚ the sands crossing is officially recognized as a public highway‚ a historical designation maintained despite its unconventional nature. This unique status underscores the route’s long-standing importance as a traditional passage. However‚ it’s also described as “the most dangerous highway in Britain” by Cedric Robinson‚ highlighting the inherent perils. Maps denote this route‚ yet reliance on traditional guidance remains essential due to shifting sands and unpredictable tides. This legal classification reflects a fascinating blend of history and hazard.
Mapping the Most Dangerous Highway in Britain
Despite its designation as a highway‚ mapping the Morecambe Bay crossing presents unique challenges. Traditional maps indicate the route‚ but they cannot fully convey the dynamic nature of the sands and tides. The Guide’s expertise is crucial for identifying safe passage‚ as shifting channels and quicksand pose constant threats. Accurate prediction relies on understanding tidal timings‚ river levels‚ and local conditions. This isn’t simply a matter of following a line on a map; it’s about navigating a constantly evolving landscape.

The History of the Guides Cottage
The Guides Cottage‚ a 17th-century structure at Sandscale Haws‚ is owned by the Crown and managed by the Duchy of Lancaster‚ providing residence for the Guide.
Ownership by the Crown
The Guides Cottage’s ownership by the Crown signifies a long-standing royal connection to the Morecambe Bay crossing and the vital role of the Guide. This historical link dates back centuries‚ reflecting the monarch’s responsibility for ensuring safe passage across the dangerous sands.
The Crown’s continued ownership underscores the enduring importance of this tradition‚ even as the sands’ use as a primary transport route diminished with the arrival of the railway. It’s a tangible symbol of the royal patronage bestowed upon the Guide and the preservation of this unique heritage.
Management by the Duchy of Lancaster
While owned by the Crown‚ the day-to-day management of the historic Guides Cottage falls under the purview of the Duchy of Lancaster. This unique arrangement reflects the Duchy’s role as a self-funding estate managing assets on behalf of the monarch.
The Duchy’s involvement ensures the cottage is maintained and available for the Queens (or Kings) Guide‚ supporting their duties in facilitating safe crossings of Morecambe Bay. This practical management complements the symbolic importance of Crown ownership‚ preserving a vital piece of local history.
The 17th-Century Origins of the Cottage
The Guides Cottage boasts origins tracing back to the 17th century‚ serving as a crucial base for those tasked with leading travelers across the perilous sands of Morecambe Bay. Its construction provided shelter and a secure location for guides to prepare for and oversee the challenging crossings.
Throughout the centuries‚ the cottage has witnessed the evolution of the guiding role‚ from monastic assistance to royal appointment‚ remaining a steadfast symbol of safety and tradition amidst the shifting tides.
The Impact of the Railway on the Sands Crossing
The arrival of the railway in 1857 significantly diminished the sands’ role as a primary transport route‚ impacting the Guide’s traditional duties and prominence.
Decline in Use as a Major Transport Route
Prior to the mid-19th century‚ the sands represented a vital‚ though perilous‚ artery for travel and trade across the region. Locals and travelers alike relied on the expertise of the guides – initially monks‚ then royally appointed individuals – to navigate the shifting tides and treacherous quicksand. However‚ the construction of the railway in 1857 fundamentally altered this landscape.
The railway offered a safer‚ faster‚ and more reliable alternative‚ swiftly eclipsing the sands as the preferred method of transport. This dramatic shift led to a substantial decline in the sands’ usage as a major route‚ diminishing the necessity for frequent guided crossings and reshaping the role of the Guide.
The Railway’s Influence on the Guide’s Role
The arrival of the railway in 1857 didn’t eliminate the Guide’s position entirely‚ but it profoundly altered its function. No longer essential for routine transport‚ the Guide transitioned from facilitating everyday travel to primarily ensuring safety for those who chose to cross the sands.
This shift saw the role evolve towards leading charity walks and accommodating adventurous individuals. While the frequency of crossings diminished‚ the Guide’s expertise remained crucial‚ highlighting the enduring dangers of the bay. The symbolic importance of the position was preserved‚ even as its practical necessity waned.

The Guide Over Sands Trust
The Guide Over Sands Trust is responsible for appointing the Queens (or Kings) Guide‚ diligently preserving the historic tradition of safe passage across Morecambe Bay.
The Trust’s Role in Appointing the Guide
The Guide Over Sands Trust undertakes the crucial responsibility of selecting the Queens Guide to the Sands‚ ensuring the continuation of this centuries-old tradition. This involves a rigorous process to identify individuals possessing the necessary local knowledge‚ navigational skills‚ and leadership qualities.
The Trust carefully assesses candidates’ understanding of the bay’s complex tidal patterns and inherent dangers. They prioritize experience and a demonstrated commitment to safety‚ vital for leading groups across the shifting sands. Ultimately‚ the Trust presents a nominee to the Crown for royal approval‚ solidifying the appointment.
Preserving the Tradition of the Sands Crossing
Preserving the tradition of the sands crossing is paramount‚ balancing historical significance with modern safety concerns. The Guide Over Sands Trust actively promotes awareness of this unique cultural heritage‚ fostering appreciation for the skills and knowledge required for a safe passage.
Charity walks‚ led by the Guide‚ play a vital role in keeping the tradition alive‚ attracting participants and raising funds. Maintaining the Guide’s Cottage and upholding the royal appointment further symbolize the enduring importance of this ancient route across Morecambe Bay.

Tidal Considerations for Safe Passage
Safe passage across the sands hinges on precise tidal timings and levels‚ alongside river conditions; the Guide expertly predicts crossing windows‚ prioritizing safety above all else.
Understanding Tide Timings and Levels
Accurate tidal prediction is paramount for a safe crossing of Morecambe Bay. The Guide meticulously studies tide tables‚ factoring in lunar cycles and meteorological influences to determine viable crossing windows. Understanding the height of the tide is crucial‚ as it dictates the available safe routes and the depth of the River Kent crossing.
Variations in atmospheric pressure and river levels further complicate calculations‚ demanding the Guide’s extensive local knowledge. Misjudging these factors could lead to being stranded or facing dangerous quicksand‚ emphasizing the critical importance of precise timing and level assessment.
The Importance of River Levels
River Kent’s level significantly impacts the sands crossing‚ acting as a major obstacle and hazard. High river levels can completely block the traditional route‚ forcing detours or postponing crossings altogether. The Guide carefully monitors rainfall upstream‚ predicting how it will affect the river’s flow and depth.
Safe passage requires the river to be shallow enough to wade across‚ but not so low as to expose dangerous mudflats. Combined with tidal timings‚ river levels dictate the narrow window for a successful and secure crossing‚ demanding constant vigilance.
Predicting Safe Crossing Windows
Accurate prediction of safe crossing windows is paramount for the Queens Guide. This involves a complex assessment of both tide timings and river levels‚ factoring in weather forecasts. The Guide utilizes historical data and real-time observations to anticipate how conditions will evolve during a crossing;
These windows are often brief‚ demanding precise timing and swift decision-making. A miscalculation could leave groups stranded or exposed to dangerous currents‚ highlighting the Guide’s critical role in ensuring participant safety.

The Future of the Queens Guide to the Sands
Maintaining this tradition requires balancing historical practice with modern safety demands‚ alongside growing tourism and charity events across Morecambe Bay’s challenging sands.
Maintaining the Tradition in a Modern World
The role’s longevity hinges on adapting to contemporary needs while preserving its unique heritage. Balancing safety protocols for large charity walks – often involving 600 participants – with the historical practice of guiding is crucial. Modern technology aids tide prediction‚ but the Guide’s local knowledge remains paramount.
Ensuring continued royal patronage and the Guide Over Sands Trust’s support are vital. Promoting the tradition through educational initiatives and responsible tourism will secure its future‚ acknowledging the sands’ inherent dangers and the Guide’s indispensable expertise.
The Role of Tourism and Charity Events
Charity walks across Morecambe Bay have become a significant aspect of the Queens Guide’s duties‚ occurring roughly fortnightly from spring to autumn. These events‚ often supporting various causes‚ draw substantial participation‚ sometimes exceeding 600 people. Tourism benefits from the unique experience‚ attracting visitors interested in the historical crossing.
However‚ balancing public access with safety remains paramount. The Guide’s role is crucial in managing these large groups‚ ensuring awareness of tidal dangers‚ and upholding the tradition while accommodating modern interests.
Ensuring the Continued Safety of Crossings
Maintaining safe passage across the sands requires constant vigilance and expert knowledge of tidal patterns‚ river levels‚ and weather conditions. The Guide must accurately predict safe crossing windows‚ a skill honed through experience and understanding of the bay’s complexities.
Emergency preparedness is also vital‚ as the sands present inherent dangers like quicksand and rapidly changing tides. The Guide’s responsibility extends to managing group dynamics and responding effectively to unforeseen circumstances‚ safeguarding all participants.

Notable Queens Guides Throughout History
Throughout centuries‚ numerous individuals have served as the Queens (or Kings) Guide‚ safeguarding travelers across Morecambe Bay’s perilous sands with expertise and courage.
A Brief Overview of Past Guides
Historically‚ the role of the Guide dates back to the monks of Cartmel Priory‚ who initially assisted travelers. Royal appointments began in the 16th century‚ solidifying the position’s importance as a vital transport route facilitator. Over time‚ these Guides ensured safe passage across the dangerous tidal sands of Morecambe Bay.
Successive Guides maintained this tradition until the railway’s arrival in 1857 diminished the sands’ role in transportation. Despite this shift‚ the Guide’s position endured‚ evolving to support charity walks and maintain a unique cultural heritage. The lineage of Guides represents centuries of local knowledge and dedication.
Cedric Robinson: The Longest-Serving Guide
Cedric Robinson notably served as the 25th Queens (and Kings) Guide to the Sands from 1963 until 2019‚ making him the longest-serving Guide in the position’s history. He expertly led countless groups across Morecambe Bay‚ often for charity fundraising events‚ sometimes guiding up to 600 people at once.
Robinson famously described the crossing as “the most dangerous highway in Britain‚” highlighting the inherent risks. His deep understanding of the tides and sands was crucial for ensuring the safety of those under his guidance‚ cementing his legacy as a dedicated and skilled professional.

The Unique Challenges of Guiding Across the Sands
Guiding presents difficulties with rapidly changing weather‚ managing diverse groups‚ and responding swiftly to potential emergencies during the perilous Morecambe Bay crossings.
Dealing with Changing Weather Conditions
Morecambe Bay’s weather is notoriously unpredictable‚ presenting significant challenges for the Queens Guide. Rapidly shifting conditions‚ including incoming fog and sudden changes in wind direction‚ can quickly obscure the safe crossing route. The Guide must constantly monitor forecasts and observe the environment‚ adapting plans as needed to ensure group safety.
Visibility is a primary concern; fog can descend swiftly‚ making navigation extremely difficult. Strong winds can also impact the crossing‚ potentially causing disorientation and increasing the risk of getting stranded by the incoming tide. Experienced judgement is crucial.
Managing Group Dynamics
Leading large groups across Morecambe Bay requires exceptional interpersonal skills from the Queens Guide. Charity walks often involve up to 600 participants with varying levels of fitness and experience. Maintaining order and ensuring everyone understands the safety instructions is paramount.
The Guide must effectively communicate the risks‚ encourage teamwork‚ and address any anxieties within the group. Managing pace‚ preventing stragglers‚ and fostering a sense of collective responsibility are vital for a successful and safe crossing. Patience and clear direction are key.
Responding to Emergency Situations
The Queens Guide must be prepared for unforeseen circumstances during a sands crossing. Rapidly changing weather‚ unexpected shifts in tide‚ or a participant becoming unwell require immediate and decisive action.
The Guide carries communication equipment and has knowledge of emergency procedures. They are responsible for assessing the situation‚ providing first aid if needed‚ and coordinating any necessary assistance from emergency services. Maintaining calm and reassuring the group are crucial in a crisis‚ ensuring a swift and safe resolution.