The Honeywell TH3210D1004 is a non-programmable digital thermostat designed for 24 VAC heat pump systems, offering precise temperature control and easy installation. Its manual provides essential guidance for setup and operation, ensuring optimal performance and energy efficiency for homeowners. This thermostat is part of the Honeywell Pro 3000 series, known for reliability and simplicity in regulating home temperatures effectively.
1.1 Overview of the Honeywell TH3210D1004 Model
The Honeywell TH3210D1004 is a non-programmable digital thermostat designed for 2 heat/1 cool heat pump systems. It offers precise temperature control with a manual changeover feature, making it ideal for users who prefer straightforward operation. The thermostat is part of Honeywell’s Pro 3000 series, known for its reliability and ease of use. It features a Premier White design and is compatible with 24 VAC systems. The TH3210D1004 is designed for horizontal mounting and provides a temperature range of 40°F to 90°F for heat. Its non-programmable nature simplifies installation and operation, making it a cost-effective solution for managing home temperatures efficiently.
1.2 Importance of the Manual for Proper Installation and Use
The manual for the Honeywell TH3210D1004 is crucial for ensuring proper installation and operation. It provides detailed step-by-step instructions, including system requirements and compatibility checks, to avoid potential issues. The manual also outlines necessary tools and materials, such as wall anchors and mounting screws, ensuring a secure and correct installation. Additionally, it covers operational guidelines, like understanding the display and controls, to help users navigate the thermostat’s features effectively. Following the manual’s instructions is essential for optimizing performance, preventing malfunctions, and maintaining energy efficiency. It also includes troubleshooting tips and safety precautions, making it an indispensable resource for both installation and ongoing use of the thermostat.

Installation Manual for the TH3210D1004 Thermostat
The Honeywell TH3210D1004 installation manual provides comprehensive guidance for setting up the non-programmable digital thermostat, ensuring proper configuration and troubleshooting for heat pump systems with clear instructions.
2.1 System Requirements and Compatibility
The Honeywell TH3210D1004 is designed for 24 VAC heat pump systems, supporting 2 Heat/1 Cool configurations. It requires a compatible HVAC system and proper wiring connections. Ensure your system matches the thermostat’s specifications for optimal performance. Compatibility with standard mounting setups and existing wiring ensures a seamless installation process. Always verify system voltage and stage compatibility before proceeding with installation to avoid malfunctions and ensure safety. Proper compatibility ensures efficient temperature control and energy savings, making it a reliable choice for heat pump systems.
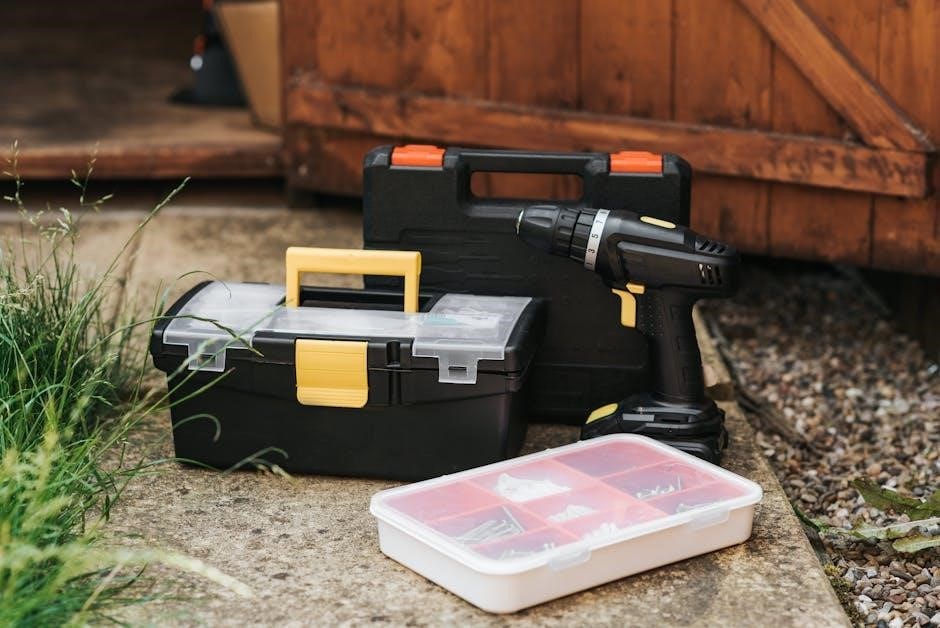
2.2 Tools and Materials Needed for Installation
To install the Honeywell TH3210D1004, you’ll need basic tools and materials. Essential tools include a screwdriver (both Phillips and flathead), wire strippers, and a drill with bits for wall anchors. Materials required are the provided wall anchors, mounting screws, and the thermostat unit itself. Additional items like a level and pencil may be helpful for accurate mounting. Ensure all components from the packaging are accounted for before starting. Properly dispose of packaging materials according to local regulations. Refer to the manual for a detailed list of required tools and materials to ensure a smooth installation process. Gathering everything beforehand will save time and prevent delays.
2.3 Step-by-Step Installation Instructions
Start by turning off the power to your HVAC system at the circuit breaker. Remove the old thermostat and disconnect the wires, noting their colors and connections. Mount the new wall plate using the provided anchors and screws, ensuring it’s level. Connect the wires to the corresponding terminals on the TH3210D1004, matching the labels from the manual. Secure the thermostat to the wall plate and restore power. Test the system by adjusting the temperature to ensure proper operation. Refer to the manual for specific wiring diagrams and additional guidance. Follow these steps carefully to ensure a safe and correct installation, avoiding any potential damage to the thermostat or HVAC system.

Operating Manual for the TH3210D1004 Thermostat
The operating manual provides detailed instructions for using the TH3210D1004 thermostat, including navigating its digital display, adjusting temperatures, and setting schedules for energy-efficient heating and cooling control.
3.1 Understanding the Thermostat Display and Controls
The TH3210D1004 features a clear digital display showing current temperature, setpoint, and system status. Controls include buttons for adjusting temperature, switching between heat and cool modes, and enabling manual changeover. The interface is user-friendly, with intuitive navigation for setting preferences. The display also indicates when the system is active, ensuring users can monitor their heating and cooling operations efficiently. Understanding these components is essential for optimal use of the thermostat’s functionalities, as outlined in the manual. Proper use of the controls helps maintain consistent comfort levels while minimizing energy consumption. This section guides users through each element of the display and control panel for seamless operation.
3.2 Basic Operations and Temperature Adjustment
The TH3210D1004 operates with a straightforward interface, allowing users to adjust temperatures using the +/- buttons. The display shows the current room temperature and the setpoint, enabling easy monitoring. To increase or decrease the desired temperature, press the respective buttons until the display reflects the preferred setting. The thermostat responds by activating the heating or cooling system to reach the setpoint. Manual changeover between heat and cool modes is also accessible via the controls. This non-programmable design ensures simplicity, focusing on immediate temperature adjustments without scheduling. Proper use of these basic functions ensures efficient operation and consistent comfort, as detailed in the manual. Users can rely on this thermostat for reliable temperature management in their homes.
3.3 Temperature Scheduling and Energy-Saving Tips
While the TH3210D1004 is a non-programmable thermostat, users can still optimize energy usage by manually adjusting settings based on daily routines. Lower the temperature when sleeping or away from home to save energy. For heat pump systems, maintain consistent settings to avoid excessive cycling. Regularly check and clean the thermostat to ensure accurate temperature readings. Consider upgrading to a programmable model for advanced scheduling options. Proper installation and leveling of the thermostat are crucial for efficient operation. Always refer to the manual for specific guidance on optimizing energy efficiency with this model. By following these tips, homeowners can enjoy both comfort and cost savings.

Features and Specifications of the TH3210D1004
The TH3210D1004 is a non-programmable digital thermostat for heat pump systems, offering precise temperature control, 24 VAC compatibility, and manual changeover. It features a white design and horizontal mounting.
4.1 Key Features of the Non-Programmable Digital Thermostat
The TH3210D1004 is a non-programmable digital thermostat designed for 2 heat/1 cool heat pump systems, offering precise electronic control. It features a backlit display, manual changeover, and horizontal mounting. The thermostat operates on 24 VAC systems and has a temperature range of 40°F to 90°F for heating. Its compact design and Premier White color ensure a sleek appearance. The thermostat requires no programming, making it user-friendly for basic temperature adjustments. It also includes wall anchors and mounting screws for easy installation. This model is part of Honeywell’s Pro 3000 series, known for reliability and simplicity in home temperature regulation.
4.2 Technical Specifications and Performance Parameters
The TH3210D1004 operates as a non-programmable digital thermostat for 24 VAC heat pump systems, supporting 2 heat/1 cool configurations. It features a backlit display for clear visibility and manual changeover. The thermostat maintains precise temperature control with a range of 40°F to 90°F for heating. Its compact design weighs 0.68 lbs, and it includes wall anchors and screws for easy installation. Designed for horizontal mounting, this model ensures reliable performance in regulating home temperatures effectively. Part of the Honeywell Pro 3000 series, it offers a user-friendly interface and energy-efficient operation, making it a practical choice for heat pump systems.

Troubleshooting Common Issues
Common issues with the TH3210D1004 include display malfunctions or temperature inaccuracies. Refer to the manual for reset instructions, wiring checks, and solutions to ensure optimal performance.
5.1 Identifying and Resolving Common Operational Issues
Common operational issues with the TH3210D1004 thermostat may include display malfunctions, inaccurate temperature readings, or unresponsive controls. To resolve these, first, check the power supply and ensure proper wiring connections. Refer to the manual for instructions on resetting the thermostat or performing a factory reset. If the display is blank, verify that the batteries are installed correctly or that the system has power. For temperature inaccuracies, calibrate the thermostat using the steps outlined in the manual. Additionally, ensure that the thermostat is mounted level and away from direct sunlight or drafts, as these can affect performance. Regular cleaning of the thermostat and checking for software updates can also prevent issues. Always follow the troubleshooting guide in the manual to address problems effectively.
5.2 Advanced Troubleshooting Techniques and Solutions
For advanced issues with the TH3210D1004 thermostat, start by checking the wiring diagram in the manual to ensure all connections are correct. If the thermostat fails to communicate with the HVAC system, verify compatibility with your specific heat pump setup. Issues like intermittent operation or incorrect temperature adjustments may require recalibrating the thermostat or resetting it to factory settings. For internal faults, consult the troubleshooting section in the manual for guidance on diagnosing and resolving complex problems. In cases where the thermostat malfunctions despite proper setup, contact Honeywell support for further assistance or consider replacing the unit if it’s no longer under warranty. Always refer to the manual for detailed steps and safety precautions during advanced troubleshooting.
The TH3210D1004 thermostat is a reliable, efficient solution for heat pump systems. Its ease of use and precise control make it ideal for maintaining comfortable temperatures. By following the manual, users can ensure optimal performance and energy savings. Regular maintenance and updates will keep the thermostat functioning at its best, providing long-term comfort and efficiency for homeowners.
6.1 Summary of the TH3210D1004 Manual and Its Benefits
The TH3210D1004 manual provides comprehensive guidance for installation, operation, and troubleshooting. It ensures users can efficiently set up and utilize the thermostat, maximizing its benefits. The manual highlights the thermostat’s compatibility with 24 VAC heat pump systems and its non-programmable design, which simplifies temperature control. By following the manual, users can enjoy precise temperature regulation, energy efficiency, and extended system lifespan. The document also includes essential safety precautions and maintenance tips, ensuring safe and optimal performance. Overall, the manual is a valuable resource for homeowners seeking to harness the full potential of their Honeywell thermostat while minimizing operational challenges.
6.2 Future Considerations for Thermostat Maintenance and Upgrades
Regular maintenance of the TH3210D1004 thermostat ensures optimal performance and longevity. Users should periodically clean the device, check battery levels, and verify wiring connections. For upgrades, consider compatibility with advanced HVAC systems or smart home integrations. Recycling outdated thermostats responsibly is crucial, as highlighted in the manual. Staying informed about new features and technologies can enhance energy efficiency. Professional installation is recommended for complex upgrades. Annual inspections by a certified technician can prevent issues and ensure the system operates efficiently. By adhering to these guidelines, users can maintain a reliable and energy-efficient heating and cooling system, adapting to future technological advancements seamlessly.