Open post

m92 suervo motor instruction manual

The M92 Servo Motor is a high-torque AC servomotor designed for industrial sewing and apparel production, offering 450W power output and compact energy-efficient design.

1.1 Overview of the M92 Servo Motor

The M92 Servo Motor is a high-torque AC servomotor designed for industrial sewing and apparel production. It features a compact, energy-efficient design with a 450W power output, making it ideal for demanding applications. The motor is part of the DDL-8700-7 model and is compatible with advanced control systems like the SC920 control box. Its programmable functions allow for precise control and customization, ensuring optimal performance in various industrial settings. The M92 is known for its durability and reliability, making it a preferred choice for high-volume production environments. Refer to the instruction manual for detailed specifications and operating guidelines.

1.2 Key Features and Benefits

The M92 Servo Motor offers high torque and 450W power output, essential for industrial sewing. Its compact design enhances energy efficiency, reducing power consumption. Programmable functions allow customization for specific tasks, optimizing performance. Compatibility with advanced control systems like the SC920 control box ensures seamless integration. The motor’s durability and reliability make it ideal for high-volume production, minimizing downtime. These features contribute to increased productivity and operational consistency, making the M92 a valuable asset in apparel manufacturing and industrial applications.

Safety Precautions and Guidelines

Read the instruction manual before installation and operation. Prevent unauthorized adjustments and ensure the servo motor is securely fixed to avoid accidents. Understand all safety information thoroughly.

2.1 General Safety Instructions

Always read the instruction manual thoroughly before installing or operating the M92 Servo Motor. Ensure all safety precautions are understood to prevent accidents. Avoid unauthorized adjustments and never touch internal components of the servo motor or amplifier. Wear protective equipment when handling electrical components. Keep the motor securely installed to prevent movement during operation. Follow all guidelines to ensure safe and efficient use of the M92 Servo Motor.

2.2 Precautions Before Installation and Operation

Before installing or operating the M92 Servo Motor, ensure all safety protocols are followed. Read the instruction manual thoroughly and understand its contents. Verify the motor’s compatibility with your system and ensure proper wiring connections. Avoid overloading the motor beyond its rated capacity. Secure the motor firmly to prevent movement during operation. Use only genuine parts and accessories to maintain performance and safety. Test the motor under no-load conditions before full operation. Do not attempt installation without proper training or knowledge. Consult a professional if unsure about any procedure.

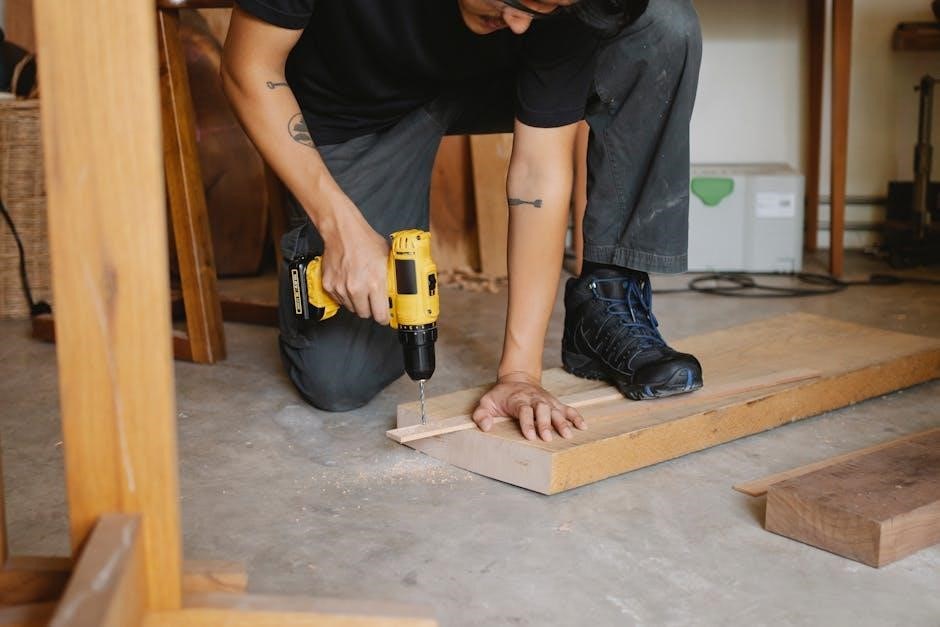
Installation and Setup of the M92 Servo Motor

Mount the M92 Servo Motor securely using compatible brackets, ensuring proper alignment. Connect wiring according to the manual, verifying all connections are tight and correct. Test the motor under no-load conditions before full operation to ensure smooth performance and prevent vibrations.

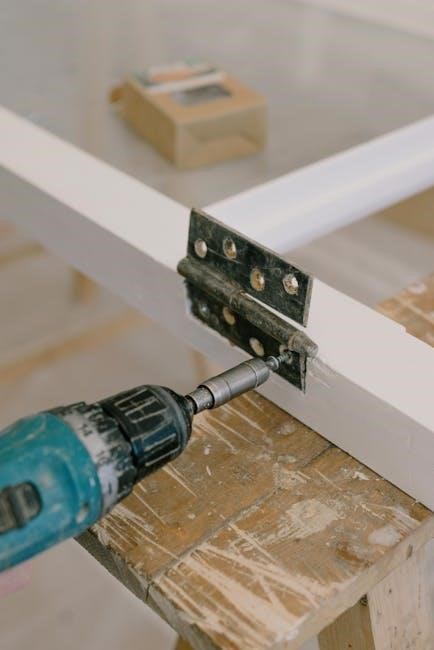
3.1 Mounting and Alignment

Proper mounting and alignment of the M92 Servo Motor are critical for optimal performance. Install the motor on a stable, flat surface using compatible mounting brackets. Ensure the motor shaft is aligned with the load to prevent vibration and wear. Tighten all bolts securely, following torque specifications in the manual. Double-check alignment with connected components to avoid mechanical stress. If misalignment occurs, adjust the motor or load position before operation. Proper installation ensures smooth operation, reduces noise, and extends the motor’s lifespan. Always refer to the manual for specific mounting instructions and diagrams to guarantee accuracy.

3.2 Connection and Wiring

For the M92 Servo Motor, ensure proper connection and wiring to guarantee safe and efficient operation. Use the recommended 4-wire cable (e.g., MR-EKCBL30M-H) and refer to the MR-J3-MA Servo Amplifier Instruction Manual for detailed connection procedures. Set parameter PC22 correctly for the 4-wire configuration to avoid communication errors. Connect power and signal lines securely, ensuring all terminals are tightly fastened. Verify polarity to prevent damage. Ground the motor and controller properly to eliminate noise and interference. Use appropriate tools and follow safety guidelines, such as disconnecting power before wiring. Double-check all connections before powering up the system to ensure reliability and performance. Always consult the manual for specific wiring diagrams and instructions.

Technical Specifications and Performance

The M92 Servo Motor delivers 450W high-torque output, ideal for industrial sewing. Its compact design ensures energy efficiency and reliable performance in demanding applications.

4.1 Motor Ratings and Capabilities

The M92 Servo Motor is rated for 450W of power output, delivering high torque for demanding industrial applications. Its compact design ensures efficient energy use while maintaining precise control. The motor is optimized for high-performance tasks, including apparel production and automated systems. With a focus on reliability, the M92 is engineered to handle continuous operation in challenging environments. Its robust construction and advanced servo technology enable smooth, accurate motion control, making it a reliable choice for industrial sewing and manufacturing processes. The motor’s capabilities are further enhanced by its compatibility with modern control systems, ensuring seamless integration and operation.

4;2 Compatibility with Control Systems

The M92 Servo Motor is designed to work seamlessly with various control systems, including the MR-J3-MA servo amplifier. For proper operation, users must ensure the motor is connected according to the specified parameters, such as adjusting parameter No. PC22 when using a 4-wire cable. The motor’s compact design and energy-efficient technology make it compatible with modern control panels and industrial sewing systems. Its compatibility ensures reliable performance in programmable applications, allowing for precise control and integration into automated workflows. Proper setup and configuration are essential for optimal functionality, as outlined in the M92 Servo Motor Instruction Manual.

Maintenance and Troubleshooting

Regular maintenance and troubleshooting ensure optimal performance of the M92 Servo Motor. Follow routine checks, clean components, and refer to the instruction manual for solutions to common issues.

5.1 Routine Maintenance Procedures

Regular maintenance is essential to ensure the M92 Servo Motor operates efficiently. Clean the motor and surrounding areas to prevent dust buildup. Check all connections and wiring for integrity. Verify the servo motor shaft rotates smoothly and inspect for wear. Lubricate mechanical components as specified in the instruction manual. Ensure proper alignment and mounting to avoid vibration. Periodically review the motor’s performance parameters and adjust as needed. Refer to the manual for specific maintenance schedules and procedures to maintain optimal functionality and extend the motor’s lifespan. Always follow safety guidelines during maintenance to avoid damage or injury.

5.2 Common Issues and Solutions

Common issues with the M92 Servo Motor include shaft rotation problems, connection errors, and parameter setting mismatches. If the motor shaft does not rotate, ensure power is supplied and connections are secure. For wiring issues, refer to the manual and verify all cables are correctly connected. Parameter mismatches can cause operational errors; adjust settings according to the instruction manual. If vibration occurs, check mounting alignment and tighten fasteners. For persistent issues, consult the troubleshooting section in the manual or contact technical support. Regular maintenance and adherence to guidelines can prevent many of these problems, ensuring smooth operation.

Additional Resources and References

For further information, refer to the M92 Servo Motor Instruction Manual available on JUKI’s official website or through authorized dealers. Supplementary guides and the MR-J3-MA manual are also accessible online for detailed setup and troubleshooting instructions.

6.1 Where to Find the Full Instruction Manual

The M92 Servo Motor Instruction Manual is available for download on JUKI’s official website or through authorized dealers. It can also be found as a supplementary guide alongside the MR-J3-MA Servo Amplifier Manual. Ensure to reference the official JUKI M92 Supplementary Setup Instructions/Parts List for comprehensive details. The manual provides in-depth guidance on installation, operation, and maintenance, ensuring safe and optimal use of the servo motor. Always consult the official documentation before proceeding with any setup or troubleshooting to avoid errors and ensure compliance with safety standards.

6.2 Supplementary Guides and Documentation

Supplementary guides for the M92 Servo Motor include detailed technical specifications, troubleshooting manuals, and compatibility charts. The MR-J3-MA Servo Amplifier Manual provides additional insights into connection parameters and settings. Users can also access wiring diagrams and parameter adjustment guides for optimized performance. These resources are available on JUKI’s official website or through authorized distributors. For advanced setups, refer to the MR-EKCBL30M-H cable configuration guide. Ensure to consult these supplementary materials for comprehensive understanding and troubleshooting of the M92 Servo Motor system, enabling efficient operation and maintenance.

Open post

cobra 480i manual

The Cobra RAD 480i is a sophisticated radar and laser detector designed to enhance driver awareness and road safety. It offers advanced detection technology, real-time alerts, and seamless smartphone connectivity, providing drivers with a reliable tool to avoid speed traps and ensure a safer driving experience;

1.1 Overview of the Cobra RAD 480i Radar Detector

The Cobra RAD 480i is an advanced radar and laser detector designed to provide drivers with enhanced road safety and awareness. It features cutting-edge detection technology, real-time alerts, and seamless integration with smartphones. This device offers improved accuracy and a long detection range, ensuring early warnings for radar and laser signals. With its connected capabilities, users can share alerts with the Cobra community, enhancing overall protection. The RAD 480i is a reliable tool for drivers seeking to avoid speed traps and maintain safe driving practices on the road.

1.2 Importance of Using a Radar Detector for Road Safety

Using a radar detector like the Cobra RAD 480i significantly enhances road safety by providing early warnings for radar and laser speed monitoring. This allows drivers to adjust their speed, reducing the risk of tickets and accidents. By offering real-time alerts and community-shared data, the detector promotes safer driving habits and increased awareness of potential hazards on the road.

Key Features and Technologies

The Cobra RAD 480i features advanced radar and laser detection, real-time alerts, and improved accuracy. It offers a long detection range and seamless smartphone connectivity for enhanced functionality.

2.1 Advanced Radar and Laser Detection Capabilities

The Cobra RAD 480i boasts cutting-edge radar and laser detection technology, providing early warnings for various speed enforcement signals. It effectively identifies X, K, and Ka bands, as well as laser guns, ensuring comprehensive coverage. The detector’s advanced algorithms minimize false alerts, offering accurate and reliable notifications. This capability helps drivers maintain safe speeds and avoid unexpected traffic enforcement encounters, making it a trusted companion for a secure and informed driving experience.

2.2 Real-Time Alerts and Community Sharing

The Cobra RAD 480i delivers real-time alerts through its advanced detection system, providing immediate notifications of radar and laser signals. It also integrates with the Cobra community, allowing users to share alerts and stay informed about speed traps and enforcement areas. This collaborative feature enhances detection range and accuracy, ensuring drivers receive up-to-date information. The system leverages data from connected devices, offering a dynamic and responsive alert network that helps drivers navigate safely and avoid potential hazards on the road.

2.3 Improved Accuracy and Long Detection Range

The Cobra RAD 480i boasts enhanced accuracy and an extended detection range, ensuring earlier warnings for radar and laser signals. Its advanced technology minimizes false alerts while maximizing sensitivity, providing reliable performance in various driving conditions. The detector’s long-range capabilities allow drivers to respond to potential threats well in advance, promoting safer and more informed driving experiences. This improved accuracy and range make it a trusted tool for avoiding speed traps and maintaining situational awareness on the road.

Installation and Setup

The Cobra RAD 480i installation involves mounting the detector, connecting it to your smartphone, and following simple setup steps from the manual for optimal performance.

3.1 Mounting the Detector in Your Vehicle

Mounting the Cobra RAD 480i in your vehicle is straightforward. Attach the detector to your windshield using the included suction cup mount, ensuring a clear view and avoiding obstruction. Adjust the angle for optimal detection performance. Secure the mount firmly to ensure stability while driving. For proper functionality, position the detector away from any windshield obstructions or tinted areas. Refer to the manual for detailed steps to ensure correct installation and maximum detection range.

3.2 Connecting the Cobra RAD 480i to Your Smartphone

Connect your Cobra RAD 480i to your smartphone using Bluetooth technology for enhanced functionality. Download the Cobra iRadar app, available for Android and iOS devices. Enable Bluetooth on your phone, then pair it with the detector by following the app’s prompts. Once connected, the detector integrates with your smartphone, providing real-time alerts, customizable settings, and access to a community-sharing network for improved detection accuracy and shared threat information while driving.

Understanding Alerts and Interpretations

The Cobra RAD 480i accurately detects and interprets radar and laser signals, providing real-time alerts to enhance driver awareness and ensure safe driving responses.

4.1 Types of Radar and Laser Signals Detected

The Cobra RAD 480i detects a wide range of radar and laser signals, including X, K, and Ka bands, as well as LIDAR signals used by law enforcement. This comprehensive detection ensures drivers are alerted to various speed monitoring technologies, providing ample time to adjust their speed and maintain compliance with traffic laws. The detector’s advanced sensors minimize false alerts, ensuring accuracy and reliability on the road.

4.2 Interpreting Alerts for Safe Driving

The Cobra RAD 480i provides clear alerts through audio tones, visual indicators, and smartphone notifications via the Cobra iRadar app. Understanding these alerts is crucial for safe driving. Radar alerts indicate the presence of speed-monitoring devices, while laser alerts signal targeted enforcement. The detector distinguishes between different signal strengths and types, allowing drivers to react appropriately. By interpreting these alerts, drivers can adjust their speed and maintain awareness of their surroundings, helping to avoid potential tickets and ensure a safer driving experience.

Operating Modes and Customization

The Cobra RAD 480i offers multiple operating modes tailored to different driving conditions, allowing users to customize settings for optimal performance, personal preference, and enhanced driving experience.

5.1 Different Modes for Various Driving Conditions

The Cobra RAD 480i features multiple operating modes, including Highway, City, and Quiet modes, each tailored to specific driving environments. Highway mode maximizes sensitivity for long-range detection on open roads, while City mode reduces false alerts in urban areas. Quiet mode limits audible alerts for a quieter drive. These modes adapt to different scenarios, ensuring optimal performance and minimizing distractions, allowing drivers to customize their experience based on their surroundings and preferences for a safer and more convenient journey.

5.2 Adjusting Settings for Personal Preference

The Cobra RAD 480i allows users to customize settings to suit their driving preferences. Adjustments can be made to sensitivity levels, audio volume, and display brightness. Drivers can enable or disable specific alert types, such as X, K, Ka bands, and laser signals, to minimize false alarms. Additionally, features like speed-based filtering and auto-mute can be tailored for a more personalized experience. These adjustments ensure the detector meets individual needs, enhancing convenience and reducing distractions while driving.

Maintenance and Troubleshooting

Regularly clean your Cobra RAD 480i with a dry cloth and avoid exposure to water. Update software via Cobra’s website and refer to the manual for troubleshooting common issues.

6.1 Cleaning and Caring for Your Detector

Regular cleaning ensures optimal performance of your Cobra RAD 480i. Use a dry, soft cloth to wipe the exterior and avoid exposure to water or harsh chemicals. Do not cover ventilation openings, as this may impair cooling. For stubborn smudges, lightly dampen the cloth with water, but ensure the detector is dry before use. Avoid extreme temperatures or direct sunlight, as these may damage the unit. Proper care extends the lifespan and maintains accuracy of radar and laser detection.

6.2 Solving Common Issues

Addressing common issues with your Cobra RAD 480i ensures optimal performance; If the detector malfunction occurs, reset it by powering it off and on; For firmware updates, use the Cobra iRadar app to ensure the latest features. If alerts are inconsistent, check sensor alignment or update settings. For connectivity issues, restart the app or reinstall it. Avoid exposure to extreme temperatures or moisture, as this may affect accuracy. Regularly clean the detector to prevent dust buildup. Troubleshooting steps are detailed in the manual for quick resolution.

The Cobra RAD 480i offers enhanced safety, advanced technology, and reliable performance, making it an excellent choice for drivers seeking to avoid speed traps and ensure safe travels.

7.1 Benefits of Using the Cobra RAD 480i

The Cobra RAD 480i offers numerous benefits, including enhanced road safety, real-time alerts, and improved detection accuracy. It provides early warnings for radar and laser signals, helping drivers avoid speeding tickets. The device also features seamless smartphone connectivity, allowing users to access a community-sharing platform for up-to-date speed trap information. Its advanced technology ensures reliable performance, while customizable settings cater to individual preferences. Overall, the Cobra RAD 480i is a practical and effective tool for promoting safe and informed driving experiences.

Open post

craftsman 18 42cc chainsaw parts manual

The Craftsman 18 42cc Chainsaw is a reliable tool for cutting tasks, offering a powerful 42cc engine and an 18-inch bar․ This manual provides essential guidance for understanding its components, ensuring proper maintenance, and troubleshooting common issues to maximize performance and longevity․

1․1 Overview of the Chainsaw

The Craftsman 18 42cc Chainsaw is a robust, versatile cutting tool designed for demanding tasks like felling, bucking, and limbing trees․ With its 42cc engine and 18-inch bar, it delivers ample power for cutting thick wood․ The chainsaw features a lightweight design, ergonomic handle, and safety mechanisms like a chain brake․ Its durability and efficiency make it a popular choice for both professionals and homeowners, supported by a comprehensive parts manual for maintenance and repair․

1․2 Importance of the Parts Manual

The parts manual is crucial for understanding and maintaining the Craftsman 18 42cc Chainsaw․ It provides detailed diagrams and part numbers, enabling users to identify components accurately․ This resource is essential for repairs, replacements, and troubleshooting, ensuring the chainsaw operates safely and efficiently․ By referencing the manual, users can maintain their tool effectively, extend its lifespan, and ensure optimal performance for various cutting tasks․

Key Components of the Craftsman 18 42cc Chainsaw

The chainsaw features a 42cc 2-cycle engine, an 18-inch bar, and a durable chain assembly․ These components work together to deliver powerful cutting performance for various tasks․

2․1 Engine and Power System

The 42cc 2-cycle engine powers the chainsaw, delivering ample energy for cutting thick wood․ It features a two-stroke design, combining efficiency and durability․ Proper air-fuel mixture and regular spark plug maintenance ensure optimal performance․ The engine’s high torque output allows for smooth operation during demanding tasks, making it suitable for both professional and home use․ Regular lubrication is essential to maintain its longevity and functionality․

2․2 Chain and Bar Assembly

The 18-inch bar and chain are designed for efficient cutting, with a robust structure to handle heavy-duty tasks․ The chain’s tension must be adjusted regularly to ensure proper cutting performance and safety․ Proper lubrication of the bar and chain is crucial to prevent overheating and extend their lifespan․ Regular sharpening of the chain ensures clean cuts and maintains overall efficiency, while inspecting for wear helps avoid unexpected breakdowns during operation․

2․3 Safety Features

The Craftsman 18 42cc Chainsaw is equipped with a chain brake system to halt the chain in emergencies, reducing injury risks․ Additional features include a protective hand guard and anti-vibration handles for better control․ Always wear protective gear, such as gloves and goggles, to ensure safe operation․ Regular maintenance of these features is essential to maintain reliability and operator safety during use․

The Craftsman 18 42cc Chainsaw Parts Manual provides detailed diagrams and part numbers, essential for maintenance, repairs, and troubleshooting․ It ensures users can identify and replace components efficiently․

3․1 Understanding the Parts Diagram

The parts diagram in the Craftsman 18 42cc Chainsaw manual is a visual guide that identifies each component, such as the engine, chain, bar, and safety features․ By referencing this diagram, users can locate specific parts quickly, understand their functions, and ensure proper assembly or replacement․ This tool is crucial for effective maintenance and repair, enhancing the chainsaw’s performance and longevity over time․

3․2 Locating Parts by Number

The Craftsman 18 42cc Chainsaw parts manual includes a detailed parts list with corresponding numbers․ Users can easily identify and locate specific components by referencing these numbers in the diagram or catalogue․ This system ensures accuracy when ordering replacements, reducing confusion and downtime․ Understanding the numbering system is essential for efficient maintenance and repair, helping users keep their chainsaw in optimal condition․

Safety Precautions and Best Practices

Always wear protective gear, including gloves and eyewear․ Ensure proper chain tension and follow manual guidelines to avoid accidents․ Regularly inspect the saw for damage․

4․1 General Safety Guidelines

Always wear protective gear, including gloves, safety glasses, and a helmet․ Ensure the area is clear of obstacles․ Maintain a firm grip and avoid cutting in confined spaces․ Never operate the saw when fatigued or in poor lighting․ Keep bystanders at a safe distance․ Regularly inspect the chain for sharpness and the bar for damage to prevent accidents․

4․2 Operating Tips for Efficiency

To maximize efficiency with your Craftsman 18 42cc chainsaw, ensure the chain is tensioned correctly to avoid slippage․ Use a pushing motion for better control․ Keep the chain sharp and clean․ Check the air filter and muffler regularly․ Monitor chain lubrication and avoid cutting too quickly․ Maintain proper posture and use both hands for stability․ Follow manufacturer guidelines for optimal results and safety․

Maintenance and Upkeep

Regularly sharpen the chain, clean the air filter, and lubricate the bar to ensure optimal performance․ Store the chainsaw in a dry place to prevent rust․

5․1 Regular Maintenance Tasks

Regular maintenance is crucial for the Craftsman 18 42cc Chainsaw․ This includes sharpening the chain, cleaning the air filter, and lubricating the bar and chain․ Ensure the chain is properly tensioned and the bar is free from debris․ Check the muffler and spark arrestor for buildup and clean as needed․ Regularly oil the bar to prevent rust and wear․ Store the chainsaw in a dry place to avoid corrosion․ Inspect all parts for damage before use․

5․2 Lubrication and Chain Care

Proper lubrication is essential for the Craftsman 18 42cc Chainsaw․ Use high-quality bar oil to lubricate the chain and bar, ensuring smooth operation and preventing overheating․ Clean the chain regularly to remove dirt and debris, which can cause wear․ Sharpen the chain frequently to maintain cutting efficiency․ Store the chainsaw with the bar and chain lightly oiled to prevent rust․ Always refer to the parts manual for specific lubrication recommendations․

Troubleshooting Common Issues

Common issues with the Craftsman 18 42cc Chainsaw include startup problems, chain dulling, and bar oil leaks․ Refer to the parts manual for diagnostic guides and solutions․

6․1 Diagnosing Engine Problems

Engine issues in the Craftsman 18 42cc Chainsaw often stem from fuel system clogs, faulty spark plugs, or carburetor malfunctions․ Check for stale fuel, dirty air filters, or a clogged muffler․ If the engine stalls, inspect the carburetor for proper adjustment․ A detailed parts manual can help identify specific components causing problems, ensuring accurate repairs and maintaining optimal performance․

  • Inspect the carburetor for dirt or blockages․
  • Check the spark plug for wear or fouling․
  • Ensure proper fuel and oil ratios are used․

6;2 Resolving Chain and Bar Issues

Common issues with the Craftsman 18 42cc Chainsaw chain and bar include rust, wear, or improper tension․ Regularly clean and lubricate the chain and bar to prevent corrosion․ Check for alignment and damage, replacing worn or damaged parts․ Refer to the parts manual for correct replacement components and adjustment procedures to ensure smooth operation and extend the lifespan of the chainsaw․

  • Inspect the chain for sharpness and wear․
  • Adjust the chain tension to prevent slippage․
  • Lubricate the bar and chain regularly․

Replacement Parts and Accessories

For the Craftsman 18 42cc Chainsaw, genuine parts ensure optimal performance and safety․ Use the parts manual to identify components, and source replacements from authorized dealers or Sears․

7․1 Identifying Genuine Parts

Genuine Craftsman parts are crucial for maintaining performance and safety․ Look for official logos and part numbers matching your 18 42cc Chainsaw manual․ Beware of counterfeit items, as they may compromise durability and functionality․ Always verify authenticity through authorized dealers or the manufacturer’s website to ensure compatibility and reliability․

7․2 Where to Source Replacement Parts

Replacement parts for the Craftsman 18 42cc Chainsaw can be sourced from the manufacturer’s official website, Sears Canada, or authorized dealers․ Local hardware stores and online marketplaces like Amazon may also carry compatible parts․ Always verify the seller’s authenticity to avoid counterfeit items․ Refer to the parts manual for specific part numbers to ensure accurate and reliable purchases․

Warranty and Support Information

The Craftsman 18 42cc Chainsaw is covered by a one-year warranty from Sears Canada․ For support, contact their customer service or visit the official website․

8․1 Warranty Coverage Details

The Craftsman 18 42cc Chainsaw is backed by a one-year limited warranty from Sears Canada․ This warranty covers repairs or replacements for defective parts due to materials or workmanship․ It applies to parts identified in the parts manual and excludes damage caused by misuse or normal wear and tear․ For specific details, refer to the warranty section in the user manual or contact Sears Canada directly․

8․2 Contacting Customer Support

For assistance with the Craftsman 18 42cc Chainsaw, customers can contact Sears Canada through their official website or by phone․ Visit the Sears Canada website, navigate to the support section, and use the “Contact Us” link for inquiries․ Additionally, local retailers carrying Craftsman products may provide support․ Ensure to have the model number and parts manual details ready for efficient assistance with parts or warranty-related questions․

User Manual and Usage Guidelines

The Craftsman 18 42cc Chainsaw user manual provides detailed instructions for safe operation, step-by-step guides, and storage tips․ Always refer to it for proper usage and safety guidelines․

9․1 Step-by-Step Operating Instructions

Before starting, ensure the chainsaw is properly assembled and all safety features are functional․ Begin by priming the engine and pulling the starter cord․ Allow the saw to warm up briefly before use․ Always maintain a firm grip and keep the chain lubricated․ For cutting, position the bar at a 45-degree angle and apply steady, controlled pressure․ Avoid over-revving the engine and use the chain brake when not in operation․ Follow all safety guidelines for optimal performance and longevity․

9․2 Storage and Transportation Tips

Store the chainsaw in a dry, secure location away from direct sunlight and moisture․ Drain fuel before long-term storage to prevent degradation․ Clean the chain and bar thoroughly and apply a protective coating to prevent rust․ Use a sturdy case or cover for transportation to avoid damage․ Always handle the saw with care to maintain its condition and ensure safety․ Check for any damage before storing or transporting․

Tips for Optimal Performance

Regular maintenance, proper chain lubrication, and efficient cutting techniques ensure optimal performance․ Always follow the parts manual for specific guidance on maintaining your Craftsman 18 42cc chainsaw effectively․

10․1 Enhancing Cutting Efficiency

To enhance cutting efficiency with your Craftsman 18 42cc Chainsaw, ensure the chain is sharp and properly lubricated․ Maintain the correct chain tension and use proper cutting techniques․ Regularly clean the bar and chain to prevent debris buildup․ Store the chainsaw in a dry place and follow the parts manual for optimal performance and longevity of the tool․ Always refer to the manual for specific maintenance guidance․

10․2 Using the Chainsaw in Various Conditions

When using the Craftsman 18 42cc Chainsaw in different conditions, adjust settings based on the environment․ For wet or icy conditions, ensure proper footing and reduce cutting speed․ In dusty environments, frequently clean the air filter․ For cold weather, use winter-grade fuel and check the chain lubrication․ Always refer to the parts manual for specific adjustments and safety precautions to maintain efficiency and safety in all conditions․

The Craftsman 18 42cc Chainsaw is a durable and efficient tool, with its parts manual being key to maintaining performance․ Regular maintenance and proper use ensure longevity and safety, making it a reliable choice for various cutting tasks․ Always refer to the manual for optimal results and troubleshooting guidance․

11․1 Recap of Key Points

The Craftsman 18 42cc Chainsaw is a powerful, reliable tool for cutting tasks, supported by a detailed parts manual․ Key points include the importance of regular maintenance, proper lubrication, and chain care to ensure optimal performance․ Safety guidelines, troubleshooting tips, and the use of genuine parts are emphasized․ Following the manual’s instructions ensures longevity, efficiency, and safe operation, making it a valuable resource for users of this chainsaw․

11․2 Final Tips for Users

Always prioritize safety by wearing protective gear and following guidelines․ Regularly inspect and maintain the chain and bar for optimal performance․ Store the chainsaw in a dry place to prevent rust․ Use genuine Craftsman parts for repairs to ensure reliability․ Refer to the parts manual for guidance on maintenance and troubleshooting․ Proper lubrication and fuel management are essential for longevity․ Happy sawing!

Additional Resources

Explore online forums and communities dedicated to Craftsman chainsaws․ These platforms offer valuable discussions, tips, and solutions for troubleshooting and maintaining your 18 42cc model effectively․

12․1 Online Forums and Communities

Online forums and communities are excellent resources for Craftsman 18 42cc Chainsaw users; Platforms like Reddit and specialized woodworking forums offer discussions, tips, and solutions for parts, troubleshooting, and maintenance․ Users share experiences, DIY guides, and advice, making these communities invaluable for understanding and optimizing your chainsaw’s performance․ Engage with experts and enthusiasts to resolve issues and enhance your chainsaw expertise effectively․

12․2 Recommended Tools and Accessories

Essential tools for the Craftsman 18 42cc Chainsaw include chain sharpeners, files, and lubrication kits․ Safety gear like gloves and goggles is crucial for protection․ Additionally, storage cases and high-quality replacement bars and chains are recommended to maintain performance․ These tools and accessories ensure proper maintenance, safety, and efficiency, helping you maximize the lifespan and functionality of your chainsaw․

Open post

liftmaster kpw250 manual

Welcome to the comprehensive guide for the LiftMaster KPW250 Wireless Keypad. This manual provides detailed instructions for installation, programming, and troubleshooting, ensuring secure and efficient access control solutions.

Overview of the LiftMaster KPW250 Wireless Keypad

The LiftMaster KPW250 Wireless Keypad is a robust, user-friendly access control solution designed for residential and commercial applications; It supports up to 250 unique user codes, ensuring secure entry for multiple users. Built with durability in mind, the keypad operates on a 9V lithium battery and features tamper detection for enhanced security. Compatible with LiftMaster Security 2.0 technology, it offers reliable performance and encryption for safe wireless communication. The keypad is ideal for controlling garage doors, gates, and other access points, providing convenience and peace of mind for property owners.

Key Features of the KPW250 Keypad

The LiftMaster KPW250 Wireless Keypad offers advanced features for secure and convenient access control. It supports up to 250 unique user codes, allowing multiple users to access the system. The keypad features an adjustable backlight for visibility in low-light conditions and tamper detection for added security. It operates on a 9V lithium battery and is designed to withstand harsh outdoor environments. The KPW250 is compatible with LiftMaster Security 2.0 technology, ensuring reliable wireless communication and encryption. Its durable design and user-friendly interface make it an ideal solution for controlling garage doors, gates, and other access points with ease and precision.

Installation and Setup

The LiftMaster KPW250 installation involves mounting the keypad securely and pairing it with compatible operators. Follow step-by-step instructions for seamless setup and operation.

Step-by-Step Installation Guide

Begin by selecting a suitable location for the KPW250 keypad, ensuring clear visibility and accessibility. Mount the keypad using the provided hardware, following the manufacturer’s instructions. Next, insert the 9V lithium battery and ensure proper alignment. Pair the keypad with your LiftMaster operator by entering the master code and configuring the frequency settings. Test the keypad by inputting a user code to verify functionality. Refer to the manual for specific wiring and alignment guidelines to ensure optimal performance and security.

Initial Configuration and Pairing with LiftMaster Operators

Start by entering the master code to access the programming mode. Set the frequency and encryption settings to match your LiftMaster operator, ensuring compatibility. For LiftMaster Security 2.0, press 03, and a long tone will confirm the settings. Pair the keypad with your operator by following the keypad prompts. Test the system by entering a user code to ensure proper communication. Refer to the manual for specific pairing instructions tailored to your operator model. Proper configuration ensures secure and reliable operation of your access control system.

Programming the KPW250 Keypad

Customize user codes, access modes, and security features to streamline operations and enhance safety, ensuring efficient and secure control of your LiftMaster gate or door operator systems.

Setting Up User Codes and Access Modes

To configure user codes, enter the Master Code, press the number of the code position, and input the new 4-digit PIN. Access modes can be set to allow temporary or permanent access, with options for specific time frames. The keypad stores up to 250 unique user codes and ensures secure access by transmitting encrypted signals. Programming involves setting codes, access modes, door times, and more. It operates by users entering valid 4-digit PINs and the # key to activate the operator. This feature enhances security and flexibility for managing access effectively.

Master Code and PIN Configuration

The Master Code is a secure, pre-set code used to program and manage user codes. To configure, enter the Master Code, press the desired code position, and input a new 4-digit PIN. The Master Code must be set before programming the gate operator. User codes are 4-digit PINs that grant access to authorized users. Temporary or permanent access modes can be assigned, with options for specific time frames. The keypad encrypts signals for enhanced security. Up to 250 user codes can be stored, ensuring efficient access control management. This system provides flexibility and security for managing access to gates or doors effectively.

Adjusting Frequency and Encryption Settings

The LiftMaster KPW250 keypad operates on LiftMaster Security 2.0, utilizing a tri-band frequency of 310, 315, and 390 MHz for enhanced security; To adjust settings, enter programming mode by pressing the Master Code, followed by ’03’ for 315 MHz, with a tone confirming the change. Encryption is preset for Security 2.0 and typically doesn’t require user adjustment, but ensure the keypad and operator are synchronized. Compatibility with Security 2.0 operators is crucial. After adjustments, test the keypad to verify proper communication with the operator, ensuring a stable and secure connection for reliable access control. Always follow manual instructions carefully to maintain functionality.

Troubleshooting Common Issues

Addressing common issues with the LiftMaster KPW250 involves checking connectivity, ensuring proper battery function, and verifying code settings. Refer to the manual for detailed solutions and steps to resolve programming errors and signal problems efficiently, ensuring optimal performance and security. Identify and fix issues promptly to maintain uninterrupted access control.

Resolving Connectivity Problems

Connectivity issues with the LiftMaster KPW250 keypad can often be resolved by checking the battery level and ensuring the keypad is properly paired with the operator.

Replace the 9V lithium battery if it is low or dead, as this can disrupt wireless communication.

Ensure the keypad is within range of the operator and free from physical obstructions.

Verify that the frequency and encryption settings match those of the operator.

Reset the keypad by removing the battery, waiting 30 seconds, and reinstalling it.

Re-sync the keypad with the operator following the manual’s instructions.

If issues persist, consult the manual or contact LiftMaster support for further assistance.

Fixing Programming Errors and Code Conflicts

Programming errors and code conflicts with the LiftMaster KPW250 keypad can often be resolved by resetting the keypad and re-establishing the connection with the operator.

Enter program mode by pressing the master code followed by the ‘#’ key.

Reset the keypad by removing the battery and waiting 30 seconds before reinstalling it.

Re-sync the keypad with the operator by following the manual’s pairing instructions.

Ensure all user codes are unique and within the 4-digit format.

Verify that the frequency and encryption settings match those of the operator.

If issues persist, refer to the manual or contact LiftMaster support for further assistance.

Maintenance and Battery Replacement

Regularly clean the keypad with a soft cloth and inspect battery contacts for corrosion. Replace the 9V lithium battery when low to ensure optimal performance.

Replacing the 9V Lithium Battery

To replace the battery in your LiftMaster KPW250 keypad:

  • Open the battery compartment located on the back of the keypad.
  • Remove the old 9V lithium battery and dispose of it properly.
  • Insert the new 9V lithium battery, ensuring the positive terminal faces the correct direction.
  • Close the compartment securely to maintain water resistance.
  • Test the keypad to ensure it functions correctly after replacement.

Replace the battery when the keypad shows low power or fails to transmit signals.

Cleaning and Maintaining the Keypad

Regular cleaning and maintenance ensure optimal performance and longevity of the LiftMaster KPW250 keypad. Use a soft, dry cloth to wipe the keypad surface, removing dirt and debris. Avoid harsh chemicals or abrasive cleaners, as they may damage the keypad’s finish or harm its electronic components. Gently clean between the buttons to prevent dust buildup. Ensure all buttons are functioning properly after cleaning. Inspect the battery compartment for corrosion and clean it with a dry cloth if necessary. Store the keypad in a dry, shaded area to protect it from extreme temperatures and moisture. Regular maintenance keeps your keypad secure and reliable.

Security Features and Best Practices

The LiftMaster KPW250 keypad offers advanced security features, including encryption and tamper detection, ensuring secure access control for your property. Regular updates and best practices enhance protection.

Ensuring Secure Access Control

The LiftMaster KPW250 keypad ensures secure access control through advanced features like encryption and tamper detection. Users can set up to 250 unique codes, enhancing security by limiting unauthorized access. The keypad operates on a secure frequency, reducing interference. Regular updates and programming ensure compliance with the latest security standards. By following best practices, such as changing default codes and monitoring access logs, users can maintain a high level of security; This makes the KPW250 an ideal solution for both residential and commercial access control needs, providing peace of mind with its robust security features.

Tamper Detection and Alarm Settings

Tamper Detection and Alarm Settings

The LiftMaster KPW250 keypad features advanced tamper detection and alarm settings to enhance security. When unauthorized access is attempted, the keypad triggers an alarm, alerting users to potential breaches. Tamper detection alerts notify users of any physical interference, ensuring the system remains secure. These features can be programmed to activate under specific conditions, providing an additional layer of protection. By enabling these settings, users can deter unauthorized access and ensure their property remains secure. Regular testing of these features is recommended to maintain optimal performance and security.

Compatibility and Integration

The LiftMaster KPW250 keypad is designed to work seamlessly with LiftMaster gate and door operators, supporting up to 250 users for efficient and secure access control solutions.

Compatibility with LiftMaster Gate and Door Operators

The LiftMaster KPW250 Wireless Keypad seamlessly integrates with various LiftMaster gate and door operators, ensuring efficient and secure access control solutions. It’s designed to work with operators using LiftMaster’s advanced Security 2.0 technology, which operates on tri-band frequencies (310, 315, and 390 MHz). This compatibility ensures reliable communication and smooth operation. The keypad supports up to 250 user codes, making it ideal for both residential and commercial settings. Its wireless design eliminates the need for complex wiring, offering a hassle-free installation process. Compatible with select LiftMaster operators, the KPW250 enhances security and convenience for access control systems.

Open post

espressione concierge manual

Welcome to the Espressione Concierge manual! This guide provides essential information for safe and effective use of your fully automatic bean-to-cup espresso machine.

Read carefully to ensure optimal performance and longevity of your appliance. Proper handling and adherence to safety guidelines are crucial for a satisfying coffee experience.

1.1 Overview of the Espressione Concierge Elite

The Espressione Concierge Elite is a fully automatic bean-to-cup espresso machine designed for domestic use. It combines sleek design with advanced features like a built-in grinder for fresh grounds. Perfect for coffee enthusiasts, it offers a user-friendly interface to craft espresso, cappuccino, and more. The machine emphasizes safety, with clear guidelines for handling and operation. Regular maintenance and adherence to instructions ensure optimal performance and longevity. This guide will help you understand its functionality, safety protocols, and care tips to enjoy a superior coffee experience every time.

1.2 Importance of Reading the Instruction Manual

Reading the instruction manual is crucial for safe and effective use of the Espressione Concierge Elite. It provides essential safety information to prevent injuries and ensures proper operation. The manual outlines key features, maintenance tips, and troubleshooting solutions to maximize performance. Understanding the guidelines helps avoid misuse, prolonging the machine’s lifespan. Always save the manual for future reference to maintain your machine and enhance your coffee experience. Proper handling and adherence to instructions are vital for optimal functionality and safety. Misuse can lead to hazards, so careful reading is highly recommended before first use. This ensures you get the most out of your appliance while maintaining safety standards.

Key Features of the Espressione Concierge Elite

The Espressione Concierge Elite features fully automatic bean-to-cup functionality, a built-in grinder for fresh grounds, and automatic shut-off for convenience. Its stainless steel design ensures durability and style, allowing you to create rich espresso, cappuccino, and other coffee favorites effortlessly at home.

2.1 Fully Automatic Bean-to-Cup Functionality

The Espressione Concierge Elite boasts a fully automatic bean-to-cup system, simplifying coffee preparation. It grinds beans immediately before brewing, ensuring maximum freshness and flavor. The machine automatically regulates water temperature, pressure, and flow, delivering a perfect shot of espresso or cup of coffee every time; This feature eliminates manual effort, making it easy for users to enjoy professional-quality beverages at home. The integrated system ensures consistency and convenience, allowing you to customize settings for strength, cup size, and more. With its advanced automation, the Concierge Elite streamlines the brewing process, providing a seamless and efficient coffee experience. This functionality is a standout feature, catering to coffee enthusiasts who value both quality and ease of use.

2.2 Built-In Grinder for Fresh Coffee Grounds

The Espressione Concierge Elite features a built-in grinder, ensuring freshly ground beans for every cup. This grinder preserves the coffee’s aroma and flavor by grinding only the needed amount right before brewing; Its stainless steel construction enhances durability and performance. The grinder’s precision ensures consistent grounds, essential for optimal extraction. Users can adjust grind settings to suit their coffee preferences, from fine espresso to coarser grounds for other brews. This feature eliminates the need for a separate grinder, saving space and effort. The built-in grinder is integral to delivering the machine’s high-quality coffee experience, making it a key component of its bean-to-cup functionality. Regular maintenance of the grinder is recommended to maintain its efficiency and longevity.

Safety Precautions and Handling

Always handle the Espressione Concierge Elite with care to avoid injury. Read the manual thoroughly before first use to ensure safe operation and understand potential hazards.

  • Avoid touching hot surfaces; use handles or buttons instead.
  • Keep the machine out of reach of children and pets.
  • Prevent misuse, as it may cause injury or damage.

3.1 Essential Safety Information

Safety is a top priority when operating the Espressione Concierge Elite. Always read the instruction manual carefully before first use to understand essential safety guidelines.

  • Do not touch hot surfaces; use handles or buttons to avoid burns.
  • Keep the machine clean and dry to prevent electrical hazards.
  • Avoid leaving the appliance unattended during operation.
  • Ensure the machine is used only for its intended purpose—domestic coffee preparation.
  • Warn other users about potential dangers and handle the machine with care.

Save the manual for future reference and follow all instructions to ensure safe and efficient operation. Misuse can lead to injury or damage, so proper handling is crucial.

3.2 Proper Handling and Usage Guidelines

To ensure optimal performance and longevity of your Espressione Concierge Elite, proper handling and usage are essential. Always place the machine on a stable, flat surface and plug it into a grounded electrical outlet. Use only original or recommended accessories to avoid damage. Avoid exposing the machine to water or excessive moisture, as this can lead to electrical hazards. Regularly rinse and descale the appliance to maintain hygiene and functionality. For extended periods of inactivity, perform a manual rinse cycle to prevent mineral buildup. Handle the machine with care, avoiding drops or impacts that could damage internal components. Follow the instructions for power button usage and ensure the machine is turned off when not in use. Proper handling ensures a safe and satisfying coffee experience. Always refer to the manual for specific care instructions.

Operating the Espressione Concierge Elite

Effortlessly brew barista-quality espresso with the Concierge Elite’s fully automatic bean-to-cup functionality. Simply load beans, select settings, and enjoy a perfect espresso at the touch of a button.

4.1 Step-by-Step Brewing Process

Ensure the machine is preheated and ready for use. Press the power button to activate it if it’s in standby mode.

Add fresh coffee beans to the bean container, ensuring it’s filled to the recommended level.

Select your desired coffee settings, such as cup size, strength, and type of drink, using the control panel.

Place a coffee cup under the spout. The machine will automatically grind the beans and brew your coffee.

Once brewing is complete, remove your cup and enjoy your perfectly crafted espresso or coffee.

For milk-based drinks, use the steam wand to froth milk to your preference and combine it with the espresso.

Regularly clean the machine after use to maintain hygiene and performance.

Follow these steps for a seamless and delicious brewing experience with your Espressione Concierge Elite.

4.2 Customizing Your Coffee Experience

The Espressione Concierge Elite allows you to tailor your coffee experience to your preferences. Adjust the strength of your brew by selecting from multiple intensity levels.

Choose the ideal cup size to suit your needs, whether it’s a small espresso or a larger coffee. You can also customize brewing temperature for optimal flavor.

For milk-based drinks, use the steam wand to froth milk to your desired consistency. Experiment with different settings to create personalized lattes or cappuccinos.

The machine’s intuitive interface makes it easy to save your preferred settings for future use. Regularly clean the steam wand and brewing components to maintain performance.

With these customization options, you can enjoy a perfectly crafted coffee every time, tailored to your unique taste preferences.

Maintenance and Troubleshooting

Regularly descale and clean the machine to ensure optimal performance. Refer to the manual for troubleshooting common issues like leaks or malfunctioning parts. Proper maintenance extends longevity.

5.1 Regular Maintenance Tips

Regular maintenance is crucial for optimal performance and longevity of your Espressione Concierge Elite. Start by rinsing the machine after prolonged inactivity. Descaling every 1-2 months prevents mineral buildup. Clean the brew group and drip tray frequently to avoid residue. Check and refill the water tank regularly. For best results, use filtered water to reduce impurities. Additionally, wipe the exterior with a damp cloth to maintain hygiene. Always refer to the manual for specific cleaning solutions and procedures. Proper care ensures consistent flavor and prevents mechanical issues. By following these tips, you can enjoy your machine for years while maintaining its efficiency and performance. Regular maintenance is key to preserving your investment and coffee quality.

5.2 Common Issues and Solutions

Common issues with the Espressione Concierge Elite can often be resolved with simple troubleshooting. If the machine leaks, check for proper alignment of the water tank and brew group. For grinder issues, ensure it is clean and free of blockages. If the machine displays an error message, refer to the manual for specific codes and solutions. Descaling regularly can prevent mineral buildup and improve performance. If the machine fails to turn on, check the power supply and ensure it is properly plugged in. For persistent problems, contact customer support. Regular maintenance and adherence to guidelines can help prevent many of these issues. Always follow the manual’s troubleshooting tips for optimal results.

The Espressione Concierge Elite is a powerful and versatile coffee machine designed to deliver exceptional coffee experiences. By following the guidelines in this manual, users can ensure optimal performance, safety, and longevity of their appliance. Regular maintenance and proper handling are key to maintaining its functionality. Troubleshooting common issues can prevent minor problems from escalating. Always refer to the manual for specific instructions and solutions. With proper care and attention, the Espressione Concierge Elite will continue to provide delicious, barista-quality coffee for years to come. Thank you for choosing Espressione, and enjoy your coffee journey with your new machine!

Open post

milton roy dosing pump manual pdf

Milton Roy dosing pumps are renowned for precise chemical dosing in industrial applications. Their robust design ensures high accuracy and reliability. The manual provides essential guidance for installation, operation, and maintenance to optimize performance and longevity.

1.1 Overview of Milton Roy Dosing Pumps

Milton Roy dosing pumps are reciprocating, chemical metering pumps designed for precise fluid control. They utilize a hydraulically actuated diaphragm and variable eccentric crank for consistent flow. Ideal for industrial applications like water treatment, these pumps deliver high accuracy and durability, making them a reliable choice for critical chemical dosing processes.

1.2 Importance of the Milton Roy Dosing Pump Manual

The Milton Roy dosing pump manual is essential for proper installation, operation, and maintenance. It provides detailed instructions, safety guidelines, and troubleshooting tips, ensuring optimal performance and longevity. The manual also covers compliance with industry standards, making it a critical resource for users to achieve accurate chemical dosing and maintain operational safety.

Key Features of Milton Roy Dosing Pumps

Milton Roy dosing pumps offer precise chemical delivery, robust design, and variable control options. They ensure durability, easy maintenance, and high performance in demanding environments.

2.1 Design and Construction

Milton Roy dosing pumps feature a robust reciprocating plunger design with a variable eccentric crank, ensuring precise chemical delivery. The pumps utilize a hydraulically actuated diaphragm for reliable operation.

The construction includes durable materials and a High Performance Diaphragm (HPD) liquid end, designed for corrosion resistance and high-pressure applications up to 600 psi.

2.2 Control Options and Adjustments

Milton Roy dosing pumps offer flexible control options, including manual and electronic adjustments. The variable eccentric crank allows precise flow rate control, ensuring accurate chemical dosing. Electronic models provide advanced features like programmable settings and remote operation, enhancing operational efficiency and adaptability for diverse applications. These adjustments ensure consistent performance across varying industrial requirements.

2.3 Materials and Compatibility

Milton Roy dosing pumps are constructed with high-quality, durable materials such as stainless steel, PVC, and PTFE, ensuring resistance to corrosion and chemical exposure. These pumps are compatible with a wide range of industrial chemicals, making them suitable for diverse applications. The materials used are carefully selected to meet stringent industry standards, ensuring reliability and longevity in demanding environments.

Installation and Setup

Proper unpacking, storage, and location selection are crucial for Milton Roy dosing pumps. Ensure the pump is placed in a suitable environment and prepared correctly for operation.

3.1 Unpacking and Storage Guidelines

Inspect the Milton Roy dosing pump for damage upon arrival. Store it in a clean, dry environment, away from direct sunlight and chemicals. Ensure all components are securely packed and protected. Follow manual instructions for proper storage conditions to maintain functionality and prevent corrosion. Handle with care to avoid mechanical stress or damage during transit and storage.

3.2 Location and Environmental Requirements

Locate the Milton Roy dosing pump in a well-ventilated area, away from direct sunlight and moisture. Ensure the environment is cool, dry, and free from corrosive substances. The pump should be positioned on a stable, level surface to prevent vibration. Adhere to manual guidelines for temperature and humidity ranges to ensure optimal performance and longevity of the equipment.

3.3 Initial Setup and Preparation

Before operating the Milton Roy dosing pump, ensure all components are unpacked and inspected for damage. Lubricate moving parts as specified in the manual. Prime the pump by filling the liquid end with the intended chemical. Set the initial flow rate and calibrate according to the manual’s instructions. Proper preparation ensures accurate dosing and prevents operational issues.

Operating the Milton Roy Dosing Pump

Start the pump by powering it on and setting the flow rate. Monitor operation to ensure accurate dosing. Adjust settings as needed for optimal performance and safety.

4.1 Startup and Initialization

Begin by powering on the Milton Roy dosing pump and ensuring all connections are secure. Review the control panel settings and initialize the pump according to the manual. Prime the pump if necessary to eliminate air bubbles. Set the desired flow rate and pressure. Perform a test run to verify proper operation before full deployment. Always refer to the manual for specific startup procedures.

4.2 Flow Rate Adjustment and Control

Adjust the flow rate on Milton Roy dosing pumps by modifying the stroke length or frequency. Use the control panel or manual knobs to set the desired output. Refer to the manual for calibration steps to ensure accuracy. Monitor the pump’s performance and fine-tune settings as needed to maintain precise chemical dosing. Regular adjustments may be required based on application demands or fluid properties.

4.3 Monitoring and Performance Tracking

Regularly monitor the pump’s performance by checking discharge pressure, flow rates, and fluid levels. Use the control panel to track real-time data and ensure accurate dosing. Inspect for leaks, wear on diaphragms, and lubricate moving parts as specified. Maintain logs of operation and perform routine checks to identify potential issues early, ensuring optimal performance and extending the pump’s lifespan.

Maintenance and Care

Regular maintenance ensures optimal performance and extends pump life. Inspect diaphragms, seals, and valves for wear. Replace worn parts promptly and follow the manual’s lubrication schedule.

5.1 Routine Maintenance Schedule

Regular maintenance is crucial for optimal pump performance. Daily checks include lubrication, connection integrity, and leak inspection. Weekly, inspect valve seats and balls for wear. Monthly, examine diaphragms and seals. Annually, service the liquid end assembly. Use genuine Milton Roy parts for replacements. Refer to the manual for detailed calibration steps and lubrication schedules to ensure longevity and accuracy.

5.2 Cleaning and Lubrication

Regular cleaning prevents chemical buildup and ensures smooth pump operation. Use mild detergents and rinse thoroughly with clean water. Lubricate moving parts monthly, using high-grade oil like Mobilarma 524. Over-lubrication can damage seals, so follow manual guidelines. Clean and inspect valves quarterly for optimal performance and to prevent corrosion or wear.

5.3 Diaphragm Replacement and Inspection

Inspect the diaphragm every 3 months or as usage demands. Replace immediately if signs of wear, cracks, or chemical degradation are evident. Use genuine Milton Roy parts to ensure compatibility and performance. Follow manual instructions for replacement to maintain pump efficiency and prevent leakage or failure during operation.

Troubleshooting Common Issues

Identify and resolve common issues like leakage, error codes, or performance drops. Refer to the manual for troubleshooting steps and solutions to ensure optimal pump operation.

6.1 Identifying Leakages and Sealing

Identify leakages by inspecting seals, connections, and diaphragms. Tighten loose fittings and replace worn-out parts. Use genuine Milton Roy seals for optimal performance. Regular lubrication prevents wear and ensures proper sealing. Refer to the manual for detailed steps on detecting and addressing leaks to maintain pump efficiency and safety.

6.2 Addressing Performance Issues

Address performance issues by checking flow rate accuracy and pump calibration. Inspect the diaphragm and valves for blockages or wear. Ensure proper suction and discharge pressures. Refer to the manual for troubleshooting guides and adjustment procedures to restore optimal pump operation and maintain precise chemical dosing.

6.3 Understanding Error Codes and Alarms

Refer to the manual for a detailed list of error codes and alarms specific to your Milton Roy dosing pump model. Common issues include low suction pressure, excessive back pressure, or diaphragm faults. Understanding these codes enables quick troubleshooting, ensuring minimal downtime and maintaining precise chemical dosing. Always consult the manual or manufacturer support for accurate diagnostics and solutions.

Spare Parts and Accessories

Ensure optimal performance by using genuine Milton Roy spare parts. Order replacements using the model number for compatibility. Refer to the manual for a detailed parts list.

7.1 Identifying Genuine Milton Roy Parts

Genuine Milton Roy parts are crucial for maintaining pump performance and longevity. Always verify the manufacturer’s logo, part number, and packaging. Refer to the manual or contact authorized distributors to ensure authenticity and compatibility. Using non-genuine parts may void warranties and compromise functionality. Prioritize quality to uphold the pump’s reliability and accuracy in dosing applications.

7.2 Ordering and Replacing Parts

Ordering genuine Milton Roy parts ensures optimal performance and warranty validity. Always include the complete model number and refer to the manual for compatibility. Contact authorized distributors or Milton Roy directly. Avoid counterfeit parts to prevent functionality issues. Replace parts promptly to maintain accuracy and reliability in dosing applications.

Safety Precautions and Compliance

Always handle chemicals safely and follow industry standards. Ensure proper installation and operation to prevent hazards. Refer to the manual for specific safety guidelines and compliance requirements.

8.1 Handling Chemicals Safely

Always wear protective gear like gloves and goggles when handling chemicals. Ensure proper ventilation and avoid splashes or spills. Follow safety data sheets and manufacturer guidelines for chemical compatibility. Properly dispose of hazardous materials and keep them away from incompatible substances. Regularly inspect equipment for leaks or damage to maintain a safe operating environment.

8.2 Compliance with Industry Standards

Milton Roy dosing pumps are designed to meet rigorous industry standards, ensuring safe and reliable operation. Compliance with global and regional regulations guarantees adherence to safety and environmental protocols. Always verify pump specifications against relevant standards for your application to ensure proper functionality and regulatory alignment in industrial or hazardous environments.

Calibration and Adjustment

Calibration ensures accurate dosing by adjusting flow rates to match application requirements. Refer to the manual for step-by-step guidance on fine-tuning settings for precise performance and reliability.

9.1 Calibration Steps for Accuracy

Calibration ensures precise dosing by aligning the pump’s output with specified flow rates. Follow the manual’s instructions to adjust the stroke length and frequency. Use a calibration column or external measurement tools to verify accuracy. Regular recalibration maintains performance and prevents deviations over time, ensuring reliable chemical dosing in various applications.

9.2 Adjusting for Different Applications

Milton Roy dosing pumps can be adapted to various applications by adjusting flow rates, pressure settings, and control parameters. The manual provides detailed guidance on modifying pump configurations for specific chemical dosing needs. Adjustments may include changing stroke lengths, altering suction/discharge valve settings, or fine-tuning electronic controls to ensure optimal performance across diverse industrial environments and fluid types.

Different Models and Their Specifications

Milton Roy offers various dosing pump models, including the G Series and Excel Series. Each model features unique specifications, such as flow rates, pressure capacities, and control options, tailored for different industrial applications and fluid handling requirements.

10.1 Milton Roy G Series

The Milton Roy G Series is a line of reciprocating, chemical dosing pumps designed for precise flow control. Capable of delivering up to 130 gallons per hour at pressures up to 600 psi, these pumps feature the robust High Performance Diaphragm (HPD) liquid end. Ideal for industrial applications, the G Series offers durability, accuracy, and versatility in handling various chemicals and fluids efficiently.

10.2 Milton Roy Excel Series

The Milton Roy Excel Series offers advanced metering pump technology with high accuracy and reliability; Designed for demanding applications, these pumps provide precise control and durability. The Excel Series features electronic control options, enabling easy adjustment and monitoring. They are ideal for critical chemical dosing tasks, ensuring consistent performance and compliance with industry standards, as detailed in the manual.

Best Practices for Using Milton Roy Dosing Pumps

Follow manual guidelines, perform regular maintenance, and use genuine parts. Ensure proper installation and calibration for optimal performance and safety in chemical dosing applications.

11.1 Installation Best Practices

  • Ensure proper planning and site preparation before installation.
  • Follow the manual for unpacking, storage, and handling guidelines.
  • Choose a location with stable environmental conditions, avoiding direct sunlight and moisture.
  • Level the pump and secure it firmly to prevent vibrations.
  • Connect the pump correctly, using compatible materials for tubing and fittings.
  • Adhere to electrical and plumbing codes for safe operation.
  • Test the system thoroughly before full operational use.

11.2 Operational Best Practices

  • Regularly calibrate the pump to ensure accurate dosing.
  • Monitor flow rates and adjust as needed for optimal performance.
  • Track pump performance through routine inspections and logs.
  • Replace diaphragms and worn parts promptly to prevent downtime.
  • Maintain proper lubrication of moving parts as per the manual.
  • Adhere to safety guidelines when handling chemicals and equipment.
  • Train operators on proper usage and troubleshooting techniques.
  • Schedule preventive maintenance to avoid unexpected failures.
  • Adjust the pump load gradually to avoid sudden pressure changes.
  • Ensure the environment meets the pump’s operational requirements.

12.1 Summary of Key Points

The Milton Roy Dosing Pump Manual provides comprehensive guidance on installation, operation, maintenance, and troubleshooting. It emphasizes safety, accuracy, and longevity, ensuring optimal performance in various industrial applications. The manual is an essential resource for users to understand and effectively utilize their dosing pumps while adhering to industry standards and best practices.

Additional Resources

The Milton Roy Dosing Pump Manual PDF is available for free download, offering detailed guidance on installation, operation, and troubleshooting. Manufacturer support and contact information are also provided for further assistance.

13.1 Accessing the Milton Roy Dosing Pump Manual PDF

The Milton Roy Dosing Pump Manual PDF is freely available for download as a PDF or text file. It includes detailed sections on installation, operation, maintenance, and troubleshooting. Users can access it directly from official sources or through authorized distributors. Ensure to download from reputable websites to guarantee authenticity and completeness of the document for optimal pump performance and safety.

13.2 Manufacturer Support and Contact Information

Milton Roy provides comprehensive support, including contact information for inquiries, technical assistance, and spare parts. Their headquarters and regional offices offer dedicated customer service. Visit their official website or contact them directly at their France office: TEL: (33) 232-683-000, FAX: (33) 232-683-093. They ensure reliable assistance for optimal pump performance and maintenance, adhering to global industry standards and customer needs.

Open post

pioneer 4200nex manual

This manual provides a comprehensive guide to understanding and utilizing the Pioneer AVH-4200NEX․ It covers installation, features, and troubleshooting, ensuring easy navigation and optimal performance․

1․1 Overview of the Pioneer AVH-4200NEX

The Pioneer AVH-4200NEX is a high-performance DVD RDS AV receiver with a 7-inch touchscreen display․ It features GPS navigation, Bluetooth connectivity, USB support, and advanced audio settings for enhanced sound quality․ Designed for seamless integration with modern smartphones, it offers voice command functionality and hands-free calling․ The manual provides detailed instructions for installation, operation, and troubleshooting to ensure optimal use of its features․

1․2 Importance of the Manual for Users

The manual is essential for users to maximize the AVH-4200NEX’s potential․ It provides step-by-step installation guidance, explains advanced features, and offers troubleshooting solutions․ Without it, users may miss key functions or face setup challenges, making it a vital resource for both beginners and experienced users to ensure smooth operation and optimal performance of the device․

Key Features of the Pioneer AVH-4200NEX

The Pioneer AVH-4200NEX features a 7-inch high-resolution touchscreen display, built-in GPS navigation, Bluetooth connectivity, and USB support․ It also offers voice command functionality and smartphone integration․

2․1 Display and Touchscreen Functionality

The Pioneer AVH-4200NEX boasts a vibrant 7-inch WVGA touchscreen display, offering crisp visuals and intuitive navigation․ The capacitive touchscreen ensures smooth operation, allowing users to easily access apps, maps, and media․ It supports multi-touch gestures for seamless zooming and panning․ The display’s brightness and color settings are customizable, ensuring optimal visibility in various lighting conditions․

2․2 Connectivity Options (USB, AUX, Bluetooth)

The AVH-4200NEX offers versatile connectivity options, including USB, AUX, and Bluetooth․ USB enables seamless connectivity for music and data transfer․ The AUX input supports traditional audio sources․ Bluetooth allows wireless pairing with smartphones for hands-free calls and audio streaming․ This comprehensive connectivity suite ensures compatibility with a wide range of devices, enhancing the user experience․

2․3 Built-in GPS and Navigation Capabilities

The AVH-4200NEX features a built-in GPS system with preloaded maps, offering turn-by-turn directions and voice guidance․ It supports real-time traffic updates and points of interest․ Users can easily input destinations and customize routes․ The system also integrates with compatible apps for enhanced navigation․ Regular map updates ensure accuracy, making it a reliable tool for drivers seeking efficient and stress-free travel experiences․

Installation Guide

This section provides detailed instructions for installing the Pioneer AVH-4200NEX, including pre-installation checks, step-by-step processes, and wiring setup to ensure a smooth and secure installation․

3․1 Pre-Installation Checks

  • Verify compatibility with your vehicle’s make and model․
  • Inspect the unit for any damage before installation․
  • Gather all necessary tools and wiring harnesses․
  • Ensure your vehicle’s electrical system meets power requirements․
  • Consult a professional if unfamiliar with wiring or dash removal․

These checks ensure a smooth and safe installation process․

3․2 Step-by-Step Installation Process

Begin by disconnecting the battery to ensure safety․ Remove the dashboard trim and old stereo carefully․ Connect the wiring harness to the Pioneer AVH-4200NEX, matching wires by color and function․ Mount the new unit securely in the dash․ Reconnect the battery and test all features to confirm proper functionality․ Replace the trim and ensure a snug fit for a professional finish․

3․3 Wiring and Connection Setup

The wiring setup for the Pioneer AVH-4200NEX involves connecting the power, ground, and illumination wires to the vehicle’s electrical system․ Match the wiring harness colors to the corresponding functions․ Connect the speaker wires to the vehicle’s speakers, ensuring proper polarity․ Carefully link the USB and AUX inputs, and integrate the Bluetooth module for seamless connectivity․ Double-check all connections to avoid damage or malfunctions․

Using the Pioneer AVH-4200NEX

Learn how to operate the Pioneer AVH-4200NEX with ease, including basic controls, menu navigation, and customization options for a personalized experience․

4․1 Basic Operations and Controls

Understand the fundamental operations of the Pioneer AVH-4200NEX, including turning the unit on/off, adjusting volume, and using the touchscreen interface․ Familiarize yourself with essential buttons and controls for seamless operation․ The remote control also provides convenient access to key functions, ensuring a user-friendly experience․

4․2 Navigating the Menu System

Navigating the Pioneer AVH-4200NEX menu system is straightforward․ Use the touchscreen to access various settings, including audio, Bluetooth, and GPS options․ The interface is intuitive, with clear icons and categorized menus․ Tap on desired options to view submenus and adjust settings․ The remote control also allows for quick access to frequently used functions, enhancing overall usability․

4․3 Customizing Settings for Optimal Performance

Customize the Pioneer AVH-4200NEX to suit your preferences for enhanced performance․ Personalize audio settings by adjusting the equalizer, crossover, and amplifier settings․ Modify display options, such as brightness, color, and layout, to optimize visibility․ Enable or disable features like voice command and GPS notifications․ Regularly update the system firmware to ensure the latest features and improvements are installed․

Advanced Features and Customization

Explore advanced features like voice command setup, GPS configuration, and audio customization․ Adjust settings to enhance sound quality, enable hands-free calling, and optimize navigation performance effortlessly․

5․1 Adjusting Audio Settings for Better Sound Quality

Enhance your listening experience by fine-tuning the audio settings on your Pioneer AVH-4200NEX․ Adjust EQ curves, balance, and fader levels to optimize sound output․ Enable features like bass boost and loudness for deeper lows and clearer highs․ Customize settings to match your preferences or vehicle acoustics, ensuring a premium audio experience every time you drive․

5․2 Setting Up Voice Command and Hands-Free Calling

Configure voice command and hands-free calling on your Pioneer AVH-4200NEX by pairing your smartphone via Bluetooth․ Enable voice commands through the settings menu for convenient control․ Adjust microphone sensitivity for clear calls and ensure your phone’s voice assistant is compatible․ This setup enhances safety and convenience, allowing you to manage calls and commands without distractions while driving․

5․3 Configuring GPS and Map Updates

To configure GPS on your Pioneer AVH-4200NEX, access the settings menu and enable location services․ For map updates, insert a compatible SD card with updated maps or download updates via Pioneer’s official website․ Ensure your device is connected to Wi-Fi or a computer for seamless updates․ Regularly updating maps ensures accurate navigation and optimal performance while driving․

Troubleshooting Common Issues

This section helps resolve common problems like software errors, connectivity issues, and display malfunctions․ Follow diagnostic steps and solutions to restore optimal functionality quickly and effectively․

6․1 Resolving Software Errors and Freeze Issues

Software errors or freeze issues can occur due to outdated firmware or corrupted files․ Restart the unit, ensure the SD card is securely inserted, and update the firmware to the latest version․ If issues persist, reset the system to factory settings or consult the manual for advanced troubleshooting steps to restore functionality․

6․2 Fixing Connectivity Problems (USB, Bluetooth)

For USB issues, ensure the device is properly connected and compatible․ Restart both the AVH-4200NEX and the connected device․ For Bluetooth, check pairing settings, reset the connection, and ensure the device is within range․ Update firmware if necessary․ Consult the manual for detailed troubleshooting steps to resolve connectivity problems effectively and restore functionality․

6․3 Addressing Display Malfunctions

Check for loose connections and restart the system․ Ensure the display settings are correctly configured․ If issues persist, update the firmware to the latest version․ Use the built-in diagnostic tools to identify and resolve display-related problems․ If malfunctions continue, reset the unit to factory settings or consult a professional for further assistance․

Firmware Updates and Maintenance

Regular firmware updates ensure system stability and optimal performance․ Always download updates from Pioneer’s official website to maintain security and compatibility․ Schedule regular maintenance to keep your AVH-4200NEX running smoothly․

7․1 How to Check for Firmware Updates

To check for firmware updates, connect the AVH-4200NEX to the internet via a USB Wi-Fi adapter or directly using a wired connection․ Navigate to the Settings menu, select System, and choose Firmware Update․ Follow on-screen instructions to download and install the latest version․ Ensure the unit is fully charged or connected to a power source during the update process․ Regular checks ensure optimal performance and security․

7․2 Updating the System Firmware

Once a firmware update is available, download it to a USB drive from Pioneer’s official website․ Insert the USB into the AVH-4200NEX, then go to Settings > System > Firmware Update․ Follow on-screen prompts to install the update․ Ensure the unit remains powered on throughout the process to prevent system corruption․ After installation, restart the device to apply changes․

7․3 Best Practices for Maintaining the System

Regularly update the firmware to ensure optimal performance and security․ Use genuine Pioneer accessories to avoid compatibility issues․ Protect the device from extreme temperatures and humidity․ Clean the touchscreen gently with a soft cloth to maintain responsiveness․ Back up settings before performing major updates or resets․ Avoid unauthorized modifications to preserve warranty and functionality․ Schedule periodic checks for loose connections and wiring․

Frequently Asked Questions (FAQs)

Common questions about the Pioneer AVH-4200NEX include installation issues, firmware updates, and troubleshooting steps․ These FAQs provide quick solutions and clarity for everyday use and maintenance․

8․1 Common Questions About Installation

Users often ask about pre-installation checks, wiring setups, and compatibility issues․ The manual provides step-by-step guides for a smooth installation process․ Common queries include ensuring proper power supply, connecting speakers correctly, and troubleshooting initial setup errors․ Additional questions cover firmware updates and system calibration for optimal performance․ Professional assistance is recommended for complex setups․

For detailed installation instructions, refer to the manual or consult a certified installer to avoid potential damage or functionality issues․ Proper installation ensures safety and enhances user experience․

8․2 Questions About Features and Functionality

Common questions include inquiries about touchscreen responsiveness, Bluetooth connectivity, and GPS navigation accuracy․ Users also seek clarity on audio customization options and app integration capabilities․ The manual addresses these topics, providing detailed instructions for optimizing features like voice command, hands-free calling, and equalizer settings to enhance overall performance and user experience․

8․3 Troubleshooting and Maintenance Queries

Users often inquire about resolving issues like screen freezes, connectivity problems, and GPS inaccuracies․ The manual provides step-by-step solutions for these common issues, as well as tips for maintaining optimal performance․ It also covers firmware updates, system resets, and error codes, ensuring users can address and prevent potential problems effectively․

The Pioneer AVH-4200NEX manual is an essential resource for maximizing your system’s potential․ By following the guide, users can resolve issues, update firmware, and enjoy enhanced functionality, ensuring a seamless and optimal experience with their device․

9․1 Summary of Key Points

The Pioneer AVH-4200NEX manual comprehensively covers installation, features, and troubleshooting․ It emphasizes firmware updates, connectivity options, and customization․ Users are advised to consult the manual for precise directions and expert help when needed, ensuring optimal performance and resolving common issues efficiently․ Regular updates and proper maintenance are crucial for longevity and functionality․

9․2 Final Tips for Getting the Most Out of the AVH-4200NEX

Regularly check for firmware updates to ensure optimal performance and security․ Maintain the system by cleaning the screen and updating maps․ Customize audio settings and display preferences for a personalized experience․ Explore all features, including voice commands and hands-free calling, to maximize functionality․ Refer to the manual for detailed guidance and troubleshooting tips to enhance your overall user experience․

Additional Resources

Visit Pioneer’s official website for the latest firmware updates, user manuals, and troubleshooting guides․ Explore FAQs, installation instructions, and compatible accessories to enhance your AVH-4200NEX experience․

10․1 Where to Download the Manual

The Pioneer AVH-4200NEX manual can be downloaded from Pioneer’s official website or trusted third-party sites like ManualsLib or ManualsOnline․ Visit the Pioneer support page, search for the AVH-4200NEX model, and follow the download instructions․ Ensure to verify the source for authenticity and safety to avoid unauthorized versions․

10․2 Recommended Tools and Accessories

For installing and maintaining the Pioneer AVH-4200NEX, recommended tools include screwdrivers, wiring harness adapters, and a MicroSD card reader․ Accessories like touchscreen protectors, GPS antennas, and backup cameras enhance functionality․ Ensure all items are compatible with the AVH-4200NEX model to avoid installation issues and maintain optimal performance․

Final Note on Security and Warranty

Protect your Pioneer AVH-4200NEX with built-in security features․ Regularly update firmware and register your device for warranty support․ Refer to the manual for detailed instructions and troubleshooting guides․

11;1 Protecting Your Device Against Theft

Protect your Pioneer AVH-4200NEX from theft by detaching the front panel when not in use․ Enable the security code feature to lock the system․ Consider using an anti-theft mounting kit for added protection․ Regularly update firmware to maintain security patches․ Always park in well-lit areas and avoid leaving valuables in plain sight․

11․2 Understanding Warranty and Support Options

The Pioneer AVH-4200NEX comes with a limited warranty covering manufacturing defects․ Register your product for extended support․ Visit Pioneer’s official website for warranty details and customer support contact information․ Firmware updates are available online to ensure optimal performance․ For assistance, contact Pioneer’s support team or visit authorized service centers for repairs and maintenance․

Open post

char broil the big easy turkey fryer manual

The Char-Broil The Big Easy Turkey Fryer is an innovative, oil-less infrared cooker designed for up to 16-pound turkeys, offering efficient, even cooking with minimal cleanup.

1.1 Key Features and Benefits

The Char-Broil The Big Easy Turkey Fryer features oil-less infrared cooking technology, eliminating the need for oil while ensuring even heat distribution. It can accommodate up to a 16-pound turkey, making it ideal for large gatherings. The fryer includes a cooking basket and lifter for easy food handling. Patented infrared technology promotes consistent cooking temperatures, reducing cooking time and effort. Additional benefits include a compact design, easy cleanup, and minimal maintenance. It’s perfect for achieving crispy, flavorful results without the hassle of traditional deep frying.

1.2 Importance of the Manual

The manual is essential for safe and effective use of the Char-Broil The Big Easy Turkey Fryer. It provides detailed assembly instructions, safety guidelines, and cooking tips to ensure optimal results. By following the manual, users can avoid potential hazards and maintain the appliance properly. It also includes troubleshooting advice and specific cooking times, helping users achieve perfectly cooked meals every time. Referencing the manual ensures you unlock the full potential of the fryer while adhering to safety standards.

Assembly and Setup

Assembly of the Char-Broil The Big Easy Turkey Fryer takes approximately 1 hour. Ensure all parts are correctly installed following the manual’s instructions for safe and efficient operation.

2.1 Step-by-Step Assembly Instructions

Begin by unpacking all components. Attach the burner to the main unit, ensuring a secure connection. Next, connect the regulator to the propane tank and link it to the burner. Install the cooking basket by aligning it with the base and tightening the screws. If using the rotisserie kit, attach it according to the manual’s instructions. Double-check all connections for tightness. Finally, place the lid on top and ensure it fits properly. Refer to the manual for detailed diagrams to confirm each step is completed correctly.

2.2 Capacity and Cooking Technology

The Char-Broil The Big Easy Turkey Fryer can accommodate up to a 16-pound turkey, 8-pound roast, or 6-pound pork shoulder. It features patented infrared cooking technology, which ensures even heat distribution and eliminates the need for oil. This technology allows for crispy results on the outside while maintaining juicy meat inside. The fryer’s design minimizes cleanup and promotes efficient cooking without the mess of traditional deep-frying methods. Its compact size and advanced heating system make it ideal for both small and large gatherings, offering versatility for various cooking needs.

2.3 Preheating the Fryer

Preheating the Char-Broil The Big Easy Turkey Fryer is essential for optimal performance. Allow the fryer to preheat for approximately 15 minutes before cooking. This ensures the infrared heating elements reach the desired temperature, providing even heat distribution. Preheating helps prevent food from sticking and promotes consistent cooking results. Once preheated, the fryer is ready to cook your turkey or other meats efficiently. Always follow the recommended preheating time to achieve the best outcomes with your Big Easy fryer.

Safety Precautions

Always use the fryer with LP gas and the supplied regulator. Follow all warnings and instructions in the manual to ensure safe operation and avoid accidents.

3.1 Installation Safety Tips

Install the fryer on a level, heat-resistant surface away from flammable materials. Use only LP gas with the provided regulator/valve assembly. Ensure proper ventilation and keep the area clear of obstructions. Never modify the appliance or use unauthorized parts. Secure the fryer to prevent tipping and always follow the manual’s guidelines for gas connections. If unsure about any step, consult a qualified professional to ensure safe installation and operation.

3.2 General Safety Guidelines

Always use the fryer on a stable, heat-resistant surface and keep children and pets away. Never leave the appliance unattended while in use. Avoid using water to extinguish grease fires; instead, turn off the burner and cover the fryer. Use oven mitts or tongs to handle hot components. Ensure proper ventilation to avoid gas buildup. Regularly inspect hoses and connections for damage or leaks. Follow all safety warnings in the manual to prevent accidents and ensure safe operation of the Char-Broil The Big Easy Turkey Fryer.

Cooking Instructions

Preheat the fryer, season the turkey, and place it breast-side up in the basket. Cook until the internal temperature reaches 165°F, using a meat thermometer for accuracy.

4.1 Cooking Time Guidelines

Cooking times vary based on the size and type of meat. For a turkey, estimate about 10 minutes per pound, resulting in a total cooking time of 2-3 hours for a 16-pound bird. Always use a meat thermometer to ensure the internal temperature reaches 165°F. Preheating the fryer before placing the turkey inside ensures even cooking. The infrared technology promotes consistent heat distribution, reducing hotspots. Monitor the turkey closely during the last 30 minutes to avoid overcooking. Adjust times slightly for smaller or larger birds, and let the turkey rest before carving.

4.2 Using a Meat Thermometer

Using a meat thermometer ensures your turkey is cooked to a safe internal temperature of 165°F. Insert the probe into the thickest part of the breast or thigh, avoiding bones or fat. The Char-Broil Big Easy includes a thermometer, but you can upgrade to a digital one for precise monitoring. Check the temperature during the last 30 minutes of cooking to avoid overcooking. This ensures juicy, evenly cooked meat every time. Always let the turkey rest before carving to retain juices. Clean the thermometer with a damp cloth after use.

4.3 Seasoning and Placement Tips

Season the turkey with your favorite herbs or garlic before cooking for enhanced flavor. Place the turkey in the cooking basket breast-side up for even cooking. Ensure the turkey is secure and balanced to prevent shifting during cooking. Tuck the wings under the body to promote uniform heat distribution. Allow space around the turkey for air to circulate, ensuring crispy skin and juicy meat. Always pat the turkey dry before seasoning to help the seasonings adhere better. Proper placement and seasoning ensure a delicious, evenly cooked result. Follow these tips for the best outcomes. Clean the basket after use for easy reuse.

Maintenance and Cleaning

Regularly clean the fryer with a damp cloth and mild detergent. Use a custom-fit cover to protect and minimize cleaning between uses. Avoid abrasive cleaners.

5.1 Cleaning Between Uses

After each use, allow the fryer to cool completely before cleaning. Use a damp cloth to wipe down surfaces, avoiding abrasive cleaners. For tougher residue, preheat the fryer briefly to loosen food particles. Regular cleaning prevents grease buildup and maintains performance. Always store the fryer with a custom-fit cover to protect it from dust and moisture. Proper maintenance ensures longevity and safe operation of your Char-Broil The Big Easy Turkey Fryer.

5.2 Storage and Cover Options

For optimal protection and maintenance, store your Char-Broil The Big Easy Turkey Fryer in a dry, secure location. Use a custom-fit cover to shield it from dust, moisture, and outdoor elements. This cover, available from Char-Broil, is designed to fit perfectly and extend the product’s lifespan. Regularly inspect the fryer before storage to ensure it is clean and dry. Proper storage ensures the fryer remains in excellent condition for future use, while the cover provides an extra layer of protection against environmental factors.

Troubleshooting Common Issues

Address common issues like ignition problems, uneven heating, or oil residue. Refer to the manual for solutions, such as cleaning burners or proper oil disposal.

6.1 Ignition and burner Control

6.1 Ignition and Burner Control

If the burner doesn’t light, ensure the igniter knob is functioning. Press and turn the burner control to the flame symbol, then quickly turn the igniter. If issues persist, clean the igniter or replace it. Always refer to the manual for detailed troubleshooting steps to ensure safe and efficient operation of your Char-Broil The Big Easy Turkey Fryer.

6.2 Oil Cooling and Cleanup

Allow the fryer to cool completely before cleaning. After preheating, cook time is about 3 minutes per pound, but oil cooling requires several hours. Never pour hot oil down the drain. Use a drip pan or heat-resistant container to collect cooled oil for recycling or disposal. Clean the burner and cooking basket with mild soap and water. Regular maintenance ensures optimal performance and longevity of your Char-Broil The Big Easy Turkey Fryer.

Additional Resources

For more detailed guidance, visit the official Char-Broil website to access the full manual. Contact Char-Broil customer support for troubleshooting or additional assistance.

7.1 Accessing the Full Manual

The full manual for the Char-Broil The Big Easy Turkey Fryer is available on the official Char-Broil website. Visit https://www.charbroil.com/support/manuals to download the PDF version. This comprehensive guide includes detailed instructions for assembly, operation, and troubleshooting. It also provides cooking charts, safety precautions, and maintenance tips. The manual is free to access and is essential for ensuring safe and effective use of the fryer. For convenience, the document is searchable and printable, making it easy to reference specific sections as needed. The manual is available in English and other languages, depending on the region.

7.2 Char-Broil Customer Support

Char-Broil offers dedicated customer support to assist with any questions or issues regarding The Big Easy Turkey Fryer. Contact their team via phone at 1-800-241-7548 or through email at customerservice@charbroil.com. Support is available Monday-Friday, 8 AM to 6 PM EST. For troubleshooting, product information, or manual clarification, visit their official website at https://www.charbroil.com/support. The website also provides FAQs, repair services, and warranty details to ensure a seamless experience with your fryer.

Open post

th6220d1028 installation manual

The Honeywell TH6220D1028 is a FocusPRO 6000 Series programmable thermostat designed for efficiency and simplicity. It offers easy installation, adaptive temperature control, and energy-saving features, making it ideal for modern home heating and cooling systems.

Overview of the Honeywell FocusPRO 6000 Series

The Honeywell FocusPRO 6000 Series is a line of programmable thermostats known for their ease of use and energy efficiency. Designed for home comfort, these thermostats feature a user-friendly interface, adaptive temperature control, and programmable scheduling. The series, including the TH6220D1028 model, is popular for its reliability and compatibility with various HVAC systems. With built-in instructions and a pull-out manual, installation and setup are streamlined. The FocusPRO 6000 Series also incorporates advanced features like Adaptive Intelligent Recovery, ensuring programmed temperatures are reached on time. This series is ideal for homeowners seeking a balance between simplicity and modern thermostat functionality;

Key Features of the TH6220D1028 Model

The Honeywell TH6220D1028 boasts a 5-1-1 programmable schedule, allowing users to customize temperature settings for weekdays and weekends. It features a backlit display for easy readability and a built-in pull-out manual for quick reference. This thermostat supports both heating and cooling systems and is compatible with most HVAC setups. Its Adaptive Intelligent Recovery technology ensures the programmed temperature is reached on time, enhancing energy efficiency. The model also includes manual changeover options and a simple interface for seamless operation. Designed for reliability and user convenience, the TH6220D1028 is an ideal choice for homeowners seeking precise temperature control and modern functionality.

Benefits of Using a Programmable Thermostat

A programmable thermostat like the Honeywell TH6220D1028 offers significant energy efficiency and cost savings. By setting schedules, you can adjust temperatures when you’re not home or sleeping, reducing unnecessary energy use. Its adaptive intelligent recovery ensures your home reaches the desired temperature by your programmed time. This feature minimizes overheating or overcooling, saving energy. The programmable schedule also enhances convenience, allowing you to customize settings for weekdays and weekends. Additionally, it supports both heating and cooling systems, making it versatile for various HVAC setups. Using a programmable thermostat like the TH6220D1028 is not only eco-friendly but also budget-friendly, ensuring optimal comfort and efficiency year-round.

Pre-Installation Requirements

Before installation, ensure system compatibility, verify voltage requirements, and turn off power to the HVAC system. Gather all necessary tools and materials for a smooth setup process.

System Compatibility and Voltage Requirements

The Honeywell TH6220D1028 is compatible with most HVAC systems, including gas, oil, and electric heating, as well as air conditioning. It operates on 24-volt systems and requires a common wire (C-wire) for proper functionality. Ensure your system meets these requirements before installation. Incompatible systems may require additional wiring or adapters. Always verify voltage specifications to avoid damage or safety hazards. Refer to the installation manual for detailed compatibility charts and wiring diagrams. Proper system matching ensures optimal performance and energy efficiency.

Tools and Materials Needed for Installation

To install the Honeywell TH6220D1028, you’ll need basic tools and materials. Essential tools include a screwdriver (Phillips and flathead), wire strippers, and a drill for wall anchors. Materials required are screws, drywall anchors, and possibly a C-wire adapter if your system lacks a common wire. Ensure all components are compatible with your HVAC system. Refer to the installation manual for specific wiring diagrams and hardware recommendations. Having these items ready will streamline the process and ensure a secure, efficient setup.

Safety Precautions Before Starting

Before installing the Honeywell TH6220D1028, ensure all safety precautions are followed. Turn off the power supply to the HVAC system at the circuit breaker or fuse box. Verify the power is off using a voltage tester. Close the furnace door securely to prevent accidental start-ups. Avoid damaging existing wires during removal of the old thermostat. Wear protective gear like gloves and safety glasses when handling tools. Follow the manufacturer’s instructions carefully to prevent hazardous conditions. Never attempt installation without disconnecting the power first. Proper adherence to these precautions ensures a safe and successful installation process.

Installation Process

The Honeywell TH6220D1028 installation involves removing the old thermostat, mounting the wallplate, connecting wires, and securing the thermostat. Follow the manual for step-by-step guidance and safety.

Step-by-Step Guide to Thermostat Installation

Start by turning off the power to your HVAC system at the circuit breaker or fuse box to ensure safe installation.
Remove the existing thermostat by gently pulling it away from the wall.
Carefully disconnect the wires from the old thermostat and note their colors for proper reconnection.
Mount the new wallplate using the provided screws, ensuring it is level and secure.
Connect the wires to the corresponding terminals on the new thermostat, matching the color codes from your notes.
Attach the thermostat to the wallplate, ensuring it clicks securely into place.
Restore power to your HVAC system and test the thermostat to ensure proper functionality.
Finally, program your preferred temperature settings and schedule using the thermostat’s built-in interface.

Wiring Diagrams and Connections

Refer to the wiring diagram in the installation manual to ensure correct connections. Identify the terminals (R, W, Y, G, C, etc.) and match the wire colors to their respective functions. Connect the R (24V) wire to the R terminal and the W wire to the W terminal for heating. The Y wire connects to the Y terminal for cooling, and the G wire to the fan terminal. If present, connect the C (common) wire to the C terminal to power the thermostat. Ensure all connections are secure and double-check the wiring configuration to avoid system malfunctions. Turn the power back on and test the system to confirm proper operation.

Mounting the Wallplate and Thermostat

Begin by removing the wallplate from the thermostat and attaching it to the wall using the provided screws or anchors. Ensure the wallplate is level and securely fastened. Once the wallplate is mounted, carefully slide the thermostat onto the wallplate, making sure it aligns properly and clicks into place. Do not force the thermostat onto the wallplate, as this could damage the unit. After mounting, check that the thermostat is level and evenly seated. Finally, test the system to ensure it operates correctly. Proper mounting ensures reliable performance and prevents potential issues with temperature sensing or display functionality.

Configuration and Setup

The Honeywell TH6220D1028 features built-in instructions for easy setup. Simply pull out the manual guide to configure heating, cooling, and scheduling options efficiently.

Setting Up the Heating and Cooling System

To set up your Honeywell TH6220D1028, ensure the system switch matches your HVAC type. Choose between heating, cooling, or auto modes. Refer to the manual for detailed steps on configuring cycle rates and airflow settings. Ensure the system is powered off before adjusting wiring connections. Follow the built-in guide for accurate setup to optimize performance and energy efficiency.

Programming Schedule and Temperature Settings

The Honeywell TH6220D1028 allows you to program a 5-1-1 schedule, enabling different settings for weekdays and weekends. Use the touchscreen interface to set preferred temperatures for morning, afternoon, evening, and night. The thermostat features adaptive intelligent recovery, which learns your system’s behavior to reach the set temperature by the scheduled time. Refer to the built-in guide for step-by-step instructions on programming. Ensure to save your settings to maintain consistent comfort and energy efficiency. This feature helps optimize energy usage while keeping your home comfortable according to your daily routine.

Understanding Adaptive Intelligent Recovery

The Honeywell TH6220D1028 features Adaptive Intelligent Recovery, a technology that ensures your programmed temperature is reached by the scheduled time. This system learns your HVAC equipment’s behavior and adjusts heating or cooling cycles to optimize performance. It begins temperature adjustments early if needed, ensuring comfort without energy waste. This feature works seamlessly with your programmed schedule, adapting to your home’s specific needs. By understanding how long it takes to reach the desired temperature, the thermostat minimizes unnecessary runtime, promoting energy efficiency while maintaining consistent comfort levels throughout the day.

Troubleshooting and Maintenance

Regularly check and clean the thermostat’s display and sensors to ensure accurate temperature readings. Replace batteries as needed and verify system compatibility to prevent malfunctions.

Common Issues and Solutions

Common issues with the Honeywell TH6220D1028 include incorrect wiring, which can prevent proper functionality. Ensure all wires are securely connected to the correct terminals. Another issue is outdated firmware; check for updates to maintain optimal performance. If the display is unresponsive, try resetting the thermostat by removing the batteries for a few seconds. For temperature inaccuracies, calibrate the sensor through the settings menu. Lastly, ensure the system is compatible with your HVAC setup to avoid operational problems. Always refer to the installation manual for detailed troubleshooting steps and solutions.

Battery Installation and Replacement

For the Honeywell TH6220D1028, install two fresh AA alkaline batteries during setup or when the low-battery indicator appears. Open the battery compartment on the back, ensuring the thermostat is powered off. Insert batteries with the correct polarity, then close the compartment securely. If the display remains dim or unresponsive, check the batteries’ orientation and connections. Replace batteries every 12-24 months or as needed. Avoid using rechargeable batteries to maintain reliability. Proper battery installation ensures accurate temperature control and prevents system malfunctions, keeping your home comfortable and energy-efficient year-round.

Regular Maintenance Tips

Regular maintenance ensures optimal performance of the Honeywell TH6220D1028 thermostat. Clean the device with a soft cloth to remove dust and debris. Check and replace batteries annually or when the low-battery indicator appears. Verify that the thermostat is level on the wall to ensure accurate temperature readings. Periodically inspect wiring connections for looseness or damage. If the display dims or malfunctions, restart the thermostat by removing and reinserting the batteries. For advanced features like Adaptive Intelligent Recovery, ensure the system is properly calibrated. Regular maintenance prolongs the thermostat’s lifespan and maintains reliable heating and cooling system operation.

The Honeywell TH6220D1028 thermostat offers a reliable, energy-efficient solution for home comfort. Follow the installation guide and maintenance tips to ensure optimal performance and longevity.

Final Checks and Verification

After installation, turn the power back on and check basic functions to ensure proper operation. Verify the thermostat display lights up and responds to button presses. Test heating and cooling modes to confirm system operation. Ensure the wallplate is securely mounted and the thermostat is level. Review the installation manual for any additional settings or calibrations required. Double-check wiring connections for accuracy and safety. Ensure all safety precautions, like proper voltage and system compatibility, are met. Finally, confirm that adaptive recovery and scheduling features are functioning as intended for optimal performance and energy efficiency.

Warranty Information and Support

Honeywell offers a limited warranty for the TH6220D1028 thermostat, covering defects in materials and workmanship for a specified period. For detailed warranty terms, refer to the product manual. Customers can access support through Honeywell’s official website, which includes downloadable resources, FAQs, and contact information. Additionally, Honeywell provides installation guides and troubleshooting tips online. For further assistance, users can contact Honeywell’s customer service or visit authorized service centers. Ensure to register the product to validate the warranty and gain access to exclusive support benefits.

Open post

sato s84ex manual

Product Overview

The SATO S84ex is a high-performance print engine designed for 24/7 mission-critical labeling operations, offering durability and versatility for industrial applications․ It supports high-speed printing and integrates seamlessly with various systems․

1․1 Key Features of the SATO S84ex Print Engine

The SATO S84ex print engine is designed for high-volume, 24/7 mission-critical operations, featuring a robust and user-friendly design․ It supports high-speed printing with precise label control and is compatible with various label formats․ The engine is equipped with advanced automation capabilities, ensuring efficient label application in industrial settings․ Its durable construction allows for non-stop operation, making it ideal for demanding environments․ Additionally, it supports multiple graphic and barcode formats, ensuring versatility for diverse labeling needs․

1․2 Design and Build Quality

The SATO S84ex print engine features a robust and durable design, built to withstand continuous operation in demanding industrial environments․ Its sturdy construction ensures long-lasting performance and reliability․ The engine is designed with a user-friendly interface, making it easy to operate and maintain․ High-quality materials and precise engineering ensure minimal downtime and consistent print quality․ The compact design allows for seamless integration into various labeling systems, while its ergonomic layout provides easy access to essential components for maintenance and adjustments․

Installation and Setup

The SATO S84ex print engine is designed for straightforward installation, with clear guidelines provided in the manual․ It supports physical and network setup options, ensuring compatibility with various systems․

2․1 System Requirements for SATO S84ex

The SATO S84ex print engine requires compatible operating systems, including Windows and Linux, with sufficient processor speed and memory for smooth operation․ It supports USB, Ethernet, and serial connections for seamless integration․ The printer is compatible with label design software like SATO LabelGallery, ensuring efficient label creation․ Adequate power supply and proper network configuration are essential for optimal performance․ Refer to the manual for detailed specifications and compatibility guidelines to ensure successful installation․

2․2 Physical Installation and Connectivity Options

The SATO S84ex print engine requires careful physical installation to ensure proper functionality․ Connect the printer using USB, Ethernet, or serial ports for reliable communication․ Mounting options include tabletop or industrial stands, depending on operational needs․ Power supply must meet specifications to avoid damage․ Follow the manual’s installation guide for step-by-step instructions․ Proper connectivity ensures seamless integration with label design software and network systems, maximizing efficiency in high-volume printing environments․

Understanding the Control Panel

The SATO S84ex control panel features an intuitive interface with essential buttons for navigation, settings, and operation․ It ensures easy access to key functions for efficient printing management․

3․1 Navigating the SATO S84ex Interface

The SATO S84ex interface is designed for intuitive operation, featuring a clear and user-friendly layout․ Key buttons provide quick access to primary functions, while menus allow for deeper customization․ Navigating through settings is straightforward, with clear labels guiding users․ The interface supports multiple languages, enhancing accessibility․ Essential operations, such as test prints or label loading, are easily accessible․ This design ensures operators can efficiently manage printing tasks without extensive training, making it ideal for industrial environments․

3․2 Essential Buttons and Their Functions

The SATO S84ex features a set of essential buttons for streamlined operation․ The Feed button advances labels, while the Pause button halts printing temporarily․ The Power button switches the printer on/off, and the Test Print button runs diagnostics․ Additional buttons include Menu for navigation and Enter to confirm settings․ These buttons are strategically placed for easy access, ensuring efficient control over printing operations․ Their intuitive design minimizes the learning curve, allowing operators to manage tasks effectively․

Configuration and Settings

The SATO S84ex offers customizable print settings, network configurations, and compatibility with various label design software, ensuring optimal performance tailored to specific operational needs․

4․1 Configuring Print Settings for Optimal Output

To achieve optimal printing results with the SATO S84ex, configure settings via the control panel or software․ Adjust DPI, print speed, and darkness to suit label materials․ Calibrate labels to ensure proper alignment and accuracy․ Conduct test prints to verify settings before full operation․ Use compatible label design software for advanced customization, including fonts and barcodes․ Refer to the manual for detailed instructions on optimizing print quality and troubleshooting common issues․ Proper configuration ensures reliable performance in high-volume printing environments․

4․2 Network and Connectivity Configuration

The SATO S84ex supports various connectivity options, including USB, Ethernet, and wireless․ Configure network settings through the control panel or SATO’s software tools․ Set IP addresses, subnet masks, and gateways for TCP/IP communication․ Enable DHCP for automatic IP assignment or use static IP for fixed networks․ Test connectivity by pinging the printer or printing a network status report․ Ensure proper network configuration to maintain seamless communication and prevent print job delays․ Refer to the manual for detailed network setup instructions․

Maintenance and Troubleshooting

Regular cleaning of the printhead and rollers ensures optimal print quality․ Resetting the printer resolves connectivity issues․ Refer to the manual for troubleshooting guides․

5․1 Routine Maintenance Tasks

Regular maintenance is crucial for the SATO S84ex to ensure optimal performance․ Cleaning the printhead and rollers should be done weekly to prevent debris buildup․ Check and replace worn-out parts like labels and ribbons․ Lubricate moving components to maintain smooth operation․ Refer to the manual for detailed steps and schedules․ Proper care extends the printer’s lifespan and prevents unexpected downtime, ensuring consistent and high-quality output for all labeling tasks․

5․2 Common Issues and Solutions

Common issues with the SATO S84ex include labels not feeding properly, misalignment, or connectivity problems․ For feeding issues, clean the sensors and ensure labels are loaded correctly․ Misalignment can be resolved by recalibrating the printer․ Connectivity problems may require restarting the printer or checking network settings․ Refer to the manual for troubleshooting steps․ Regular maintenance, such as cleaning the printhead, can prevent many issues․ If problems persist, consult the manual or contact support for assistance․

Software and Driver Compatibility

The SATO S84ex supports various label design software and multiple barcode formats․ Drivers are available for different operating systems, with installation guidance provided in the manual․

6․1 Compatible Label Design Software

The SATO S84ex is compatible with various label design software, including SATO Printer Connect, NiceLabel, and Bartender․ These programs support multiple graphic and barcode formats, ensuring flexibility for diverse labeling needs․ The printer also integrates seamlessly with SATO’s proprietary software, offering advanced features for custom label creation․ Additionally, the manual provides detailed guidance on software installation and configuration, enabling users to optimize their label design workflows efficiently․

6․2 Driver Installation and Updates

The SATO S84ex requires compatible drivers for optimal performance․ Drivers can be downloaded from the official SATO website and are compatible with various operating systems, including Windows and Linux․ Regular driver updates are essential to ensure compatibility and enhance functionality․ The manual provides step-by-step guidance for installing and updating drivers, ensuring a smooth process․ Additionally, the printer supports automatic notifications for firmware updates, keeping your system up-to-date and secure․

Label Calibration and Alignment

Proper calibration ensures accurate label positioning and detection․ Adjust sensors and alignment settings as outlined in the manual to optimize print quality and prevent errors․

7․1 Calibrating Labels for Accurate Printing

Calibrating labels ensures precise printing alignment and detection․ Load the labels, access the control panel, and run the calibration process following the manual’s instructions․ This step adjusts the printer’s sensors to match the label dimensions, ensuring accurate output․ After calibration, perform a test print to verify alignment and quality․ Proper calibration prevents misprints and ensures efficient operation․ Refer to the manual for detailed calibration procedures specific to the SATO S84ex model․

7․2 Adjusting Label Sensors for Proper Detection

Adjusting the label sensors ensures accurate detection of label positions and gaps․ Open the printer’s cover and locate the sensors․ Use the adjustment screws to align the sensors with the label edge, ensuring proper detection․ Perform a test print to verify sensor accuracy․ If labels are not detected correctly, refer to the manual for troubleshooting steps․ Proper sensor alignment is crucial for seamless printing and preventing errors․ Regularly check and adjust sensors to maintain optimal performance․

Safety Precautions

Always handle the printer with care, avoiding direct contact with hot components․ Keep loose clothing tied back and ensure proper ventilation․ Disconnect power before maintenance․ Use only approved supplies to prevent damage and ensure safe operation․

8․1 Handling the Printer Safely

Handle the SATO S84ex with care to avoid damage or injury․ Avoid touching hot components like the print head or cutter․ Ensure proper ventilation and keep loose clothing tied back․ Disconnect power before performing maintenance․ Use only approved supplies to prevent damage and ensure safe operation․ Follow all safety guidelines in the manual to maintain a safe working environment․

8․2 Precautions for Preventing Damage

To prevent damage to the SATO S84ex, avoid exposing it to extreme temperatures, humidity, or dust․ Use only approved labels and ribbons to ensure compatibility․ Regularly clean the print head and internal components to prevent buildup․ Avoid overloading the printer with excessive label rolls․ Store the printer upright in a dry, stable environment when not in use․ Follow the manual’s guidelines for proper handling and maintenance to extend the printer’s lifespan and performance․

The SATO S84ex print engine is a robust and reliable solution for high-volume labeling needs․ With its durable design and user-friendly interface, it ensures accurate and efficient printing․ By following the manual’s guidelines for installation, configuration, and maintenance, users can maximize its performance and longevity․ Regular upkeep and proper handling are key to preventing damage and ensuring optimal functionality․ This printer is an excellent choice for industries requiring consistent, high-quality labeling solutions․

Posts navigation

1 2 3 4 5 6
Scroll to top