2021 Honda CR-V Manual: A Comprehensive Guide
Discover essential operating procedures, safety features, and detailed specifications for your 2021 Honda CR-V, conveniently available as a downloadable PDF resource.
Welcome to the comprehensive guide for your 2021 Honda CR-V! This manual provides crucial information regarding safe operation, maintenance, and features. Access detailed insights into Honda Sensing technologies and vehicle functionalities. Download the PDF version for convenient offline access. Explore interactive owner’s manuals and resources available online, ensuring a rewarding ownership experience. Understand your vehicle thoroughly for optimal performance and safety on every journey.

Understanding the Owner’s Manual
This manual is your key resource for maximizing the enjoyment and safety of your 2021 Honda CR-V. It details safe driving practices, operating instructions, and maintenance schedules. Familiarize yourself with the safety section and warning indicators. Download the PDF for easy reference. The manual covers everything from climate control to the infotainment system, ensuring you understand all vehicle features and functions.
Safety Precautions and Features
Your safety is paramount; this section details crucial precautions for operating your 2021 Honda CR-V. It covers safe driving techniques and explains the function of Honda Sensing technologies. Review warning labels and the safety section within the owner’s manual. Understanding these features—like vehicle stability assist—is vital for preventing accidents and ensuring a secure driving experience for you and passengers.
Important Safety Information
Always prioritize safety when operating your 2021 Honda CR-V. This manual provides vital instructions for correct and safe vehicle use. Familiarize yourself with all warnings and cautions detailed throughout. Pay close attention to the safety section, covering essential driving practices. This information alerts you to potential hazards and helps ensure the wellbeing of yourself, passengers, and others on the road.

Honda Sensing Technologies

Explore the advanced Honda Sensing technologies integrated into your 2021 CR-V. This suite of safety and driver-assistive systems enhances awareness and responsiveness. The owner’s manual details features like Collision Mitigation Braking System, Road Departure Mitigation, Adaptive Cruise Control, and Lane Keeping Assist. Understand their functions and limitations for optimal, safe operation and a confident driving experience.
Vehicle Overview
Familiarize yourself with your 2021 Honda CR-V’s key components. This section of the manual provides a comprehensive look at both exterior and interior features. Discover details about lighting, mirrors, doors, and the vehicle’s overall design. Inside, learn about seating configurations, dashboard layout, and available technology. Understanding these elements maximizes your enjoyment and operational efficiency.
Exterior Features
Explore the 2021 Honda CR-V’s exterior elements, including headlights, taillights, and side mirrors. Understand operation of the windshield wipers and washers for optimal visibility. Learn about door locks, the tailgate, and exterior lighting controls. This manual details features like alloy wheel specifications and exterior dimensions, aiding in parking and maneuvering your vehicle safely and efficiently.
Interior Features
Familiarize yourself with the 2021 Honda CR-V’s cabin, covering seat adjustments, steering wheel controls, and interior lighting. This section details the dashboard layout, instrument panel indicators, and the driver information interface. Learn about the climate control system, audio system, and available infotainment features for a comfortable driving experience. Understand the location of storage compartments and interior trim details.
Starting and Operating the Vehicle
This section provides detailed instructions on the ignition system and key operation for your 2021 Honda CR-V. Learn about starting procedures, understanding driving modes, and utilizing the transmission effectively. Discover how to safely operate the vehicle, including information on the power button and vehicle stability assist; Proper operation ensures a smooth and secure driving experience.
Ignition System and Key Operation
The 2021 CR-V features a smart entry system; ensure the key fob is present for operation. Press the power button while pressing the brake pedal to start. Familiarize yourself with key functions like locking, unlocking, and the panic button. Understand the immobilizer system for security. Proper key operation is crucial for vehicle startup and preventing unauthorized access.
Driving Modes and Transmission
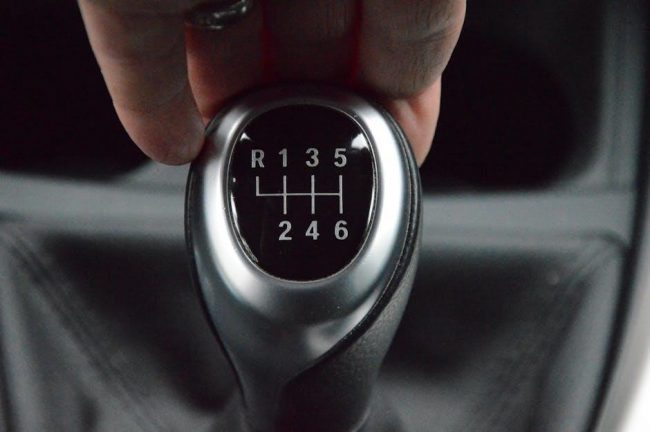
The 2021 CR-V offers various driving modes – Normal, Eco, Sport, and Snow – to optimize performance and efficiency. Understand how each mode affects throttle response and transmission behavior. The Continuously Variable Transmission (CVT) provides smooth, seamless acceleration. Learn about manual shift mode for greater control. Proper mode selection enhances driving experience.

Maintenance and Care
Regular maintenance ensures your 2021 CR-V’s longevity and reliability. This section details scheduled service intervals, including oil changes, filter replacements, and fluid checks. Follow the recommended maintenance schedule to maintain optimal performance. Proper care extends vehicle life and prevents costly repairs. Refer to the manual for specific fluid types and maintenance procedures.
Scheduled Maintenance Services
Adhering to the scheduled maintenance plan is crucial for your 2021 CR-V. Services include oil and filter changes, tire rotations, brake inspections, and fluid level checks. The manual outlines specific intervals based on mileage or time. Following these recommendations helps maintain vehicle performance, safety, and warranty coverage. Consult your Honda dealer for detailed service options.
Fluid Checks and Replacements
Regularly inspect and maintain essential fluids in your 2021 CR-V. This includes engine oil, coolant, brake fluid, power steering fluid, and windshield washer fluid. The owner’s manual details proper checking procedures and replacement intervals. Using the correct fluid types is vital for optimal performance and preventing damage. Address any leaks promptly to avoid potential issues.
Understanding the Dashboard and Instruments
Familiarize yourself with the 2021 CR-V’s dashboard layout and instrument cluster. Understand the meaning of each warning light and indicator, as detailed in the owner’s manual. The driver information interface provides crucial vehicle data. Recognizing these signals ensures timely responses to potential issues, promoting safe and informed driving. Promptly address any illuminated warning lights.

Warning Lights and Indicators
The 2021 CR-V utilizes various warning lights and indicators to communicate vehicle status. These signals alert drivers to potential problems, ranging from low fuel to critical engine issues. Consult the owner’s manual for a comprehensive explanation of each light’s meaning. Ignoring these warnings could lead to vehicle damage or unsafe driving conditions; address them promptly for optimal performance.
Driver Information Interface
The 2021 CR-V’s Driver Information Interface displays crucial vehicle data, including fuel economy, trip mileage, and system warnings. Accessible through steering wheel controls, it allows drivers to monitor performance without distraction. Familiarize yourself with its functions, like accessing Honda Sensing features, for a safer and more informed driving experience. Detailed instructions are found within the owner’s manual.

Climate Control System
The 2021 CR-V features a sophisticated HVAC system for optimal comfort. Learn to effectively operate the controls for heating, cooling, and ventilation. Understand features like automatic climate control and fan speed adjustments. The owner’s manual details air conditioning operation, heating functionality, and proper usage for maximizing efficiency and ensuring a pleasant cabin environment throughout all seasons.
Operation of the HVAC System
To operate the 2021 CR-V’s HVAC system, utilize the power button and mode selector. Adjust temperature using the dial, and fan speed with dedicated controls. Explore auto mode for automated climate regulation. The manual details recirculation settings for air quality and defrost functions for clear visibility. Proper operation ensures efficient heating, cooling, and ventilation for passenger comfort.
Air Conditioning and Heating
The 2021 CR-V features a robust air conditioning and heating system. Cooling is activated via the A/C button, while heating utilizes the heater core. Temperature control adjusts airflow warmth or coolness. The manual explains efficient usage for optimal comfort. Defrost settings quickly clear windshields. Regular maintenance, as outlined, ensures peak performance and longevity of these vital climate control components.
Audio and Infotainment System
The 2021 CR-V’s audio system offers radio and media playback options. Bluetooth connectivity enables wireless streaming from smartphones. The owner’s manual details pairing procedures and troubleshooting tips. Controls allow for volume adjustment, source selection, and track navigation. Further instructions cover utilizing available features for an enhanced driving experience, ensuring optimal audio quality and seamless integration with personal devices.
Radio and Media Playback
Your 2021 CR-V’s system supports AM/FM radio, and playback via USB. The manual explains tuning procedures and accessing preset stations. It details compatibility with various media formats. Instructions cover utilizing the display screen for track information and control. Troubleshooting guidance addresses common issues like distorted sound or inability to recognize devices, ensuring a smooth and enjoyable listening experience during every journey.
Bluetooth Connectivity
The 2021 CR-V manual thoroughly explains pairing your smartphone or other Bluetooth-enabled devices. It details step-by-step instructions for connecting, disconnecting, and managing paired devices within the infotainment system. Troubleshooting tips address common connectivity problems, like failed pairings or audio interruptions. Learn to utilize hands-free calling and audio streaming features for a safer, more connected driving experience, as outlined in the owner’s guide.
Navigation System (If Equipped)
The 2021 CR-V manual provides detailed guidance on utilizing the vehicle’s navigation system, if equipped. It covers map display features, route guidance options, and destination input methods. Explore voice recognition functionalities for hands-free operation, and learn how to update maps for accurate routing. The manual also explains troubleshooting steps for common navigation issues, ensuring a smooth and informed journey, as detailed within the comprehensive owner’s resource.

Map Display and Route Guidance
The 2021 CR-V manual explains how to customize the map display, including zoom levels and orientation. It details route guidance features like turn-by-turn directions, route recalculation, and points of interest searches. Learn to input destinations using addresses, coordinates, or saved locations. The manual clarifies how to view traffic information and alternative routes, optimizing your journey. Understanding these features, as outlined in the owner’s manual, enhances navigation efficiency and safety.
Voice Recognition Features
The 2021 CR-V manual details utilizing voice commands for navigation, audio control, and phone calls. It explains initial setup, voice command syntax, and troubleshooting common recognition issues. Learn to activate the system and issue commands clearly for optimal performance. The manual clarifies how to use voice recognition while driving safely, minimizing distractions. Mastering these features, as described, enhances convenience and connectivity within your vehicle.
Seating and Interior Comfort
The 2021 CR-V manual thoroughly explains seat adjustments – including power lumbar support and headrest settings – for personalized comfort. It details interior lighting controls, ambient lighting options, and how to operate features like heated front seats. Learn about maximizing passenger space and utilizing available storage solutions within the cabin. The manual guides you through maintaining the interior’s cleanliness and protecting its surfaces for lasting enjoyment.
Seat Adjustments and Features
The 2021 CR-V owner’s manual provides detailed instructions on adjusting both front and rear seats for optimal positioning. It covers manual and power seat controls, including height, tilt, and sliding adjustments. Learn about the available lumbar support features and how to properly adjust headrests for safety and comfort. The manual also explains any memory seat functions, allowing drivers to save preferred settings for convenience.
Interior Lighting
Your 2021 CR-V’s manual details the operation of various interior lights, including map lights, dome lights, and footwell illumination. It explains how to adjust brightness levels and utilize features like automatic illumination when doors open. The guide clarifies the function of the overhead console lights and any available ambient lighting options, enhancing visibility and creating a comfortable cabin environment for both driver and passengers during nighttime driving.
Cargo Area and Storage
The 2021 CR-V manual illustrates maximizing cargo space, detailing rear cargo area dimensions and configurations with seats up or folded down. It explains the use of tie-down anchors and available cargo nets for secure transport. The guide also covers hidden storage compartments, including under-floor storage and various console organizers, helping owners efficiently utilize all available space for luggage, groceries, and other items.
Rear Cargo Space
The 2021 CR-V owner’s manual provides specific rear cargo volume measurements with both rows of seats in use and when the rear seats are folded flat. It details how to easily lower the rear seats for expanded storage, highlighting the available configurations for various cargo sizes. Diagrams illustrate optimal loading practices, maximizing the usable space for luggage, equipment, and everyday items, ensuring efficient transport.
Storage Compartments
Your 2021 CR-V manual outlines all available storage areas beyond the main cargo hold. This includes detailing the center console’s layout, door pocket dimensions, and glove compartment capacity. It explains the function of any hidden compartments or trays, maximizing in-cabin organization. Diagrams show the location of each space, aiding in efficient packing and secure storage of personal belongings during travel.
Tires and Wheels
The 2021 CR-V manual provides crucial tire information, including recommended inflation pressures for optimal performance and fuel efficiency. It details the Tire Pressure Monitoring System (TPMS), explaining its operation and warning light indicators. Guidance on tire replacement specifications, proper maintenance procedures, and understanding tire sidewall markings ensures safe driving. Wheel care and compatibility details are also included for informed decisions.
Tire Pressure Monitoring System (TPMS)

Your 2021 CR-V features a TPMS that monitors air pressure in each tire, alerting you to potentially unsafe conditions via a dashboard indicator. The owner’s manual explains how the system functions, including reset procedures after tire inflation or rotation. It details what to do when the TPMS light illuminates, emphasizing the importance of checking and adjusting tire pressure promptly for safety and efficiency.

Tire Replacement and Maintenance
The 2021 CR-V manual provides guidance on proper tire replacement, including recommended tire sizes and load ratings. It details crucial maintenance practices like regular tire rotations, ensuring even wear and extending tire life. The manual also covers visual inspection for damage, proper inflation techniques, and the importance of using compatible tires for optimal vehicle performance and safety on all journeys;
Emergency Procedures
The 2021 CR-V owner’s manual outlines critical steps for jump-starting a disabled vehicle, emphasizing safety precautions to prevent damage. It provides detailed instructions for handling accident scenarios, including securing the vehicle, exchanging information, and contacting emergency services. This section also covers procedures for dealing with flat tires and other roadside emergencies, ensuring driver preparedness.
Jump Starting the Vehicle
The 2021 CR-V manual details a safe jump-start procedure, stressing the importance of proper cable connection sequence – positive to positive, negative to ground. It cautions against sparks and emphasizes using correctly rated jumper cables. The guide specifies suitable jump-start locations and warns against attempting this procedure if the battery is damaged or leaking, prioritizing safety above all else.
What to Do in an Accident
The 2021 CR-V owner’s manual provides crucial post-accident guidance, prioritizing personal safety and legal obligations. It instructs drivers to check for injuries, secure the vehicle, and contact emergency services immediately. The manual emphasizes documenting the scene, exchanging information with other parties, and promptly reporting the incident to insurance, ensuring a smooth claims process.
Technical Specifications
The 2021 Honda CR-V manual details comprehensive technical data, including engine and transmission specifics. It outlines precise dimensions, weight capacities, and fuel efficiency ratings for various trim levels. This section provides vital information for maintenance, repairs, and understanding the vehicle’s performance capabilities, ensuring informed ownership and proper servicing.
Engine and Transmission Details
The 2021 Honda CR-V manual thoroughly explains engine specifications, covering displacement, horsepower, and torque outputs for both standard and hybrid powertrains. Detailed transmission information, including gear ratios and drive systems, is also provided. This section clarifies fluid types, maintenance schedules, and component layouts for optimal performance and longevity.
Dimensions and Weight
The 2021 Honda CR-V manual presents precise vehicle dimensions, including overall length, width, height, and wheelbase, crucial for parking and storage considerations. It details curb weight, gross vehicle weight rating (GVWR), and payload capacity for safe loading practices. This section aids in understanding vehicle handling and space utilization, ensuring optimal driving experiences.
Warranty Information
The 2021 Honda CR-V manual thoroughly outlines Honda’s warranty coverage, detailing bumper-to-bumper, powertrain, and corrosion protection periods. It clarifies what components are covered and any associated deductibles. Furthermore, it provides details regarding roadside assistance programs, offering peace of mind and support for unexpected vehicle issues, ensuring a positive ownership experience.
Honda Warranty Coverage
The 2021 Honda CR-V’s warranty includes a 3-year/36,000-mile bumper-to-bumper coverage, protecting against defects in materials and workmanship. A 5-year/60,000-mile powertrain warranty safeguards the engine, transmission, and drivetrain. Corrosion protection is offered for 5 years/unlimited miles; The manual details exclusions and claim procedures, ensuring owners understand their rights and responsibilities.
Roadside Assistance
Honda provides roadside assistance for your 2021 CR-V, offering services like jump-starts, tire changes, lockout assistance, and towing. Coverage details, including limitations and eligibility, are thoroughly explained within the owner’s manual. Accessing this support is simple – contact Honda’s dedicated assistance line. This valuable benefit provides peace of mind, ensuring help is readily available when needed on the road.
Downloading the 2021 CR-V Manual (PDF)
Easily access a comprehensive digital copy of your 2021 Honda CR-V owner’s manual in PDF format. Visit the official Honda Owners website to download the manual directly to your device. This provides convenient, on-the-go access to vital information regarding vehicle operation, maintenance, and safety features. Having a digital copy ensures you’re always prepared with essential guidance.
Troubleshooting Common Issues
Encountering minor problems with your 2021 Honda CR-V? The owner’s manual offers guidance on addressing frequently reported issues. Consult the manual for solutions to concerns like infotainment system glitches, tire pressure monitoring system alerts, or basic starting difficulties. If problems persist, seeking professional assistance from a Honda dealer is recommended for accurate diagnosis and repair.
Frequently Asked Questions (FAQ)
Need quick answers? Common questions regarding the 2021 Honda CR-V, such as locating specific controls, understanding warning lights, or accessing the navigation system, are addressed in the FAQ section. If your query isn’t covered, the manual directs you to Honda’s official owner resources or suggests contacting a dealership for personalized support and detailed explanations.