Open post

tent instructions manual

Welcome to our comprehensive guide on tent setup! Properly setting up your tent ensures safety, comfort, and durability․ Start by selecting a flat, dry spot and using a tarp for ground protection․ Follow the manufacturer’s instructions carefully to avoid damage and ensure a secure structure․ This guide will walk you through essential steps to make your camping experience enjoyable and stress-free․

1․1 Choosing the Right Location for Your Tent

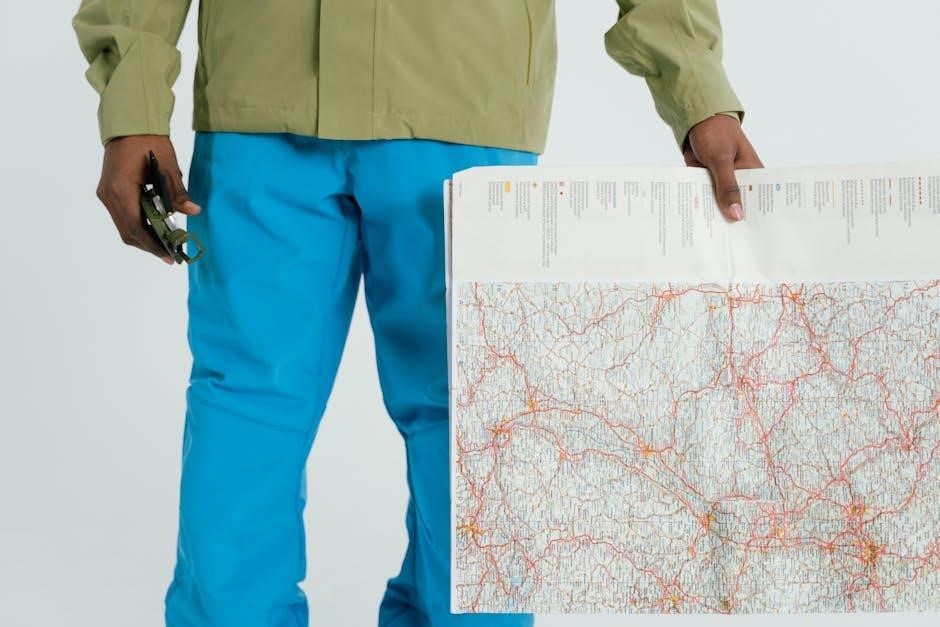
Selecting the right location is crucial for a safe and comfortable camping experience․ Look for a flat, dry area free from rocks, branches, and standing water․ Avoid low-lying spots to prevent water accumulation․ Clear the site of debris and sharp objects to protect the tent floor․ Ensure the area is level and stable to maintain structural integrity․ If camping in a designated site, use the provided tent pad․ Consider wind direction to position the tent for optimal ventilation and stability․

1․2 Unpacking and Organizing Components

Start by unpacking all tent components, including poles, stakes, rainfly, and footprint․ Lay them out on a clean, dry surface to ensure nothing is missing or damaged․ Identify each part by referring to the manual or product page․ Organize poles by length and type, and separate stakes from other hardware․ Prepare the footprint or tarp to lay the tent body on, ensuring a smooth setup process․ Double-check for any missing items before proceeding to avoid delays during assembly․

Understanding Tent Components

Familiarize yourself with tent fabric, poles, stakes, rainfly, and footprint․ The fabric provides structure and weather protection, while poles form the frame․ Stakes secure the tent, the rainfly adds extra waterproofing, and the footprint protects the base from moisture and abrasion․

2․1 Identifying Tent Fabric, Poles, and Stakes

Identify the tent fabric, poles, and stakes before assembly․ The fabric is typically waterproof and durable, while poles are lightweight yet sturdy, made of materials like aluminum or fiberglass․ Stakes, usually metal or plastic, secure the tent to the ground․ Familiarizing yourself with these components ensures proper setup and structural integrity․ Each part plays a crucial role in maintaining the tent’s stability and weather resistance, so inspect them for damage before use․

2․2 Familiarizing Yourself with the Rainfly and Footprint

Familiarize yourself with the rainfly and footprint, essential components for weather protection․ The rainfly is a waterproof layer placed over the tent, while the footprint is a protective barrier beneath it, shielding the tent floor from moisture and abrasion․ Both enhance durability and comfort․ Ensure the rainfly is securely attached to the tent’s poles and the footprint aligns perfectly with the tent’s base for optimal performance and longevity․

Step-by-Step Assembly Guide

Begin by laying out the footprint and tent body․ Attach poles to corners, stand the tent upright, and secure with stakes․ Follow instructions carefully for a sturdy setup․

3․1 Preparing the Site and Laying Out the Footprint

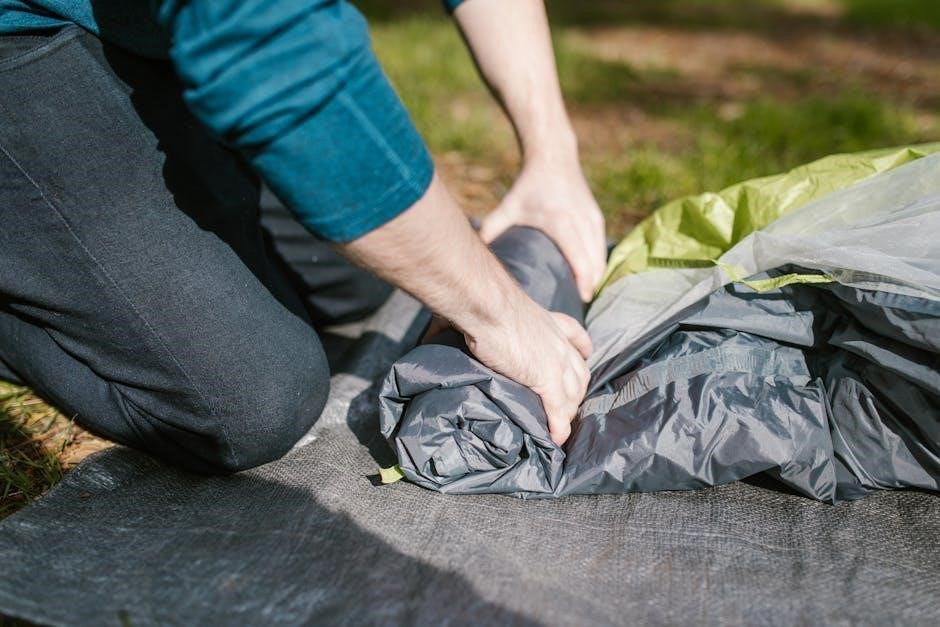
Start by selecting a flat, dry area, clearing debris like rocks or branches․ Lay a tarp or footprint to protect the tent floor from moisture and damage․ Ensure the site is level and free of sharp objects that could puncture the tent․ Position the footprint evenly, aligning it with the tent body for proper fit․ This step ensures a stable base for the tent, preventing water pooling and enhancing durability․ Always follow the manufacturer’s guidelines for site preparation․

3․2 Attaching the Tent Body to the Poles

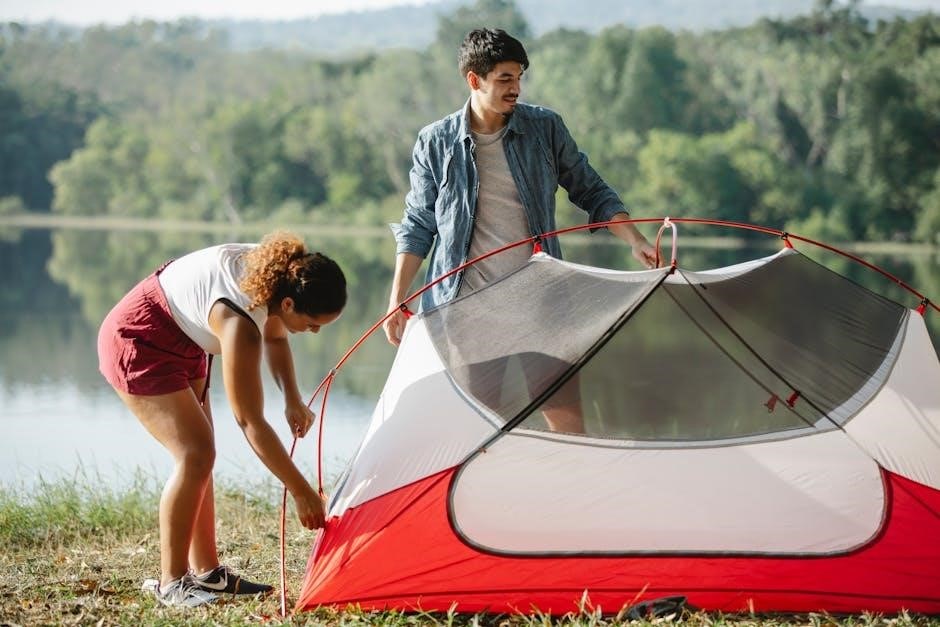
Locate the grommets or pole sleeves on the tent body and align them with the corresponding poles․ Insert the pole tips into the grommets, ensuring they fit securely․ For color-coded systems, match the poles to the sleeves for proper alignment․ Attach the clips or hooks on the tent body to the poles, working from the bottom up․ Ensure the tent stands upright and the fabric is taut but not overly tight․ Repeat for all poles, then move on to securing the structure with stakes․

3․3 Raising the Tent and Securing with Stakes

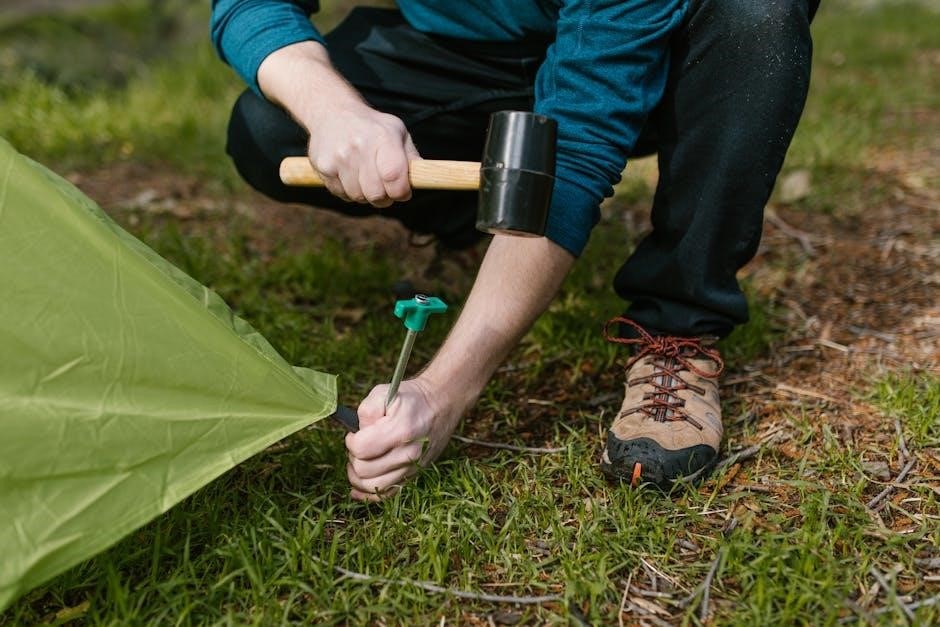
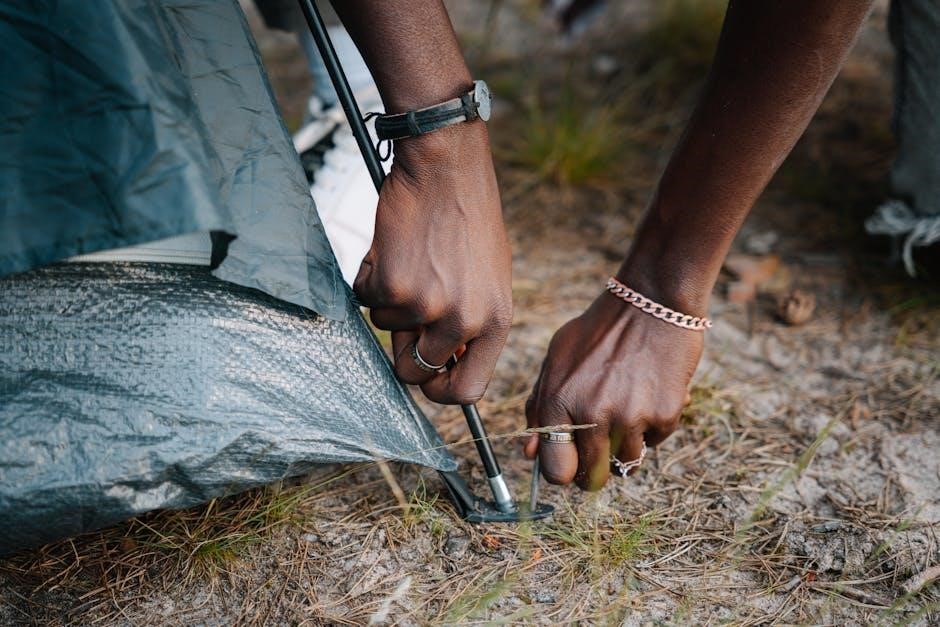
Once the poles are attached, carefully stand the tent upright․ Ensure all corners are aligned and the structure is balanced․ Insert stakes through the stake loops at the base of the tent and hammer them firmly into the ground․ Start with the four corners, then move to the sides, tightening the fabric as you go․ Use a mallet to secure the stakes deeply for stability․ Check that the tent is level and the fabric is taut but not overly strained․ Periodically inspect the stakes to ensure they remain secure, especially in windy or wet conditions․

Securing and Tightening Your Tent

Stake the tent firmly at each corner, ensuring the fabric is tight․ Use ropes to secure the rainfly and tighten all connections․ Check for any slack or sagging areas and re-stake if necessary to maintain stability and weather resistance․

4․1 Properly Staking and Tightening the Tent Fabric

Properly staking and tightening the tent fabric is crucial for stability and weather resistance․ Start by driving stakes into the ground at a 45-degree angle to secure the tent corners․ Ensure the fabric is tight and evenly spread, with no sagging areas․ Use the provided ropes and tensioners to tighten the fabric around the poles․ Check each stake and rope connection to ensure they are firmly in place, preventing any looseness that could compromise the tent’s structure during wind or rain․

4․2 Attaching and Adjusting the Rainfly

Attach the rainfly by clipping or hooking it to the tent’s pole ends, ensuring it covers the entire roof․ Adjust the rainfly tightly to prevent sagging, using the provided straps or toggles․ Secure the rainfly edges to the tent stakes, ensuring proper alignment and even tension․ Check for any gaps or loose areas to maintain weather resistance․ Tighten all connections firmly to guarantee the rainfly stays in place during wind or rain, providing optimal protection for your tent․

Maintenance and Storage Tips

Regularly clean and dry your tent to prevent mold and mildew․ Store it in a cool, dry place, away from direct sunlight․ Avoid harsh chemicals and ensure all components are securely packed to maintain durability and performance for future use․

5․1 Cleaning and Drying the Tent

Regular cleaning and proper drying are essential for maintaining your tent’s longevity․ Start by brushing off loose dirt and debris․ For tougher stains, use a mild soap and warm water, avoiding harsh chemicals that can damage the fabric․ Rinse thoroughly and allow the tent to air dry completely, ensuring no moisture remains․ Never store a damp tent, as this can lead to mold and mildew growth, compromising its water resistance and overall integrity․ Always follow the manufacturer’s cleaning guidelines to preserve your tent’s condition and performance for future camping trips․

Additional Accessories for Enhanced Setup

Enhance your tent setup with essential accessories like tarps, footprints, and gear lofts․ These additions protect your tent, organize gear, and improve overall camping comfort and functionality․

6․1 Using a Tarp or Footprint

A tarp or footprint is essential for protecting your tent from moisture and abrasion․ Lay it flat on the ground before setting up your tent to create a barrier․ Ensure the tarp is slightly smaller than the tent floor to prevent water pooling․ This extra layer not only extends the life of your tent but also makes cleanup easier․ Always check the manufacturer’s size recommendations for the best fit and durability․

6․2 Incorporating Gear Lofts or Vestibules

Gear lofts and vestibules are excellent additions to enhance your tent’s functionality․ Gear lofts provide overhead storage for small items, keeping your tent organized and clutter-free․ Vestibules extend your tent’s footprint, offering a protected area for boots and gear․ Both are easy to attach and can significantly improve your camping experience by maximizing space and keeping essentials dry and accessible․ They are ideal for campers seeking extra storage without compromising tent performance․

Safety Precautions and Best Practices

Ensure your tent’s longevity and safety by avoiding prolonged UV exposure, maintaining proper ventilation, and keeping the area clear of sharp objects and hazards․

7․1 Avoiding Overexposure to UV Rays

Protect your tent from prolonged UV exposure to prevent material degradation and discoloration․ Select shaded areas when possible and avoid leaving your tent set up for extended periods․ Use UV-resistant tarps or covers for added protection․ Regularly inspect fabric for signs of wear, and ensure proper ventilation to reduce heat buildup․ Follow manufacturer guidelines for UV protection to maintain your tent’s durability and performance over time․

7․2 Ensuring Proper Ventilation

Proper ventilation is crucial for maintaining a dry and comfortable tent environment․ Always ensure windows and vents are open to allow airflow, reducing moisture buildup․ Use the rainfly correctly to protect against rain while keeping the tent breathable․ Avoid fully sealing the tent, as this can trap condensation and lead to mold․ Regularly inspect and clean vents to ensure optimal airflow․ Proper ventilation prevents internal humidity and extends the lifespan of your tent, ensuring a pleasant camping experience․

Disassembly and Packing Up

Disconnect poles, remove stakes, and gently fold the tent․ Clean and dry all components before storage․ Organize parts in the storage bag for future use․

8․1 Dismantling the Tent Safely

Begin by removing all stakes and ropes to prevent damage․ Carefully disengage poles from the tent body, starting from the back and working towards the front․ Avoid abrupt movements that could bend or break the poles․ Once the tent is completely dismantled, inspect each component for wear or damage․ Store poles and stakes separately to maintain organization and prevent loss․ Clean and dry all parts before packing to ensure longevity and prevent mildew․

8․2 Organizing and Storing Components

After dismantling, clean and dry all components thoroughly to prevent mildew․ Store poles, stakes, and tent body in separate, labeled storage bags for easy access․ Use the original packaging or sturdy containers to protect items during storage․ Keep the tent manual and repair kit with the tent for future reference․ Ensure all parts are completely dry before storing to maintain quality and prevent damage․ Store in a cool, dry place to preserve the tent’s condition for future use․

Troubleshooting Common Issues

Identify and address common tent issues like broken poles, water leakage, or torn fabric․ Use repair kits for quick fixes and consult the manual for detailed solutions․

9․1 Fixing Broken Poles or Damaged Fabric

Assess the damage to poles or fabric and use repair tools from the tent kit․ For broken poles, apply a splint or ferrule to stabilize the break, securing with tape․ If fabric is torn, clean the area and apply a patch kit or waterproof adhesive․ Allow repairs to dry before continuing setup․ Regular maintenance and proper storage can prevent such issues․ Always refer to the manual for specific repair instructions tailored to your tent model․

9․2 Addressing Water Leakage or Condensation

Inspect the tent for water leakage by checking seams and fabric for damage․ Apply a waterproof sealant or repair tape to affected areas․ For condensation, ensure proper ventilation by opening windows and vents․ Pitch the tent on a well-drained site to reduce moisture accumulation․ Regularly cleaning and drying the tent can prevent mold and mildew․ Addressing these issues promptly will maintain the tent’s performance and extend its lifespan․ Always follow the manufacturer’s recommendations for repairs and maintenance․

Open post

char broil the big easy turkey fryer manual

The Char-Broil The Big Easy Turkey Fryer is an innovative, oil-less infrared cooker designed for up to 16-pound turkeys, offering efficient, even cooking with minimal cleanup.

1.1 Key Features and Benefits

The Char-Broil The Big Easy Turkey Fryer features oil-less infrared cooking technology, eliminating the need for oil while ensuring even heat distribution. It can accommodate up to a 16-pound turkey, making it ideal for large gatherings. The fryer includes a cooking basket and lifter for easy food handling. Patented infrared technology promotes consistent cooking temperatures, reducing cooking time and effort. Additional benefits include a compact design, easy cleanup, and minimal maintenance. It’s perfect for achieving crispy, flavorful results without the hassle of traditional deep frying.

1.2 Importance of the Manual

The manual is essential for safe and effective use of the Char-Broil The Big Easy Turkey Fryer. It provides detailed assembly instructions, safety guidelines, and cooking tips to ensure optimal results. By following the manual, users can avoid potential hazards and maintain the appliance properly. It also includes troubleshooting advice and specific cooking times, helping users achieve perfectly cooked meals every time. Referencing the manual ensures you unlock the full potential of the fryer while adhering to safety standards.

Assembly and Setup

Assembly of the Char-Broil The Big Easy Turkey Fryer takes approximately 1 hour. Ensure all parts are correctly installed following the manual’s instructions for safe and efficient operation.

2.1 Step-by-Step Assembly Instructions

Begin by unpacking all components. Attach the burner to the main unit, ensuring a secure connection. Next, connect the regulator to the propane tank and link it to the burner. Install the cooking basket by aligning it with the base and tightening the screws. If using the rotisserie kit, attach it according to the manual’s instructions. Double-check all connections for tightness. Finally, place the lid on top and ensure it fits properly. Refer to the manual for detailed diagrams to confirm each step is completed correctly.

2.2 Capacity and Cooking Technology

The Char-Broil The Big Easy Turkey Fryer can accommodate up to a 16-pound turkey, 8-pound roast, or 6-pound pork shoulder. It features patented infrared cooking technology, which ensures even heat distribution and eliminates the need for oil. This technology allows for crispy results on the outside while maintaining juicy meat inside. The fryer’s design minimizes cleanup and promotes efficient cooking without the mess of traditional deep-frying methods. Its compact size and advanced heating system make it ideal for both small and large gatherings, offering versatility for various cooking needs.

2.3 Preheating the Fryer

Preheating the Char-Broil The Big Easy Turkey Fryer is essential for optimal performance. Allow the fryer to preheat for approximately 15 minutes before cooking. This ensures the infrared heating elements reach the desired temperature, providing even heat distribution. Preheating helps prevent food from sticking and promotes consistent cooking results. Once preheated, the fryer is ready to cook your turkey or other meats efficiently. Always follow the recommended preheating time to achieve the best outcomes with your Big Easy fryer.

Safety Precautions

Always use the fryer with LP gas and the supplied regulator. Follow all warnings and instructions in the manual to ensure safe operation and avoid accidents.

3.1 Installation Safety Tips

Install the fryer on a level, heat-resistant surface away from flammable materials. Use only LP gas with the provided regulator/valve assembly. Ensure proper ventilation and keep the area clear of obstructions. Never modify the appliance or use unauthorized parts. Secure the fryer to prevent tipping and always follow the manual’s guidelines for gas connections. If unsure about any step, consult a qualified professional to ensure safe installation and operation.

3.2 General Safety Guidelines

Always use the fryer on a stable, heat-resistant surface and keep children and pets away. Never leave the appliance unattended while in use. Avoid using water to extinguish grease fires; instead, turn off the burner and cover the fryer. Use oven mitts or tongs to handle hot components. Ensure proper ventilation to avoid gas buildup. Regularly inspect hoses and connections for damage or leaks. Follow all safety warnings in the manual to prevent accidents and ensure safe operation of the Char-Broil The Big Easy Turkey Fryer.

Cooking Instructions

Preheat the fryer, season the turkey, and place it breast-side up in the basket. Cook until the internal temperature reaches 165°F, using a meat thermometer for accuracy.

4.1 Cooking Time Guidelines

Cooking times vary based on the size and type of meat. For a turkey, estimate about 10 minutes per pound, resulting in a total cooking time of 2-3 hours for a 16-pound bird. Always use a meat thermometer to ensure the internal temperature reaches 165°F. Preheating the fryer before placing the turkey inside ensures even cooking. The infrared technology promotes consistent heat distribution, reducing hotspots. Monitor the turkey closely during the last 30 minutes to avoid overcooking. Adjust times slightly for smaller or larger birds, and let the turkey rest before carving.

4.2 Using a Meat Thermometer

Using a meat thermometer ensures your turkey is cooked to a safe internal temperature of 165°F. Insert the probe into the thickest part of the breast or thigh, avoiding bones or fat. The Char-Broil Big Easy includes a thermometer, but you can upgrade to a digital one for precise monitoring. Check the temperature during the last 30 minutes of cooking to avoid overcooking. This ensures juicy, evenly cooked meat every time. Always let the turkey rest before carving to retain juices. Clean the thermometer with a damp cloth after use.

4.3 Seasoning and Placement Tips

Season the turkey with your favorite herbs or garlic before cooking for enhanced flavor. Place the turkey in the cooking basket breast-side up for even cooking. Ensure the turkey is secure and balanced to prevent shifting during cooking. Tuck the wings under the body to promote uniform heat distribution. Allow space around the turkey for air to circulate, ensuring crispy skin and juicy meat. Always pat the turkey dry before seasoning to help the seasonings adhere better. Proper placement and seasoning ensure a delicious, evenly cooked result. Follow these tips for the best outcomes. Clean the basket after use for easy reuse.

Maintenance and Cleaning

Regularly clean the fryer with a damp cloth and mild detergent. Use a custom-fit cover to protect and minimize cleaning between uses. Avoid abrasive cleaners.

5.1 Cleaning Between Uses

After each use, allow the fryer to cool completely before cleaning. Use a damp cloth to wipe down surfaces, avoiding abrasive cleaners. For tougher residue, preheat the fryer briefly to loosen food particles. Regular cleaning prevents grease buildup and maintains performance. Always store the fryer with a custom-fit cover to protect it from dust and moisture. Proper maintenance ensures longevity and safe operation of your Char-Broil The Big Easy Turkey Fryer.

5.2 Storage and Cover Options

For optimal protection and maintenance, store your Char-Broil The Big Easy Turkey Fryer in a dry, secure location. Use a custom-fit cover to shield it from dust, moisture, and outdoor elements. This cover, available from Char-Broil, is designed to fit perfectly and extend the product’s lifespan. Regularly inspect the fryer before storage to ensure it is clean and dry. Proper storage ensures the fryer remains in excellent condition for future use, while the cover provides an extra layer of protection against environmental factors.

Troubleshooting Common Issues

Address common issues like ignition problems, uneven heating, or oil residue. Refer to the manual for solutions, such as cleaning burners or proper oil disposal.

6.1 Ignition and burner Control

6.1 Ignition and Burner Control

If the burner doesn’t light, ensure the igniter knob is functioning. Press and turn the burner control to the flame symbol, then quickly turn the igniter. If issues persist, clean the igniter or replace it. Always refer to the manual for detailed troubleshooting steps to ensure safe and efficient operation of your Char-Broil The Big Easy Turkey Fryer.

6.2 Oil Cooling and Cleanup

Allow the fryer to cool completely before cleaning. After preheating, cook time is about 3 minutes per pound, but oil cooling requires several hours. Never pour hot oil down the drain. Use a drip pan or heat-resistant container to collect cooled oil for recycling or disposal. Clean the burner and cooking basket with mild soap and water. Regular maintenance ensures optimal performance and longevity of your Char-Broil The Big Easy Turkey Fryer.

Additional Resources

For more detailed guidance, visit the official Char-Broil website to access the full manual. Contact Char-Broil customer support for troubleshooting or additional assistance.

7.1 Accessing the Full Manual

The full manual for the Char-Broil The Big Easy Turkey Fryer is available on the official Char-Broil website. Visit https://www.charbroil.com/support/manuals to download the PDF version. This comprehensive guide includes detailed instructions for assembly, operation, and troubleshooting. It also provides cooking charts, safety precautions, and maintenance tips. The manual is free to access and is essential for ensuring safe and effective use of the fryer. For convenience, the document is searchable and printable, making it easy to reference specific sections as needed. The manual is available in English and other languages, depending on the region.

7.2 Char-Broil Customer Support

Char-Broil offers dedicated customer support to assist with any questions or issues regarding The Big Easy Turkey Fryer. Contact their team via phone at 1-800-241-7548 or through email at customerservice@charbroil.com. Support is available Monday-Friday, 8 AM to 6 PM EST. For troubleshooting, product information, or manual clarification, visit their official website at https://www.charbroil.com/support. The website also provides FAQs, repair services, and warranty details to ensure a seamless experience with your fryer.

Open post

aqa gcse geography revision guide

This comprehensive AQA GCSE Geography Revision Guide covers Physical and Human Geography topics‚ offering clear study notes‚ case studies‚ and practice questions to enhance exam preparation and understanding.

1.1 Overview of the AQA Specification

The AQA GCSE Geography specification is structured to cover a wide range of topics‚ including Natural Hazards‚ Climate Change‚ Water and Carbon Cycles‚ Urbanisation‚ Population‚ and Environmental Management. It is divided into Physical and Human Geography components‚ with a strong emphasis on geographical skills and fieldwork. The specification is designed to develop critical thinking‚ data analysis‚ and evaluation skills. It aligns with the latest educational standards‚ ensuring students gain a comprehensive understanding of key concepts and their real-world applications. Regular updates ensure relevance and engagement with contemporary issues.

1.2 Importance of Structured Revision

Structured revision is essential for mastering the AQA GCSE Geography syllabus‚ helping students organize their study time effectively. By breaking down topics into manageable sections‚ learners can focus on key concepts‚ case studies‚ and skills. Regular revision reinforces understanding‚ improves retention‚ and enhances exam performance. Using resources like flashcards‚ past papers‚ and interactive tools ensures active engagement and confidence-building. A structured approach also allows students to identify weaknesses‚ address gaps in knowledge‚ and develop strategies for tackling complex questions. Consistency and planning are key to achieving success in the AQA GCSE Geography exams.

Physical Geography Topics

Covers Natural Hazards‚ Climate Change‚ and Water and Carbon Cycles‚ providing clear notes‚ case studies‚ and exam-style questions to aid understanding and exam preparation.

2.1 Natural Hazards (Volcanoes‚ Earthquakes‚ etc.)

This section explores the causes‚ impacts‚ and management of natural hazards such as volcanoes and earthquakes. It includes monitoring techniques‚ eruption prediction methods‚ and case studies on human and environmental impacts. Students learn how to evaluate the effectiveness of mitigation strategies and understand why people choose to live in hazardous areas. The guide provides structured notes‚ diagrams‚ and practice questions to help students master these topics and apply their knowledge in exams. Clear examples and real-world applications ensure a deep understanding of natural hazards and their geographical significance.

2.2 Climate Change and Its Impacts

This section examines the causes and effects of climate change‚ focusing on global warming‚ extreme weather events‚ and rising sea levels. It explores mitigation strategies‚ such as reducing greenhouse gas emissions‚ and adaptation measures‚ like flood defenses. Case studies highlight the socio-economic impacts of climate change‚ emphasizing vulnerable regions. The guide also includes practice questions on evaluating mitigation versus adaptation and understanding recent extreme weather events. Key concepts are supported by clear explanations‚ diagrams‚ and real-world examples to enhance student understanding and exam readiness.

2.3 Water and Carbon Cycles

This section explores the water and carbon cycles‚ essential processes sustaining life on Earth. The water cycle involves evaporation‚ condensation‚ precipitation‚ and collection‚ while the carbon cycle includes carbon exchange between the atmosphere‚ oceans‚ and living organisms. Key processes like photosynthesis‚ respiration‚ and decomposition are explained. The guide highlights human impacts‚ such as deforestation and fossil fuel combustion‚ on these cycles. Clear diagrams and examples‚ including case studies‚ help students understand these critical systems and their role in shaping ecosystems and climate regulation.

Human Geography Topics

This section covers urbanisation‚ population dynamics‚ migration‚ and environmental management‚ exploring how human activities shape landscapes and interact with economic and social processes‚ supported by case studies.

3.1 Urbanisation and Economic Development

Urbanisation is a key driver of economic development‚ transforming rural areas into vibrant hubs. Cities attract investment‚ fostering innovation and job creation‚ which in turn fuels growth. Megacities‚ such as Tokyo and New York‚ exemplify this dynamic. However‚ rapid urbanisation often leads to challenges like overcrowding‚ inequality‚ and strain on resources. This section explores these complexities‚ using case studies to illustrate how urbanisation shapes economies and societies. Practice questions and revision tools help students grasp these concepts effectively for their exams.

3;2 Population and Migration Patterns

Population dynamics and migration patterns are crucial in understanding human geography. Factors such as natural increase‚ birth rates‚ and death rates shape population growth. Migration‚ driven by push and pull factors like economic opportunities or conflict‚ influences global population distribution. Case studies‚ such as urban-rural migration in the UK or international movements to developed nations‚ highlight these trends. This section provides insights into demographic transitions and their impacts on societies‚ supported by practice questions to reinforce understanding for AQA GCSE Geography exams.

3;3 Environmental Management

Environmental management focuses on strategies to address climate change‚ conservation‚ and sustainable development. Key topics include renewable energy‚ deforestation solutions‚ and pollution control. Case studies explore how human activities impact ecosystems‚ emphasizing the importance of balanced resource use. This section provides insights into global agreements like the Paris Accord and local initiatives‚ offering practical examples for effective environmental stewardship. Practice questions help students apply theoretical knowledge to real-world scenarios‚ ensuring a deep understanding of environmental management for AQA GCSE Geography exams.

Geographical Skills and Fieldwork

Geographical skills and fieldwork are essential for AQA GCSE Geography. This section covers data collection‚ analysis techniques‚ and fieldwork investigations‚ providing practical guidance for exam success and report writing.

4.1 Data Collection and Analysis Techniques

Data collection and analysis are crucial skills in AQA GCSE Geography. Techniques include fieldwork measurements‚ such as river discharge and soil sampling‚ alongside secondary data interpretation. Students learn to process and present data effectively using graphs‚ charts‚ and GIS mapping. Practical exercises and past paper questions help refine these skills‚ ensuring confidence in handling data during exams and fieldwork investigations. These methods are vital for producing accurate and comprehensive geographical reports.

4.2 Fieldwork Investigations and Reports

Fieldwork investigations are a key component of AQA GCSE Geography‚ enabling students to collect primary data and apply geographical skills. Students learn to plan‚ conduct‚ and report on fieldwork‚ such as river studies or urban surveys. Data collection techniques‚ including measurements and observations‚ are documented and analyzed. Reports require clear presentation of findings‚ using graphs and maps. Practical investigations help students develop critical thinking and problem-solving abilities‚ preparing them for exam questions and real-world geographical applications.

Exam Preparation Strategies

Effective exam preparation involves practicing past papers and using mark schemes to refine answering techniques. Regular revision sessions and utilizing online resources can enhance understanding and retention. Time management during exams is essential for completing all questions.

5.1 Practicing Past Papers and Mark Schemes

Practicing past papers and mark schemes is crucial for AQA GCSE Geography exam preparation. It helps students understand the exam format‚ identify strengths and weaknesses‚ and refine answering techniques. Past papers provide real-life examples of questions‚ enabling students to familiarize themselves with the types of questions and the required depth of answers. Mark schemes offer detailed insights into what examiners expect‚ allowing students to align their responses with assessment criteria. Regular practice with past papers enhances time management and improves the ability to address questions effectively under exam conditions. Utilizing these resources ensures students are well-prepared for the challenges of the exam. Additionally‚ tools like Quizlet and Study Mind offer interactive ways to revise and test knowledge‚ reinforcing understanding of key concepts and case studies. By consistently practicing past papers‚ students can build confidence and develop a strategic approach to tackling complex questions‚ ultimately leading to better exam performance.

5.2 Effective Use of Revision Resources

Maximizing revision resources is essential for AQA GCSE Geography success. Utilize textbooks like the CGP Revision Guide for clear notes and case studies. Online platforms such as Quizlet offer interactive flashcards and study sets aligned with the AQA specification. Additionally‚ websites like Study Mind provide practice questions and mark schemes to refine understanding. These tools complement structured revision‚ ensuring comprehensive coverage of both Physical and Human Geography topics; Regular use of these resources enhances retention and exam readiness‚ helping students achieve their full potential. They are designed to support independent study and classroom learning effectively.

Revision Resources and Tools

Explore recommended textbooks like the CGP Revision Guide‚ offering clear notes and case studies. Utilize online platforms such as Quizlet for interactive flashcards and Study Mind for practice questions with mark schemes to enhance learning and retention.

6.1 Recommended Textbooks and Guides

The CGP Revision Guide is a top choice‚ offering clear study notes‚ case studies‚ and practice questions. It covers both Physical and Human Geography topics‚ with a glossary for key terms. Priced at £5.95 online‚ it’s a cost-effective resource. Additionally‚ the GCSE 9-1 Geography AQA Revision Guide is praised for its student-friendly approach‚ aligning perfectly with the specification. These guides provide structured content‚ making them essential for focused revision and exam success.

6.2 Online Platforms for Interactive Learning

Quizlet and Study Mind are excellent online platforms for AQA GCSE Geography revision. Quizlet offers curriculum-aligned study sets and flashcards for topics like natural hazards and water cycles. Study Mind provides practice questions with mark schemes‚ helping students assess their understanding. Additionally‚ interactive tests based on past papers boost exam skills‚ focusing on fieldwork and geographical concepts. These platforms enhance learning through engaging‚ structured resources‚ making revision more effective and enjoyable for students preparing for their exams.

Exam Tips and Techniques

Highlight key terms‚ manage time effectively‚ and use past papers to familiarize yourself with question formats. Practice structuring answers clearly and support them with relevant evidence.

7.1 Answering Structured Questions Effectively

To excel in AQA GCSE Geography exams‚ it’s crucial to understand how to tackle structured questions. Always read the question carefully and highlight key terms to focus your response. Plan your answer using bullet points or mind maps to ensure clarity and organization. Use the mark scheme as a guide to identify the expected content and structure. Practice answering questions within timed conditions to improve time management. Start with a clear introduction‚ followed by detailed explanations supported by examples and case studies. Avoid waffling and stick to the point to maximize marks. Finally‚ review your answer to ensure it meets the question’s requirements and is free of errors.

7.2 Time Management During the Exam

Effective time management is crucial during the AQA GCSE Geography exam. Allocate time evenly to each question‚ ensuring you leave enough for higher-mark questions. Read each question carefully to understand what is being asked. Plan your response briefly before writing to stay focused. Prioritize questions you are most confident about first to secure marks early. Use the allocated time wisely‚ avoiding spending too long on a single question. Keep an eye on the clock and review your answers if time permits to correct errors or add details.

This AQA GCSE Geography Revision Guide provides a thorough overview of key topics‚ revision strategies‚ and exam techniques to help students excel. By focusing on structured study methods‚ practicing past papers‚ and utilizing recommended resources‚ students can build confidence and achieve their best. The guide emphasizes the importance of understanding both Physical and Human Geography‚ alongside essential geographical skills. With careful preparation and effective time management‚ students will be well-equipped to tackle the exam successfully and reach their full potential in AQA GCSE Geography.

Open post

function transformation rules pdf

Function transformation rules are fundamental in mathematics, enabling the modification of graphs through shifts, stretches, compressions, and reflections. Understanding these rules is essential for analyzing and interpreting function behavior. They allow students to manipulate functions to fit real-world applications, making them a crucial tool in graphing and problem-solving. This guide provides a comprehensive overview, complete with examples and a downloadable PDF for easy reference.

Overview of Function Transformations

Function transformations involve altering the graph of a function through vertical or horizontal shifts, reflections, stretches, or compressions. These modifications allow the original function to be adapted to fit specific scenarios or data. Vertical shifts move the graph up or down, while horizontal shifts move it left or right. Reflections flip the graph over the x-axis or y-axis, and stretches or compressions adjust its vertical or horizontal scale. Understanding these transformations is essential for analyzing and interpreting function behavior in various mathematical and real-world applications.

Importance of Understanding Transformation Rules

Understanding function transformation rules is crucial for effectively manipulating and analyzing mathematical functions; These rules enable the modification of graphs to fit specific scenarios, making them indispensable in problem-solving and real-world applications. By mastering transformations, students can shift, stretch, or reflect functions to model various phenomena accurately. This knowledge enhances graphing skills, deepens insights into function behavior, and simplifies complex mathematical concepts. It also serves as a foundation for advanced topics in calculus, engineering, and data analysis, where function transformations are essential tools for solving practical problems.

Types of Function Transformations

Function transformations include vertical shifts, horizontal shifts, stretching, compressing, and reflecting. These transformations allow functions to be shifted, scaled, or mirrored to model real-world scenarios effectively.

Vertical Transformations

Vertical transformations modify the function’s output values, altering the graph’s position or scale vertically. A vertical shift moves the graph up or down by adding or subtracting a constant. For example, ( f(x) + d ) shifts the graph up by ( d ) units, while ( f(x) — d ) shifts it down. Vertical stretches and compressions are achieved by multiplying the function by a factor ( a ). If ( a > 1 ), the graph stretches vertically; if ( 0 < a < 1 ), it compresses. Reflection over the x-axis occurs when the function is multiplied by ( -1 ), resulting in ( -f(x) ). These transformations are crucial for understanding how functions can be manipulated to model real-world phenomena accurately.

Horizontal Transformations

Horizontal transformations alter the function’s input values, modifying the graph’s position or scale horizontally; Adding or subtracting a constant inside the function shifts the graph left or right. For instance, ( f(x — c) ) shifts the graph right by ( c ) units, while ( f(x + c) ) shifts it left by ( c ) units. Horizontal stretches and compressions are achieved by multiplying the input by a factor ( b ). If ( 0 < b < 1 ), the graph stretches horizontally; if ( b > 1 ), it compresses. Reflection over the y-axis occurs when the input is negated, resulting in ( f(-x) ). These transformations are essential for understanding how functions can be adjusted to represent various scenarios, making them a key component in graph analysis and problem-solving.

Stretching and Compressing Transformations

Stretching and compressing transformations alter the scale of a function’s graph vertically or horizontally. Vertical stretches/compressions are applied by multiplying the function by a factor ( a ). If ( a > 1 ), the graph stretches vertically; if ( 0 < a < 1 ), it compresses. Horizontal stretches/compressions involve multiplying the input by a factor ( 1/b ). If ( 0 < b < 1 ), the graph stretches horizontally; if ( b > 1 ), it compresses. These transformations adjust the function’s scale without shifting its position, providing insights into the function’s behavior and flexibility in modeling real-world phenomena.

Reflecting Transformations

Reflecting transformations flip a function’s graph over the x-axis or y-axis. Reflecting over the x-axis is achieved by negating the function, resulting in ( -f(x) ). This transformation mirrors the graph across the x-axis, reversing its direction. Reflecting over the y-axis involves replacing ( x ) with ( -x ), creating ( f(-x) ). This mirrors the graph across the y-axis, changing the direction of horizontal features. Both reflections are essential for understanding symmetry and reversing function outputs, with applications in graphing and analyzing function behavior across various mathematical contexts.

Transformation Rules in Detail

This section provides an in-depth look at function transformation rules, covering vertical shifts, horizontal shifts, reflections, and stretching/compressing transformations in detail.

Vertical Shifts and Reflections

Vertical shifts involve moving a function up or down by adding or subtracting a constant to the function’s output. For example, f(x) + d shifts the graph of f(x) upward by d units, while f(x) ― d shifts it downward. Reflections, such as -f(x), flip the graph over the x-axis, inverting its orientation. These transformations are essential for modeling real-world phenomena and analyzing function behavior. Understanding vertical shifts and reflections provides a foundation for more complex transformations. A downloadable PDF guide offers detailed examples and practice problems for mastering these concepts.

Horizontal Shifts and Reflections

Horizontal shifts involve moving a function left or right by adding or subtracting a constant inside the function’s input. For instance, f(x ― c) shifts the graph of f(x) right by c units, while f(x + c) shifts it left by c units. Horizontal reflections, such as f(-x), reflect the graph over the y-axis, reversing its direction. These transformations are crucial for aligning functions with real-world data and understanding their symmetry. A downloadable PDF guide provides detailed examples and exercises to master horizontal shifts and reflections.

Stretching and Compressing Vertically

Vertical stretching and compressing involve multiplying the function’s output by a factor to alter its height. For instance, y = a*f(x) stretches the graph vertically by a factor of a if a > 1, and compresses it if 0 < a < 1. This transformation affects the y-values, making the graph taller or shorter without changing its width. Understanding these transformations is crucial for graphing and analyzing functions effectively. A downloadable PDF guide provides detailed examples and practice problems to master vertical stretching and compressing techniques easily.

Stretching and Compressing Horizontally

Horizontal stretching and compressing modify a function’s input by a factor, affecting the graph’s width. For example, in y = f(bx), if b > 1, the graph compresses horizontally, while 0 < b < 1 causes it to stretch. This transformation impacts the x-values, altering the graph's horizontal scale without changing its height. A downloadable PDF guide offers step-by-step instructions and exercises to help students master these techniques, ensuring a solid grasp of horizontal function transformations and their practical applications in graphing and analysis.

Combining Multiple Transformations

Combining transformations involves applying multiple changes to a function, such as shifts, stretches, and reflections, in a specific order to achieve the desired graph. Understanding the sequence of operations is crucial for accurate results. This section explores how to layer transformations effectively, ensuring clarity and precision in modifying functions. A downloadable PDF guide provides detailed examples and exercises to master this complex topic.

Order of Operations for Transformations

When combining multiple transformations, the order of operations is crucial. Start with horizontal shifts and reflections, followed by horizontal stretching or compressing. Next, apply vertical stretching or compressing and reflections. Finally, perform vertical shifts. This sequence ensures that transformations are applied correctly without interference. Always follow this order to maintain accuracy and clarity in function transformation. For detailed guidance, refer to the downloadable PDF guide.

Applying Multiple Transformations to a Function

Applying multiple transformations to a function involves combining vertical and horizontal shifts, reflections, stretches, and compressions. Start with horizontal transformations, such as shifts and reflections, followed by horizontal stretches or compressions. Next, address vertical transformations, like stretches, compressions, reflections, and shifts. This sequence ensures clarity and accuracy. For example, transforming ( f(x) ) to ( -2f(x-3) + 4 ) involves shifting right 3 units, vertically compressing by 2, reflecting over the x-axis, and shifting up 4 units. Always graph step-by-step for precision. Refer to the downloadable PDF guide for detailed examples and practice exercises.

Real-World Applications of Function Transformations

Function transformations are vital in modeling real-world phenomena, such as population growth, sound waves, and financial trends. They enable precise adjustments to mathematical models, ensuring accurate predictions and representations of complex systems. For instance, vertical shifts can represent baseline changes, while horizontal shifts model time-dependent variations. These applications highlight the practical importance of transformation rules in solving real-world problems efficiently. The downloadable PDF guide provides further insights and examples to enhance understanding and application.

Using Transformations in Graphing

Function transformations are essential tools in graphing, allowing users to shift, stretch, compress, or reflect graphs to model real-world data accurately. Vertical shifts adjust the baseline, while horizontal shifts align data with specific time frames. Reflections over axes can represent changes in direction or orientation. Stretching and compressing transformations modify the scale of graphs to fit complex datasets. These techniques enable precise visualization and analysis, making transformations indispensable in fields like science, engineering, and economics. The downloadable PDF guide offers practical examples and exercises to master these skills.

Practical Examples of Function Transformations

Practical examples of function transformations include shifting a quadratic function vertically to model temperature changes over time or reflecting a linear function to represent a mirror image. For instance, transforming ( f(x) = x^2 ) to ( f(x) + 3 ) raises the graph by 3 units, while ( f(-x) ) reflects it over the y-axis. These examples help visualize real-world applications, such as adjusting a function to fit experimental data or creating symmetry in designs. The downloadable PDF guide provides step-by-step examples to practice these transformations effectively.

Mastering function transformation rules enhances your ability to analyze and graph functions effectively. For deeper study, download the comprehensive PDF guide, packed with examples and summaries, to solidify your understanding and skills.

Function transformations include vertical shifts, horizontal shifts, reflections, stretches, and compressions. Vertical shifts move graphs up or down, while horizontal shifts move them left or right. Reflections flip graphs over the x-axis or y-axis. Stretches and compressions adjust the graph’s vertical or horizontal scale. Understanding these rules is crucial for graphing and analyzing functions effectively. They allow functions to be modified to fit real-world applications, making them essential tools in mathematics and problem-solving.

Downloadable PDF Guide for Function Transformations

A downloadable PDF guide is available, offering a concise summary of key transformation rules, examples, and practice problems. This resource is designed to help students and educators master function transformations, providing clear explanations and visual aids. The guide covers vertical shifts, horizontal shifts, reflections, stretches, and compressions, ensuring a comprehensive understanding. Perfect for homework support or classroom use, it serves as a handy reference for reinforcing learning and applying transformation rules effectively. Download it today to simplify your journey through function transformations!

Posts navigation

1 2
Scroll to top