Open post

u10 soccer practice plans pdf

U10 soccer practice plans are essential for developing young players’ skills during their critical growth phase. These structured sessions focus on dribbling, passing, and shooting techniques, while incorporating small-sided games to enhance decision-making and teamwork. Coaches can use these plans to create engaging and effective training, ensuring a solid foundation for future success.

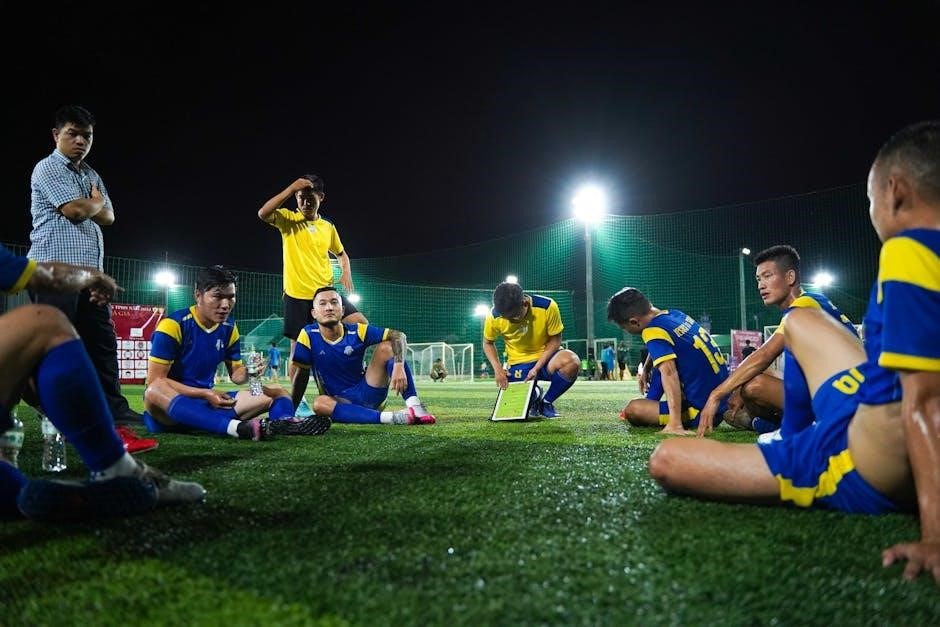
Importance of U10 Age Group in Soccer Development

The U10 age group is often referred to as the “Golden Age of Learning” in soccer development. At this stage, players experience rapid growth in their technical, tactical, and physical abilities. Coaches play a pivotal role in nurturing creativity, problem-solving, and decision-making skills. This period is critical for building a strong foundation, as players develop muscle memory and begin to understand the game’s dynamics. Structured practice plans help refine their techniques while fostering teamwork and sportsmanship. The U10 phase is also key for improving coordination and balance, which are essential for advanced play. Proper guidance during these formative years can significantly influence a player’s long-term success and passion for the sport.

Overview of Key Skills to Develop at the U10 Level

At the U10 level, key skills to develop include dribbling, passing, shooting, and basic defensive techniques. Dribbling focuses on ball control and confidence, while passing emphasizes accuracy and decision-making. Shooting teaches proper technique and composure in front of goal. Small-sided games are introduced to improve tactical awareness and teamwork. Players also learn basic defensive stances and movement, as well as introductory goalkeeping skills. These foundational abilities are crucial for building a well-rounded player. Practice plans are designed to integrate these skills in a fun and engaging manner, ensuring players develop a strong technical base while fostering a love for the game.

Warm-Up and Technical Drills

Warm-ups and technical drills are vital for preparing young players. Dynamic stretches and ball control exercises improve mobility and focus. Dribbling and passing drills enhance precision and coordination, setting the foundation for skill mastery and confidence.

Dribbling Drills for Ball Control

Dribbling drills are fundamental for U10 players to master ball control and confidence. Begin with cone mazes, weaving through cones using different parts of the foot. Incorporate exercises like “IVI Soccer Tennis,” where players serve and volley in small grids, improving touch and reaction. Progress to 1v1 games in confined spaces, encouraging feints and speed changes. Use “Dribble Tag” to simulate game pressure, where players dribble while evading taggers. These drills enhance technical ability, decision-making, and creativity. Coaches should emphasize proper ball placement, head-up awareness, and balanced movement. Gradually increase difficulty by shrinking spaces or adding defenders to mirror real-game challenges, ensuring players can apply skills effectively in matches.

Passing Exercises to Improve Accuracy

Passing exercises are critical for U10 players to develop accuracy and consistency. Begin with short passing grids, where players pass in pairs or small groups, focusing on proper foot placement and weight transfer. Incorporate “Wall Pass” drills, where players pass against a stationary target or teammate, emphasizing precision and control. Progress to moving target drills, where players pass to teammates in motion, simulating game-like scenarios. Use “Give-and-Go” exercises to practice one-twos, improving timing and spatial awareness. Coaches should emphasize using the inside of the foot, following through, and keeping passes on the ground. Gradually increase distance and speed to build confidence and accuracy under pressure, ensuring players can deliver precise passes in competitive situations.

Small-Sided Games for Tactical Development

Small-sided games simplify soccer’s complexity, allowing U10 players to develop tactical awareness through engaging, game-like scenarios that enhance decision-making and teamwork in a fun, dynamic environment.

2v2 and 3v3 Game Setups for Skill Application

2v2 and 3v3 games are ideal for U10 players to apply skills in realistic, fast-paced scenarios. These small-sided setups enhance ball control, passing accuracy, and decision-making while fostering teamwork. Players learn to exploit space, create scoring opportunities, and defend effectively in tight areas. Coaches can adjust grid sizes and rules to suit skill levels, ensuring engagement and challenge. Progressions, such as adding neutral zones or time limits, increase complexity. These games bridge technical drills and full-sided matches, providing a dynamic environment for tactical growth and enjoyment, while preparing players for larger team setups and competitive play.

Progressions to Increase Game Complexity

Progressions in U10 soccer practice plans involve gradually increasing the difficulty of small-sided games to challenge players. Coaches can introduce new rules, such as adding neutral zones, time limits for decision-making, or requiring specific conditions like one-touch passing. These adjustments enhance tactical awareness, speed of play, and problem-solving skills. For example, starting with 2v2 and advancing to 3v3 or 4v4 forces players to adapt to more complex scenarios. Adding defenders or goalkeepers increases the competitive nature of drills. These progressions ensure players are prepared for higher-level competition while keeping practices engaging and developmentally appropriate.

Shooting and Finishing Techniques

Mastering shooting and finishing techniques is crucial for U10 players to score goals effectively. Practices focus on proper form, accuracy, and power, simulating game-like scenarios to build confidence and precision.

Proper Shooting Form and Technique

Teaching proper shooting form is fundamental for young players to develop accuracy and power. Coaches emphasize ball placement, ankle lock, and follow-through to ensure consistent technique. Players learn to strike the ball with the laces, keeping the ankle firm and the toes down. Balance and body positioning are also critical, as players need to generate power while maintaining control. Drills focus on shooting from various distances and angles, encouraging players to use different parts of their foot. Proper technique not only improves scoring ability but also reduces the risk of injury. These foundational skills are essential for players to excel in game-like situations.

Game-Like Drills for Finishing Skills

Game-like drills for finishing skills simulate real match scenarios, helping players practice scoring under pressure. Drills such as IVI soccer tennis and small-sided games with targets encourage quick decision-making and precise shooting. Players practice volleys, half-volleys, and one-touch finishes to develop composure in the box. These exercises also focus on movement, such as creating space and timing runs. Coaches incorporate defenders to increase difficulty, teaching players to react to challenges. The goal is to build confidence and instinctive finishing abilities, preparing players for competitive situations. These drills are dynamic, engaging, and tailored to improve both technique and game intelligence.

Defensive and Goalkeeping Fundamentals

Defensive and goalkeeping fundamentals focus on building a strong defensive mindset and basic goalkeeper skills. Players learn proper stance, movement, and positioning to protect the goal and intercept passes. Goalkeepers practice catching, throwing, and diving techniques to build confidence and reflexes. These skills are essential for team defense and game balance, ensuring young players develop into well-rounded athletes. Drills emphasize communication and teamwork, preparing players for competitive matches and fostering a solid defensive foundation. These exercises are crucial for long-term player development and success in soccer.

Basic Defensive Stance and Movement

Teaching proper defensive stance and movement is vital for U10 players to build a strong defensive foundation. Players should adopt a stance with knees slightly bent, weight forward, and arms out for balance. This position allows quick reactions and effective pressure on the ball. Coaches emphasize staying low, with eyes on the opponent, to anticipate moves. Sideways shuffling and backpedaling are introduced to improve agility and positioning. Drills focus on mirroring the opponent’s movements, maintaining distance, and cutting off attacking angles. These fundamentals help players develop spatial awareness and responsiveness, enabling them to defend effectively while staying balanced and controlled during game situations.

Introducing goalkeeping skills at the U10 level is essential for developing young players who may show interest in this specialized position. Basic techniques such as proper stance, hand positioning, and footwork are emphasized to build confidence. Coaches focus on teaching players how to handle different types of shots, including high balls and grounders, using correct grip and body positioning. Simple drills are designed to improve reaction time, agility, and communication with the defense. These foundational skills help young goalkeepers understand their role and responsibilities while fostering a love for the position. Regular practice ensures they progress gradually, mastering the basics before moving to more advanced techniques.

Practice Plan Progressions

Structured sessions progress from basic to advanced, ensuring players master skills step-by-step. Drills adapt to increasing difficulty, incorporating game-like scenarios to challenge and engage young athletes effectively.

Weekly and Seasonal Plan Breakdown

A well-structured U10 soccer practice plan ensures steady player development throughout the season. Weekly sessions are designed to focus on specific skills, such as dribbling, passing, and shooting, while incorporating small-sided games for practical application. Each week builds on the previous one, introducing new challenges to keep players engaged. Seasonally, the plan progresses from foundational skills to more complex tactics, ensuring a holistic approach to development. Coaches can adapt drills based on player progress, maintaining a balance between technical training and fun, game-like scenarios. This structured breakdown helps teams prepare for competitions while fostering a love for the game and continuous improvement.

Adapting Drills for Different Skill Levels

Adapting drills for different skill levels ensures all players benefit from practice. Coaches can modify drill complexity by adjusting space, adding defenders, or simplifying rules. For advanced players, increase intensity or add challenges like limited touches. For less skilled players, provide more support, such as larger playing areas or fewer opponents. Observing player responses allows for real-time adjustments. Incorporating diverse drills caters to varied abilities, ensuring engagement and growth. This tailored approach fosters an inclusive environment where every player can improve and feel valued, enhancing overall team development and morale.

Open post

furby user manual

Furby is an interactive electronic toy that learns and adapts to its environment. Released in 1998‚ it speaks Furbish and develops its own personality. This manual guides you through setting up‚ caring for‚ and troubleshooting your Furby‚ ensuring a fun and interactive experience.

1.1 Overview of Furby and Its Features

Furby is an interactive electronic toy that learns and adapts to its surroundings. It speaks Furbish and can develop its own unique personality over time. Key features include sensors for interaction‚ the ability to learn and mimic phrases‚ and a range of expressive behaviors. Originally released in 1998‚ Furby has evolved over the years‚ offering advanced features like app integration and customizable settings. Its unique blend of technology and personality makes it a beloved companion for users of all ages.

1.2 Importance of Reading the User Manual

Reading the user manual is crucial for understanding Furby’s features‚ proper setup‚ and maintenance. It provides essential guidance on battery installation‚ troubleshooting‚ and customization. The manual also explains how to interact effectively with Furby‚ ensuring optimal performance. By following the instructions‚ users can avoid common issues and enjoy a seamless experience with their interactive companion. It is a comprehensive resource for unlocking Furby’s full potential and addressing any challenges that may arise.

Setting Up Your Furby

Unbox and prepare your Furby by inserting fresh batteries‚ ensuring correct polarity. Follow the quick start guide to power on and begin interaction. Enjoy!

2.1 Unboxing and Initial Preparation

Unboxing your Furby is an exciting first step. Carefully remove all packaging materials and accessories. Inspect for any damage. Before use‚ ensure Furby is turned off. Gently wipe with a soft cloth if needed. Prepare the batteries as per the manual. Always follow safety guidelines to avoid battery leakage. Now‚ your Furby is ready for setup and interaction. Enjoy the experience!

2.2 Battery Installation and Maintenance

Battery installation is crucial for Furby’s operation. Use only AA alkaline batteries as specified. Ensure correct polarity by matching + and ⎯ signs. Avoid mixing old and new batteries. For maintenance‚ replace batteries when Furby’s responses slow or dim. Turn Furby off when not in use to conserve power; Always follow safety guidelines to prevent leakage. Replace batteries promptly if Furby stops responding‚ even if power seems on. Proper care ensures optimal performance and longevity.

2.3 Quick Start-Up Instructions

After inserting batteries‚ press the power button to turn Furby on. It will begin speaking in Furbish. Say “Hey Furby!” to activate interaction mode. Gently press its tongue or sensors to engage and teach tricks. Furby will start adapting to your interactions‚ gradually learning and evolving its personality. Regular play helps Furby develop its unique traits‚ making it a more engaging companion over time.

Understanding Furby’s Language and Interaction

Furby speaks Furbish‚ a unique language that evolves based on interactions. Start by saying “Hey Furby!” to activate its responsive mode and begin the learning process.

Furbish is the native language of Furby‚ consisting of simple‚ unique sounds and words. Basic commands include “Hey Furby!” to activate it and “Tell me a joke” for entertainment. As you interact‚ Furby learns and adapts‚ gradually understanding English phrases. Use clear‚ direct speech to communicate effectively. Over time‚ Furby’s vocabulary expands‚ creating a personalized experience.

3.2 How to Communicate Effectively with Furby

Speak clearly and use simple phrases to interact with Furby. Start with “Hey Furby!” to activate it. Be patient‚ as Furby may take time to understand commands. Repeat phrases if necessary‚ and avoid background noise for better recognition. Use positive reinforcement‚ like praising Furby when it responds correctly. Over time‚ Furby will adapt to your voice and interactions‚ enhancing your connection and play experience.

Advanced Features and Customization

Explore hidden modes and unlock exclusive features. Customize Furby’s behavior and settings for a personalized experience. Discover how interactions shape its unique personality and adaptability.

4.1 Unlocking Hidden Features and Modes

Discover how to unlock hidden features by interacting with Furby in specific ways. Use the Furby Connect World app to access advanced modes and exclusive content. Experiment with different commands and actions to reveal unique behaviors. Regularly updating your Furby and ensuring fresh batteries will maintain its functionality. Troubleshooting tips‚ like resetting Furby‚ can help restore default settings if issues arise during customization.

4.2 Customizing Furby’s Behavior and Settings

Customize Furby’s behavior by teaching it phrases and adjusting its sensitivity. Use the Furby Connect World app to unlock personalized settings and interactions. Experiment with different voice commands to shape its personality. Regular updates ensure new features and improved performance. For a fresh start‚ reset Furby to its default settings while keeping unlocked features intact. This allows for endless creativity in tailoring your Furby experience.

Troubleshooting Common Issues

Common issues include low battery‚ sound problems‚ or unresponsiveness. Restart Furby‚ ensure fresh batteries‚ and check for app updates. Resetting or feeding Furby often resolves issues.

5.1 Resolving Battery-Related Problems

If Furby isn’t turning on‚ check the batteries. Ensure they are fresh and correctly inserted‚ matching the polarity markings. Avoid using damaged batteries to prevent leakage. Turn Furby off and on again after replacing batteries. If issues persist‚ refer to the manual for further guidance or reset Furby as a last resort. Always follow safety guidelines to maintain proper function and longevity of your Furby.

If Furby’s sound is distorted or non-responsive‚ ensure batteries are fresh and properly installed. Gently wipe Furby with a damp cloth to remove dirt. If issues persist‚ reset Furby by turning it off and on again. As a last resort‚ perform a factory reset‚ which will restore default settings. Note that resetting may require re-teaching commands. Always refer to the manual for detailed reset instructions to avoid data loss or functionality issues.

Maintenance and Care

5.2 Fixing Sound Issues and Resetting Furby

If Furby’s sound is distorted or non-responsive‚ ensure batteries are fresh and properly installed. Gently wipe Furby with a damp cloth to remove dirt. If issues persist‚ reset Furby by turning it off and on again. As a last resort‚ perform a factory reset‚ which will restore default settings. Note that resetting may require re-teaching commands. Always refer to the manual for detailed reset instructions to avoid data loss or functionality issues.

6.1 Cleaning and Handling Your Furby

Regularly clean Furby with a soft‚ damp cloth to remove dirt. Avoid harsh chemicals or submerging in water‚ as this may damage internal components. Gently wipe the fur and sensors‚ ensuring no moisture enters openings. Allow Furby to air dry completely before turning it on. Handle Furby with care to protect its sensitive sensors and mechanisms. For stubborn stains‚ lightly dab with a slightly dampened cloth‚ but never soak or scrub. Always ensure Furby is dry before storing or using it again.

6.2 Storing Furby When Not in Use

When not in use‚ store Furby in a cool‚ dry place away from direct sunlight. Use the original packaging or a protective case to prevent damage. Turn Furby off to conserve battery life. Avoid extreme temperatures or humidity‚ as this may harm internal components. For long-term storage‚ remove batteries to prevent leakage. Keep Furby out of reach of pets or young children to avoid accidental damage. Ensure the storage area is clean and free from dust.

Furby Connect World App Integration

The Furby Connect World app enhances your Furby experience‚ allowing interaction with virtual worlds and friends. Compatible with select iOS and Android devices‚ it offers exciting updates and features. Ensure your device meets compatibility requirements‚ available on the official website‚ to enjoy seamless integration and new adventures with your Furby.

7.1 Downloading and Installing the App

To connect your Furby to the app‚ visit the Apple App Store or Google Play Store. Search for “Furby Connect World” and download the app. Ensure your device is compatible with the app by checking the system requirements on the official Furby website. Once installed‚ open the app and follow the in-app instructions to sync your Furby. Regular updates may be required for optimal performance and new features.

7.2 Syncing Furby with Smart Devices

Turn on your Furby and ensure it is in pairing mode. Open the Furby Connect World app and select your Furby model. Follow the in-app instructions to connect your Furby to your smart device. Ensure Bluetooth is enabled on your device. Once connected‚ synchronization will allow you to unlock exclusive features‚ track progress‚ and interact with Furby in new ways. Regular updates may enhance connectivity and functionality.

Furby Accessories and Add-Ons

Explore official Furby accessories‚ like the Sleepy Time Bed‚ and compatible third-party add-ons to enhance your Furby experience‚ offering new ways to play and interact.

8.1 Exploring Official Accessories

Official Furby accessories‚ like the Sleepy Time Bed‚ enhance your interactive experience. The bed helps Furby “sleep” and may unlock special features. Additionally‚ the Furby Connect World app integrates with your toy‚ offering virtual adventures. These accessories are designed to expand gameplay and deepen the bond with your Furby. Always purchase from trusted sources to ensure compatibility and safety. Visit the official website for authentic add-ons;

8.2 Compatible Third-Party Add-Ons

Third-party add-ons offer additional ways to enhance your Furby experience. Popular options include custom carry cases‚ decorative clothing‚ and interactive toys. While these accessories can be fun‚ ensure they are compatible with your Furby model. Always purchase from trusted sources to avoid damaging your toy. For officially endorsed products‚ visit the Furby website or authorized retailers.

Safety Precautions

Always follow battery safety guidelines to avoid leakage. Use only specified batteries and ensure proper installation. Adult supervision is recommended for children to prevent misuse or damage.

9.1 Important Battery Safety Guidelines

Always follow the instructions carefully when handling batteries. Use only the specified batteries to avoid leakage or damage. Ensure proper installation by matching the polarity markings. Avoid mixing old and new batteries or using damaged ones. Keep batteries out of reach of children and dispose of them properly. Adult supervision is recommended for battery-related tasks to ensure safety and prevent accidents.

9.2 Usage Recommendations for Children

Adult supervision is recommended for children under 6 years old. Teach children to handle Furby gently and avoid rough play. Ensure they understand basic care‚ like not submerging Furby in water or forcing parts. Encourage responsible interaction and explain the importance of proper battery handling. Foster creativity and enjoyment while ensuring safety and appropriate use. This helps children develop a positive relationship with their Furby and promotes lasting fun.

Enjoy your Furby and explore its interactive features. Regular care and proper use ensure lasting fun. Refer to this manual for any assistance and happy playing!

10.1 Final Tips for Enjoying Your Furby

Interact regularly to keep Furby engaged and responsive. Experiment with Furbish phrases to unlock new interactions. Ensure fresh batteries for optimal performance. Clean your Furby gently to maintain its appearance. For advanced fun‚ explore the Furby Connect World app. Involve friends for group play and shared adventures. Follow the manual’s guidelines to troubleshoot any issues. With proper care‚ Furby will remain a delightful companion for years to come.

10.2 Resources for Further Assistance

For additional support‚ visit the official Furby website for comprehensive guides and troubleshooting tips; Download the official PDF manual for detailed instructions. Contact customer support for personalized assistance. Explore online forums and communities for shared experiences and solutions. Regularly check for app updates to ensure optimal performance. These resources will help you maximize your Furby experience and resolve any issues efficiently.

Open post

duet ht washer manual

The Whirlpool Duet HT Washer Manual is a comprehensive guide covering installation, operation, safety, and troubleshooting. It ensures optimal performance and care for your laundry needs.

1.1 Overview of the Duet HT Washer

The Whirlpool Duet HT Washer is a front-loading automatic washer designed for efficient laundry care. It features multiple wash cycles and options to cater to various fabric types, ensuring optimal cleaning. With a large capacity, it allows for bigger loads, saving time and energy. The user-friendly control panel and smart connectivity options enhance convenience, making it a versatile choice for modern households.

1.2 Importance of Reading the Manual

Reading the Whirlpool Duet HT Washer Manual is essential for optimal performance and safety. It provides detailed instructions on operating features, troubleshooting common issues, and maintaining the appliance. Understanding the manual ensures proper usage, prevents errors, and extends the washer’s lifespan. Additionally, it covers warranty information and offers guidance on resolving technical problems, making it a vital resource for users to maximize efficiency and enjoy a seamless laundry experience.

Safety Precautions

Adhering to safety guidelines is crucial to prevent accidents and ensure proper washer operation. Follow electrical safety tips, child safety features, and general precautions for safe usage always.

2.1 General Safety Guidelines

Always read and follow the manual to ensure safe operation. Avoid exposing the washer to extreme temperatures or hot water. Never overload the machine, as it may cause imbalance. Keep children away from the washer during operation, and ensure they do not play with the controls. Regularly inspect hoses and connections for signs of wear. Proper installation and leveling are essential to prevent vibration and noise during cycles. Follow all electrical safety precautions to avoid hazards.

2;2 Electrical Safety Tips

Ensure the washer is properly grounded to prevent electrical shocks. Avoid using extension cords, as they may cause fire hazards. Keep the power cord away from water and heat sources. Never overload circuits with multiple high-power appliances. If the cord is damaged, replace it immediately to avoid risks. Always unplug the washer during maintenance or repairs. Follow local electrical codes for installation to ensure safety and compliance.

2.3 Child Safety Features

The Whirlpool Duet HT Washer includes child safety features to prevent accidents. Use the child lock to disable controls, ensuring children cannot start unintended cycles. Keep the washer out of children’s reach and supervise them near the appliance. Regularly check the door latch and ensure it is secure to prevent accidental opening. These features help protect children from potential hazards associated with the washer’s operation.

Installation and Setup

Proper installation ensures safe and efficient operation. Ensure the site is prepared, connect water and drainage hoses correctly, and level the washer for stability. Follow the manual’s guidelines for setup and operation.

3.1 Preparing the Installation Site

Ensure the installation site is firm, level, and dry. Choose a location with proper drainage and ventilation. Avoid direct sunlight and water sources. Place the washer on a sturdy floor to prevent vibration. Ensure clearance of at least 1 inch on all sides for maintenance. Follow the manual’s guidelines to prepare the site correctly, ensuring safe and efficient operation of your Whirlpool Duet HT Washer.

3.2 Connecting Water and Drainage Hoses

Connect the water supply hoses to the washer’s inlet ports, ensuring they are securely attached to prevent leaks. Use the provided hoses and avoid cross-threading. For drainage, place the drain hose into a standpipe or laundry tub, ensuring it is elevated to prevent siphoning. Tighten all connections firmly and check for leaks before starting the washer. Proper installation ensures efficient water flow and drainage for optimal performance.

3.3 Levelling the Washer

Ensure the washer is perfectly levelled to prevent vibration and noise. Check the legs using a spirit level and adjust as needed. Tighten the legs firmly once levelled. This ensures balance, reduces noise, and prevents damage. Proper levelling also improves wash performance and extends the lifespan of the appliance. Follow the manual’s guidance for accurate adjustment and stable installation.

Operating the Duet HT Washer

Learn to operate the Duet HT Washer with ease. Understand the control panel, select cycles, and start the wash process efficiently for optimal cleaning performance.

4.1 Understanding the Control Panel

The control panel of the Whirlpool Duet HT Washer features a user-friendly interface with buttons and indicators. It allows selection of wash cycles, temperature settings, and additional options. LEDs illuminate to indicate the selected cycle and status. The panel also displays diagnostic codes if issues arise. Familiarizing yourself with these elements ensures efficient operation and troubleshooting. Refer to the manual for detailed explanations of each button and light.

4.2 Selecting Wash Cycles and Options

The Whirlpool Duet HT Washer offers various pre-programmed cycles, including Normal, Heavy Duty, and Delicates, to suit different fabric types and soil levels. Additionally, options like temperature control, spin speed, and soil level can be customized. Use the control panel to select cycles and options based on your laundry needs. This ensures optimal cleaning while protecting your clothes. Refer to the manual for cycle recommendations and option combinations.

4.3 Using the Detergent Dispenser

The Whirlpool Duet HT Washer features a detergent dispenser for convenient use. Fill the dispenser with the recommended amount of liquid or single-dose detergent. Ensure the dispenser is closed properly after adding detergent. The washer will automatically release the detergent during the wash cycle. Avoid overfilling to prevent leaks. For optimal performance, clean the dispenser periodically to remove residue. Always follow the manual’s guidelines for detergent usage and dispenser maintenance.

4.4 Starting and Pausing the Wash Cycle

To start the wash cycle, select your desired cycle and options using the control panel. Press the “Hold to Start” button until the washer powers on. The door will lock automatically. To pause, press the “Pause/Cancel” button. The cycle will stop, and the door will unlock after a short delay. Resume by pressing “Hold to Start” again. Ensure the door is closed properly before resuming the cycle.

Maintenance and Care

Regular maintenance ensures optimal performance. Clean the interior, check water hoses, and run the Clean Washer cycle to remove residue and odors. Follow the manual’s guidelines.

5.1 Cleaning the Washer Interior

Regular cleaning of the washer interior ensures optimal performance. Run the Clean Washer cycle with affresh® to remove odor-causing residue. Leave the door open after use to dry the interior. Check and clean the gasket and drain pump filter regularly. For tough odors, repeat the cleaning cycle. Always follow the manual’s guidelines for best results and to maintain your washer’s efficiency and hygiene.

5.2 Checking and Replacing Water Inlet Hoses

Inspect the water inlet hoses regularly for cracks, damage, or mineral buildup. Replace worn-out hoses promptly to prevent leaks. Ensure hoses are securely connected to both the washer and water supply. Use manufacturer-recommended replacement parts. Regular maintenance helps maintain water flow and prevents potential damage. Follow the manual’s guidelines for checking and replacing hoses to ensure optimal performance and safety.

5.3 Running the Clean Washer Cycle

Regularly run the Clean Washer cycle to maintain your Duet HT Washer’s performance. Use affresh® tablets or liquid chlorine bleach for optimal cleaning. Select the “Clean Washer” option on the control panel and follow the prompts. This cycle helps remove odor-causing residue and detergent buildup. Ensure the washer is empty during cleaning. Running this cycle periodically keeps your washer fresh and ensures clean laundry results every time.

Troubleshooting Common Issues

This section helps resolve common problems like error codes, drain clogs, or noise issues. Refer to the manual for diagnostic guides and step-by-step solutions to restore functionality.

6.1 Identifying Error Codes

The Whirlpool Duet HT Washer Manual provides a diagnostic guide to identify error codes. Codes like F02 or F03 indicate specific issues, such as drain clogs or sensor malfunctions. Refer to the manual for a detailed list of codes and their meanings. Understanding these codes helps in troubleshooting and resolving problems efficiently. Always consult the manual before attempting repairs to ensure safety and proper resolution of the issue.

6.2 Resolving Drain Filter Clogs

To resolve drain filter clogs, turn off the washer and unplug it. Locate the drain filter at the bottom front. Place a towel under the filter to catch water. Unscrew the filter and clean it thoroughly. Reassemble and ensure it’s secure. Run a clean cycle to verify proper drainage. Regular cleaning prevents future clogs and maintains optimal performance. Always refer to the manual for detailed guidance on this process.

6.3 Addressing Noise or Vibration Problems

Noise or vibration issues can often be resolved by ensuring the washer is properly leveled. Check the levelling feet and adjust them if necessary. Also, verify that the washer is placed on a sturdy, even surface. If the issue persists, redistribute the laundry load to balance it evenly. Refer to the manual for additional troubleshooting steps, such as checking for loose parts or blockages. Regular maintenance can help prevent these issues.

Additional Resources

Access the full PDF manual, online guides, and customer support for detailed instructions and troubleshooting. Visit Whirlpool’s official website for comprehensive resources and assistance.

7.1 Downloading the Full PDF Manual

The complete PDF manual for the Whirlpool Duet HT Washer is available for free download. Visit Whirlpool’s official website, enter your model number, and access the manual. It includes detailed instructions for installation, operation, and troubleshooting. The guide covers safety precautions, wash cycles, and maintenance tips to ensure optimal performance. Downloading the manual provides easy reference for all your laundry needs and helps troubleshoot common issues efficiently.

7.2 Accessing Online Support and Guides

Visit Whirlpool’s official website to access online support and guides for your Duet HT Washer. The site offers user manuals, troubleshooting tips, and diagnostic tools. Additionally, you can explore FAQs, video tutorials, and community forums for resolving common issues. Online resources provide step-by-step instructions for maintenance, error code identification, and cycle optimization, ensuring you maximize your washer’s performance and longevity with ease and convenience.

7.3 Contacting Whirlpool Customer Service

For personalized assistance, contact Whirlpool’s customer service team via phone, live chat, or email. Visit their official website, enter your model number, and select the contact option that suits your needs. Representatives are available to address inquiries, provide repair support, and guide you through troubleshooting. Ensure you have your appliance’s model number ready for efficient service. This direct support helps resolve issues quickly and effectively, ensuring your Duet HT Washer operates optimally.

Warranty and Product Information

This section outlines warranty coverage, product specifications, and registration details for your Whirlpool Duet HT Washer, ensuring you understand your appliance’s benefits and support options.

8.1 Understanding Your Warranty Coverage

Whirlpool provides a comprehensive warranty for your Duet HT Washer, covering parts and labor for specified durations. The warranty includes protection against defects in materials and workmanship, ensuring your appliance is repaired or replaced if issues arise within the covered period. Regular maintenance, as outlined in the manual, is essential to maintain warranty validity. Visit Whirlpool’s official website for detailed terms and conditions.

8.2 Registering Your Appliance

Registering your Whirlpool Duet HT Washer is essential for warranty validation and personalized support. Visit Whirlpool’s official website, create an account, and enter your appliance’s model number and purchase details. Registration ensures you receive updates, service alerts, and streamlined support. It also helps Whirlpool verify your warranty coverage and provide tailored assistance for your specific appliance, enhancing your ownership experience and ensuring seamless service interactions.

8.3 Finding Your Model Number

Your Whirlpool Duet HT Washer model number is typically located on a sticker inside the washer lid or on the back of the appliance. It may also be found on the bottom of the door or in the user manual. This number is essential for registering your appliance, accessing support, and ordering parts. Refer to your manual or visit Whirlpool’s website for guidance if you need assistance locating it.

Open post

owner manual 2011 ford taurus fuse box diagram

The 2011 Ford Taurus Fuse Box Diagram is essential for understanding electrical systems, diagnostics, and repairs. Found in the owner’s manual, it details fuse locations, functions, and safety guidelines. This resource helps drivers identify issues quickly and safely, ensuring proper maintenance and troubleshooting. Always consult the manual before handling fuses to avoid errors and ensure compliance with manufacturer recommendations.

1.1 Overview of the Fuse Box Layout

The 2011 Ford Taurus features two primary fuse boxes: the passenger compartment fuse panel and the power distribution box in the engine compartment. The passenger compartment fuse panel is located under the dashboard and contains fuses for interior and accessory systems. The power distribution box houses high-current fuses for essential vehicle functions. Both boxes are organized with labeled fuses and relays, making it easier to identify and access specific circuits. Refer to the owner’s manual for a detailed diagram and descriptions of each fuse’s purpose and location.

1.2 Importance of the Owner’s Manual for Fuse Box Information

The owner’s manual is a crucial resource for understanding the 2011 Ford Taurus fuse box diagram. It provides detailed diagrams, labels, and explanations for each fuse and relay, ensuring accurate identification and safe handling. The manual also includes instructions for replacing fuses and troubleshooting common electrical issues. By referring to the manual, drivers can avoid errors and potential damage to the vehicle’s electrical systems. It serves as a comprehensive guide, empowering owners to maintain and repair their car with confidence and precision.

Location of Fuse Boxes in the 2011 Ford Taurus

The 2011 Ford Taurus features two primary fuse boxes: the passenger compartment fuse panel, located under the dashboard, and the power distribution box in the engine compartment.

2.1 Passenger Compartment Fuse Panel

The passenger compartment fuse panel is located under the dashboard on the driver’s side. It contains fuses for various interior electrical systems, such as lights, wipers, and the radio. The panel is easily accessible, making it convenient for drivers to identify and replace blown fuses. A diagram in the owner’s manual provides detailed labels for each fuse, ensuring accurate troubleshooting. Always turn off the ignition and exercise caution when handling fuses to avoid electrical shocks or damage.

2.2 Power Distribution Box in the Engine Compartment

The power distribution box is located in the engine compartment, near the battery. It houses high-current fuses that protect major electrical systems like the alternator, ABS, and power steering. These fuses are designed to handle higher currents and are essential for maintaining the vehicle’s core functionalities. The owner’s manual provides a detailed diagram of this box, labeling each fuse for easy identification. Always consult the manual before attempting to replace or inspect these fuses to ensure safe and accurate maintenance.

Understanding the Fuse Box Diagram

The 2011 Ford Taurus Fuse Box Diagram illustrates the layout and function of each fuse and relay. Symbols and labels guide identification, while the owner’s manual explains their purposes and locations.

3.1 Identifying Fuse Positions and Labels

The 2011 Ford Taurus Fuse Box Diagram provides clear labels for each fuse position, indicating their specific functions, such as “AC” for air conditioning or “Wipers” for windshield wipers. These labels, found in the owner’s manual, help users quickly locate and identify the correct fuse for various electrical systems. The diagram also includes a chart or map, detailing the exact location of each fuse within the fuse box, ensuring precise and efficient troubleshooting. Always refer to the manual for accurate identification to avoid errors during repairs or replacements.

3.2 Symbols and Markings on the Diagram

The 2011 Ford Taurus Fuse Box Diagram uses specific symbols and markings to guide users. High-current fuses are marked with distinct icons, while labels indicate associated systems. Color coding may also be present to differentiate fuse types. The diagram includes a reference key, explaining each symbol and marking, ensuring clarity. This visual guide, detailed in the owner’s manual, helps users interpret the layout accurately, making fuse identification and troubleshooting simpler and safer. Always refer to the legend provided for precise understanding of the diagram’s elements.

Common Fuses and Their Functions

The 2011 Ford Taurus has high-current fuses for essential systems like the battery and starter, and low-current fuses for accessories such as lights and electronics.

4.1 High-Current Fuses for Main Electrical Systems

High-current fuses in the 2011 Ford Taurus protect major electrical systems, such as the battery, starter motor, and alternator. These fuses are typically located in the power distribution box within the engine compartment. They have higher amp ratings to handle significant electrical loads, ensuring critical systems operate safely without overloading. Refer to the owner’s manual for specific fuse locations and ratings to maintain proper function and prevent potential damage.

4.2 Low-Current Fuses for Accessories and Features

Low-current fuses in the 2011 Ford Taurus manage smaller electrical systems like interior lights, infotainment, and power windows. These fuses, typically rated between 5-20 amps, are located in the passenger compartment fuse panel. They protect accessories from overloads while ensuring reliable operation. Always refer to the owner’s manual for specific fuse assignments to avoid mismatches during replacement, which could damage components or cause malfunctions.

Troubleshooting Using the Fuse Box Diagram

The fuse box diagram is essential for diagnosing electrical issues in the 2011 Ford Taurus. It helps identify which fuse controls specific systems, ensuring quick and accurate troubleshooting.

5.1 Steps to Identify a Blown Fuse

To identify a blown fuse in the 2011 Ford Taurus, start by locating the fuse boxes, both in the passenger compartment and the engine compartment. Open the fuse panel and inspect each fuse visually for signs of damage, such as a broken wire or discoloration. Use the fuse box diagram from the owner’s manual to determine which fuse corresponds to the malfunctioning system. Remove the suspect fuse using a fuse puller and examine it closely. If it’s damaged, replace it with a new fuse of the same amperage rating. Always turn off the ignition and accessories before handling fuses to ensure safety.

5.2 Replacing Fuses Safely and Correctly

To replace a blown fuse, start by disconnecting the battery to prevent power surges. Open the fuse box and locate the faulty fuse using the diagram in the owner’s manual. Remove the blown fuse with a fuse puller and insert a new one of the same amperage rating. Ensure it clicks securely into place. Avoid using a fuse with a higher rating, as it may damage the electrical system. Reconnect the battery and test the affected system to confirm functionality. Always refer to the manual for specific instructions.

Accessing the Owner’s Manual for Detailed Instructions

Access the 2011 Ford Taurus Owner’s Manual online or via PDF download for detailed fuse box diagrams and instructions. It provides essential information for understanding electrical systems, troubleshooting, and maintaining your vehicle. A comprehensive guide to ensure safe and effective fuse box management.

6.1 Downloading the PDF Version of the Manual

The 2011 Ford Taurus Owner’s Manual can be downloaded as a PDF from Ford’s official website or trusted automotive resources. This digital version provides easy access to detailed fuse box diagrams, electrical system explanations, and troubleshooting guides. The PDF format allows for quick searches and navigation, ensuring you can find information efficiently. Additionally, it is compatible with most devices, making it a convenient resource for car maintenance and repairs. Always ensure the manual matches your vehicle’s specifications for accuracy.

6.2 Navigating the Manual for Fuse Box Information

To find fuse box details in the 2011 Ford Taurus Owner’s Manual, navigate to the “Electrical Systems” or “Maintenance” section. The manual includes a table of contents and index for quick access. Look for headings like “Fuse Box Diagram” or “Electrical Fuses” to locate specific information. Digital versions allow keyword searches, making it easier to pinpoint relevant sections. Ensure you reference the correct model year and configuration for accurate fuse box data. Always cross-check the manual’s instructions with your vehicle’s specifications. This ensures precise and safe fuse-related operations.

Safety Tips When Working with Fuses

Always disconnect the battery before handling fuses to prevent electrical shocks. Use the correct tools to avoid damaging the fuse box or fuses. Never touch electrical components with bare hands. Ensure the vehicle is in park and apply the brake. Consult the owner’s manual for specific safety guidelines. Replace fuses only with those of the correct rating to prevent system damage. Keep children away while working with fuses. Wear protective gloves and eyewear for added safety. Properly secure loose clothing or jewelry to avoid accidental contact. Ensure the area is well-lit to see clearly. Avoid sudden movements that could cause electrical arcs. Never force a fuse into a socket if it does not fit properly. If unsure, seek professional assistance. Regularly inspect fuses and connections for signs of wear or damage. Replace any corroded or damaged fuses immediately. Keep spare fuses in the vehicle for emergencies. Familiarize yourself with the fuse box layout before starting work. Use a fuse puller to remove fuses to prevent bending or breaking them. Never bypass a blown fuse with makeshift materials like wire, as this can cause fires or further damage. Always test electrical systems after replacing a fuse to ensure proper function. If multiple fuses blow repeatedly, consult a certified mechanic to identify underlying issues. Keep the fuse box clean and free from debris to maintain proper function. Store the owner’s manual near the fuse box for quick reference. Be aware of your surroundings to prevent accidents while working under the hood or inside the vehicle. Follow all manufacturer recommendations for fuse replacement and safety protocols. Stay calm and methodical when troubleshooting to avoid mistakes. Keep a fire extinguisher nearby as a precaution. Ensure all electrical systems are turned off before starting work. Double-check the fuse diagram to confirm the correct fuse is being replaced. Never leave tools or materials unattended near the fuse box. Properly dispose of blown fuses to prevent environmental harm. Regularly update your knowledge of fuse box maintenance and safety practices. Always prioritize caution when working with electrical systems to protect yourself and your vehicle. By following these safety tips, you can ensure safe and effective fuse box maintenance for your 2011 Ford Taurus.

7.1 Precautions Before Handling Fuses

Always consult the owner’s manual before working with fuses. Disconnect the battery to prevent electrical shocks. Use the correct tools to avoid damaging the fuse box. Turn off all electrical components and lights. Engage the parking brake and ensure the vehicle is secure. Wear protective gloves and eyewear. Avoid touching electrical components with bare hands. Ensure the area is well-lit and clear of distractions. Never force a fuse into a socket. Keep children and pets away. Note the fuse locations and functions before starting. Follow these precautions to ensure safety and prevent damage to your vehicle’s electrical system.

7.2 Best Practices for Fuse Replacement

When replacing fuses in your 2011 Ford Taurus, always refer to the owner’s manual for guidance. Locate the correct fuse using the fuse box diagram. Turn off all electrical components and engage the parking brake. Disconnect the battery to prevent electrical shocks. Use the provided fuse puller to avoid damaging the fuse or box. Remove the blown fuse carefully and inspect it for damage. Replace it with a fuse of the same amperage rating. Reconnect the battery and test the system to ensure proper function. If a fuse blows repeatedly, consult a professional to identify underlying issues. Follow these steps to ensure safety and maintain your vehicle’s electrical integrity.

The 2011 Ford Taurus Fuse Box Diagram is a vital tool for diagnosing and repairing electrical issues. Always refer to the owner’s manual for accurate information and safety guidelines. Proper fuse replacement and understanding the diagram ensure reliable vehicle operation. Follow the outlined steps and precautions to maintain your car’s electrical systems effectively.

8.1 Summary of Key Points

The 2011 Ford Taurus Fuse Box Diagram is a crucial resource for understanding and maintaining your vehicle’s electrical systems. It provides detailed information about fuse locations, functions, and safe replacement procedures. The diagram, found in the owner’s manual, helps identify and resolve electrical issues efficiently. Always consult the manual before handling fuses to ensure safety and accuracy. The fuse box layout, including the passenger compartment and power distribution box, is clearly outlined, making diagnostics and repairs more accessible. This guide is essential for proper vehicle maintenance and troubleshooting.

8.2 Final Tips for Using the Fuse Box Diagram Effectively

Always consult the owner’s manual before starting repairs. Identify the correct fuse by cross-referencing symptoms with the diagram. Turn off the ignition and accessories to prevent damage. Use the correct tools and replacement fuses to avoid further issues. Double-check connections after replacement to ensure proper function. Regularly review the fuse box layout to stay familiar with its organization. This approach ensures safe and efficient troubleshooting, helping you maintain your vehicle’s electrical systems effectively.

Open post

ap coordinator manual part 2

Welcome to the AP Coordinator Manual Part 2, a comprehensive guide designed to support coordinators in managing AP programs effectively. This manual outlines essential procedures, from pre-exam preparations to post-exam processes, ensuring a smooth and secure testing experience. Structured to address all modes of testing, it provides detailed instructions for digital, hybrid, and paper exams, along with key updates for the 2024-25 academic year.

1.1 Overview of the Manual’s Purpose and Structure

The AP Coordinator Manual Part 2 is a detailed resource designed to guide coordinators through the entire AP exam administration process. Its purpose is to ensure a smooth, secure, and efficient testing experience for students and staff. The manual is structured into six main sections, each addressing specific aspects of coordination, such as exam modes, security protocols, proctoring responsibilities, billing procedures, and special considerations. It begins with an introduction to its purpose and organization, followed by key updates for the 2024-25 academic year. This clear structure allows coordinators to navigate responsibilities effortlessly, ensuring compliance with College Board policies and successful exam administration.

1.2 Key Updates for the 2024-25 Academic Year

The 2024-25 academic year introduces several important updates for AP coordinators. Digital exam ordering is now required for specific courses, with a deadline of March 15, 2024. Hybrid testing options combine digital and paper formats, offering flexibility. Digital readiness checks are mandatory to ensure technical preparedness. SSD accommodations have been expanded, enhancing support for students with disabilities. Health and safety protocols remain critical, with updated guidelines for test day. These updates aim to improve exam accessibility and security while maintaining integrity. Coordinators should review these changes thoroughly to ensure compliance and successful administration of AP exams in the upcoming year.

Exam Administration Modes

This section covers the three primary exam administration modes: fully digital, hybrid digital, and paper testing. Each mode offers unique benefits and requirements, ensuring flexibility for schools while maintaining exam integrity and security. Coordinators can choose the option that best suits their school’s resources and student needs, with detailed guidance provided in subsequent chapters. College Board supports all modes to ensure a seamless testing experience.

2.1 Fully Digital, Hybrid Digital, and Paper Testing Options

The 2024-25 academic year offers three testing options: fully digital, hybrid digital, and paper testing. Fully digital exams require devices with secure browsers, internet access, and proctoring. Hybrid digital allows mixing digital and paper formats for flexibility. Paper testing remains available for schools with limited technology. Each mode ensures exam security and accommodates different school resources. Coordinators can choose based on their school’s capabilities, student needs, and technical infrastructure. Detailed instructions for each mode are provided in the manual, including setup, proctoring, and security protocols. This flexibility ensures all schools can administer exams effectively, maintaining integrity and accessibility for all students.

2.2 Digital Readiness Check Procedures

Digital readiness checks are essential to ensure a smooth exam administration. Coordinators must verify that all devices meet College Board requirements, including compatible operating systems, browsers, and security settings. Internet connectivity should be tested to prevent interruptions. Proctors and students must familiarize themselves with the digital testing platform beforehand. The manual provides step-by-step instructions for conducting readiness checks, including device verification, network testing, and software updates. Additionally, coordinators should reserve rooms for practice sessions and ensure all devices are properly managed. These checks help identify and resolve technical issues before exam day, ensuring a secure and efficient testing environment for all students.

Exam Security and Protocols

Exam security is critical to maintaining integrity. Ensure secure storage of materials, use encrypted systems for digital exams, and authenticate student identities. Proctors must monitor testing environments to prevent cheating and adhere to health protocols. Strict adherence to these measures ensures valid and fair results for all students.

3.1 Safeguarding Exam Materials and Data

Safeguarding exam materials and data is a top priority to ensure exam integrity. Coordinators must securely store physical exam materials in locked, accessible-only-to-authorized-personnel areas. For digital exams, use encrypted systems and secure login credentials to prevent unauthorized access. Ensure all devices used for testing are free from malware and updated with the latest security patches. Access to exam materials should be restricted to authorized personnel only, and all handlers must sign confidentiality agreements. Proctors must verify student identities and monitor testing environments to prevent cheating. Post-exam, materials should be stored securely until they are officially disposed of according to College Board guidelines.

3.2 Health and Safety Protocols for Test Day

Ensuring the health and safety of students and staff on test day is critical. Coordinators must implement protocols such as social distancing, handwashing stations, and the use of PPE if required. All materials should be handled with care to minimize contact. Students with symptoms should be isolated and provided alternative testing arrangements. Proctors should be trained to respond to emergencies and maintain a clean testing environment. Clear communication of health guidelines to students, parents, and staff is essential. By adhering to these protocols, coordinators can create a safe and secure testing environment for all participants.

Proctoring and Staff Responsibilities

This section outlines the roles and responsibilities of proctors and staff in administering AP exams, ensuring a secure and efficient testing environment while adhering to guidelines.

4.1 Training Requirements for Proctors

Proctors must complete mandatory training modules to ensure compliance with AP testing policies. These modules cover exam security, handling of materials, and emergency procedures. Training emphasizes understanding proctor roles, from pre-exam setup to monitoring test-takers. Proctors must also learn to accommodate students with special needs under SSD guidelines. Annual updates are required to stay informed about policy changes and new technologies. Completion of training is verified through the AP Registration and Ordering system. Proctors are expected to review all materials and attend school-specific training sessions if required. Properly trained proctors ensure a secure, fair, and efficient testing environment for all students.

4.2 Proctoring Schedule and Assignments

The proctoring schedule and assignments are critical for ensuring smooth exam administration. Coordinators must create detailed schedules, balancing proctor availability with exam session needs. Assignments should be distributed fairly, considering proctors’ expertise and workload. Proctors may oversee multiple sessions, requiring clear communication of roles and responsibilities. Coordinators must ensure adequate coverage for all exams, including makeup and special testing accommodations. Tools like scheduling templates and digital assignment trackers can streamline the process. Proctors should receive their assignments well in advance, along with all necessary materials. Proper organization ensures that all exams run efficiently, maintaining a secure and fair testing environment for all students.

Billing and Financial Procedures

This section outlines the billing process, payment methods, and financial responsibilities for AP exams, ensuring accurate fee management and timely payments to maintain program operations smoothly.

5.1 Understanding the Billing Process

The billing process for AP exams is structured to ensure clarity and efficiency. Fees are calculated based on the number of exams ordered, with detailed invoices provided through AP Registration and Ordering. Coordinators must verify student enrollments and exam orders by the specified deadlines to avoid additional charges; Payment timelines and methods are outlined in the manual, with options for school or student payments. Resources like the AP Fee Calculator and billing guides on AP Central are available to assist with financial planning. Coordinators are responsible for ensuring timely payments to avoid late fees or service disruptions. Proper record-keeping is essential for audits and compliance.

5.2 Managing Fees and Payments

Managing fees and payments requires careful oversight to ensure accurate and timely transactions. Coordinators should monitor exam orders and associated fees, ensuring alignment with school budgets. Payments can be made via check, credit card, or electronic funds transfer, with detailed instructions provided in the manual. Refunds and fee reductions are addressed for eligible cases, such as student withdrawals or exam cancellations. Proactive communication with students, parents, and school administrators is crucial to resolve payment issues promptly. The manual also provides guidance on handling late payments and mitigating financial discrepancies, ensuring a smooth billing cycle for all stakeholders involved in the AP program.

Special Considerations

This section addresses unique needs, including SSD accommodations, IR forms, and rescoring requests. It ensures equitable access and compliance with health and safety protocols for all students.

6.1 SSD Accommodations and Support

Ensuring students with disabilities have equal access is crucial. The manual details SSD accommodations, such as extended time, use of assistive technology, and separate testing rooms. Coordinators must verify eligibility and submit required documents by specified deadlines to guarantee accommodations are applied. Additionally, proctors should be trained to support students with diverse needs effectively. Clear communication with students, parents, and school staff is essential to implement these accommodations seamlessly. The manual also provides resources for addressing complex scenarios, ensuring compliance with College Board policies and legal requirements. Proper planning and documentation are key to creating an inclusive testing environment for all students.

6.2 Handling IR Forms and Rescoring Requests

This section outlines procedures for managing irregularity reports (IR forms) and rescoring requests. Coordinators must ensure all irregularities during testing are documented and submitted promptly to the College Board. Rescoring requests require careful review of student eligibility and test materials. Deadlines for submitting these requests are strictly enforced, and proper documentation is mandatory. Coordinators should communicate clearly with students and parents regarding the process and timelines. The manual provides detailed steps for initiating and tracking rescoring requests, ensuring compliance with College Board policies. Proper handling of IR forms and rescoring requests is essential for maintaining exam integrity and upholding student rights.

Open post

game manual ftc

The FTC Game Manual is an essential guide for teams, outlining rules, game structure, and resources․ It ensures fair play and provides a clear framework for competition․

1․1 Purpose and Importance of the FTC Game Manual

The FTC Game Manual serves as the official rulebook, ensuring fair play and consistency across all competitions․ It provides detailed guidelines, game structure, and resources, enabling teams to prepare effectively․ Its importance lies in maintaining transparency, accountability, and a level playing field for all participants, fostering a competitive yet respectful environment․

1․2 Structure and Content Overview

The FTC Game Manual is divided into two main parts: Part 1 covers traditional events, rules, and gameplay basics, while Part 2 focuses on seasonal updates, theme-specific objectives, and new regulations․ It includes detailed sections on scoring systems, field setups, and resources for teams, ensuring a comprehensive guide for understanding and competing in FTC events effectively․

FTC Game Manual Part 1 ー Traditional Events

Part 1 outlines traditional FTC game rules, scoring systems, and field setup, providing foundational knowledge for teams to understand and prepare for competition effectively․

2․1 Game Rules and Regulations

The FTC Game Manual Part 1 details game rules, including match duration, penalties for violations, and field interactions․ It emphasizes fair play, safety, and adherence to regulations, ensuring a structured competition environment․ Teams must comply with all outlined rules to maintain eligibility and uphold the spirit of Gracious Professionalism in FTC competitions․

2․2 Scoring System and Match Play

The FTC scoring system rewards teams for completing specific tasks during matches, such as scoring elements and executing autonomous commands․ Match play involves alliances, with teams earning points based on performance․ Penalties for rule violations are deducted․ The queue area and match procedures ensure organized gameplay․ Understanding these elements is crucial for strategic planning and maximizing points․

2․3 Field Setup and Game Elements

The FTC field setup includes specific layouts and game elements like goals, obstacles, and scoring zones․ The queue area is where teams prepare for matches․ Detailed descriptions and visuals are provided in the official FTC Game Manual and resources to ensure accurate setup and gameplay alignment․

FTC Game Manual Part 2 ー Seasonal Updates

Part 2 details seasonal themes, objectives, and rule updates․ It provides additional resources for teams to adapt to yearly changes in gameplay and competition structure․

3․1 Seasonal Game Themes and Objectives

Each FTC season introduces a unique theme and objectives, guiding gameplay and innovation․ Themes like “INTO THE DEEP” inspire teams to design robots for underwater exploration․ Objectives outline specific challenges, such as scoring points through autonomous and tele-operated modes․ These elements ensure dynamic competition and encourage creative problem-solving while aligning with the season’s narrative and technical requirements․

3․2 Changes in Rules and Gameplay

Each season, the FTC Game Manual updates rules and gameplay to align with the new theme․ For 2024-2025, “INTO THE DEEP” introduces timed penalties and clarifies illegal moves․ Autonomous and tele-operated modes are refined, ensuring fair competition․ These changes enhance gameplay dynamics and encourage strategic thinking while maintaining core FTC principles of innovation and sportsmanship․

3․3 Additional Resources for Teams

The FTC provides extensive resources to support teams, including official game manuals, seasonal updates, and instructional videos․ Rookie teams benefit from guides on starting a team, design principles, and hardware/software basics․ Additional tools like forums, mentorship programs, and archived documentation ensure teams are well-equipped to succeed in the competition․

FTC Competition Manual and Resources

The FTC Competition Manual provides official game materials, team updates, and notifications․ It includes resources like field setup guides and videos, ensuring teams are well-prepared and comply with rules․

4․1 Official Game and Season Materials

The official FTC Game Manual and season materials are available on the FIRST website, including Part 1 and Part 2․ These documents detail game rules, field setup, and scoring elements․ Teams can access PDF versions, ensuring they have the most up-to-date information․ Additional resources like field guides and videos are provided to aid in preparation and compliance with competition standards․

4․2 Team Updates and Notifications

Teams receive regular updates and notifications through official FTC channels․ These updates include rule clarifications, game changes, and important deadlines․ Notifications are posted on the FIRST website and shared via email․ Teams must stay informed to ensure compliance with the latest rules and to access new resources, ensuring they remain competitive and up-to-date throughout the season․

4․3 Playing Field Materials and Videos

This section provides detailed information about the materials and videos related to the playing field in the FTC Game Manual․ It includes diagrams, instructional videos, and specific materials required for setup․ These resources help teams understand the field layout, scoring elements, and game components, ensuring a clear and accurate competition setup aligned with official FTC standards and requirements․

Rookie Team Guide to the FTC Game Manual

This guide helps new teams navigate the FTC Game Manual, offering resources on starting a team, understanding rules, design skills, and hardware basics for successful competition․

5․1 Starting an FTC Team

Starting an FTC team involves forming a group, securing a mentor, and understanding the game manual․ Teams must register, budget, and gather resources; Rookie teams can access guides for design skills, hardware, and competition basics to ensure a smooth start and successful participation in FIRST Tech Challenge events․

5․2 Design Skills and Engineering Principles

Design skills and engineering principles are crucial for FTC teams․ The engineering design process guides problem-solving, while prototyping and iteration refine robot designs․ Teams learn to apply mechanical, electrical, and software engineering concepts to create functional robots, fostering innovation and teamwork through hands-on learning and competition preparation․

5․3 Hardware and Software Components

FTC robots rely on hardware components like motors, servos, and sensors, and software tools such as the FTC SDK, Robot Controller app, and programming languages like Java, Kotlin, or Blocks․ Teams use these tools to design, build, and program robots, ensuring they can perform tasks autonomously and through driver control, meeting game-specific requirements effectively․

FTC Game Specifics

FTC games feature unique themes, field layouts, and scoring elements, requiring teams to adapt strategies․ Understanding specifics like autonomous modes and match procedures is crucial for success․

6․1 Field Layout and Scoring Elements

The FTC field is meticulously designed with specific zones and scoring elements․ Teams earn points by completing tasks like depositing game pieces into designated areas or navigating through marked zones․ Understanding the layout and scoring requirements is vital for strategic planning and maximizing points during matches․ Official resources provide detailed diagrams and descriptions for accurate setup and gameplay․

6․2 Autonomous and Tele-Operated Modes

The FTC game features two primary modes: Autonomous and Tele-Operated․ Autonomous mode relies on pre-programmed instructions, while Tele-Operated mode involves driver-controlled robots․ Teams must master both to maximize scoring․ The transition between modes is seamless, and understanding their roles is essential for strategic gameplay․ Official guidelines ensure smooth operation and fair competition throughout the match․

6․3 Queue Area and Match Procedures

The FTC queue area is a critical pre-match zone where teams prepare and inspect their robots․ Match procedures include referee coordination, ensuring smooth transitions between Autonomous and Tele-Operated modes․ Teams must adhere to guidelines for efficiency and fair play, ensuring all robots are competition-ready before entering the field․ These procedures ensure a smooth and fair competition․

Rules and Regulations

FTC rules ensure fair play, outlining penalties for violations and promoting Gracious Professionalism․ Teams must adhere to these guidelines to maintain sportsmanship and competitive integrity․

7․1 Match Play Rules

Match play rules govern field setup, gameplay phases, and scoring elements․ Teams must adhere to autonomous and tele-operated modes, queue area procedures, and penalties for rule violations․ Gracious Professionalism is emphasized, ensuring respect and sportsmanship throughout competition;

7․2 Penalties and Rule Violations

Penalties and rule violations are addressed to maintain fair play․ Teams may face point deductions or disqualification for illegal actions․ Violations include unauthorized robot modifications, interference, or unsportsmanlike behavior․ Gracious Professionalism guidelines emphasize respect and integrity, ensuring a positive competitive environment for all participants․

7․3 Gracious Professionalism Guidelines

Gracious Professionalism emphasizes respect, kindness, and integrity in competition․ Teams should prioritize fair play, support fellow competitors, and maintain a positive attitude․ This core value ensures a collaborative and inclusive environment, fostering sportsmanship and mutual respect among all participants, regardless of outcomes․

FTC Software and Tools

The FTC Software Development Kit (SDK) includes tools for robot control, programming, and driver station apps․ It supports languages like Java, Kotlin, and Blocks, enabling seamless robot operation․

8․1 FTC Software Development Kit (SDK)

The FTC SDK is essential for programming robots, offering tools for Java, Kotlin, and Blocks․ It integrates with the FTC Robot Controller and Driver Station apps, enabling seamless robot operation and competition readiness․ Regular updates ensure compatibility with the latest season’s requirements and advancements in robotics technology․

8․2 FTC Robot Controller and Driver Station Apps

The FTC Robot Controller and Driver Station apps are crucial for managing robot operations during matches․ They support Android devices and REV hardware, enabling control in autonomous and tele-op modes․ These apps ensure smooth communication between robots and driver stations, with regular updates provided by FIRST to maintain compatibility and functionality․

8․3 Programming Languages and AprilTags

FTC supports programming languages like Java, Kotlin, and Blocks within the SDK․ AprilTags, barcode-like markers, enable autonomous navigation and object recognition․ Teams use these tools to create efficient robot behaviors, ensuring precise interaction with game elements and adherence to competition rules․

Archived Game Documentation

Archived Game Documentation provides access to past FTC game manuals, including rules, themes, and resources from previous seasons for reference and historical insight․

9․1 Accessing Past Seasons’ Manuals

Past FTC game manuals are available on the FIRST Tech Challenge website’s resource library․ Teams can access archived documents, including game rules, themes, and resources, for reference and historical research; These manuals are organized by season and provide valuable insights for strategy development and understanding game evolution over time․

9․2 Historical Game Themes and Rules

Historical FTC game themes and rules provide insights into the evolution of the competition․ Past themes, like “Quad Quandary” and “Ultimate Goal,” shaped gameplay mechanics and scoring systems․ These archives, accessible via the FIRST resource library, offer teams a chance to study previous challenges and strategies, enriching their understanding of the game’s development and competitive aspects over the years․

9․3 Legacy Resources for Reference

Legacy resources, including archived manuals and historical game documentation, provide valuable insights for teams․ These materials, accessible through the FTC resource library, offer a comprehensive understanding of past challenges and rules, helping teams appreciate the evolution of the game while preparing for current and future competitions effectively․

FIRST Tech Challenge Community Resources

FTC Community Resources offer support through team collaboration, mentorship programs, and official documentation, fostering growth and success for all participants․

10․1 Team Collaboration and Knowledge Sharing

Team collaboration and knowledge sharing are vital within the FTC community․ Teams exchange ideas, strategies, and resources through forums, workshops, and mentorship programs, fostering innovation and mutual growth․

10․2 Mentorship and Support Programs

The FTC provides robust mentorship and support programs, connecting teams with experienced mentors․ These initiatives offer guidance on robot design, programming, and competition strategies․ Resources include workshops, webinars, and access to official FTC documentation, fostering a supportive environment for teams to thrive and innovate effectively in the competition․

10․3 Official FTC Documentation Archive

The Official FTC Documentation Archive provides access to past game manuals, seasonal updates, and legacy resources․ It serves as a centralized repository for historical game themes, rules, and materials, allowing teams to reference previous seasons for inspiration, strategy development, and understanding the evolution of the competition․

The FTC Game Manual serves as an essential guide, ensuring teams understand rules, resources, and game specifics․ It promotes fair play, innovation, and Gracious Professionalism, key to success․

11․1 Summary of Key Points

The FTC Game Manual provides a comprehensive guide for teams, covering essential rules, resources, and game specifics․ It outlines seasonal updates, scoring systems, and field setups while emphasizing Gracious Professionalism․ Understanding the manual is crucial for competition success, ensuring fairness, innovation, and effective teamwork among all participants․

11․2 Final Tips for Teams

Teams should thoroughly review the FTC Game Manual to ensure compliance with rules and maximize performance․ Stay updated with seasonal changes and utilize official resources for guidance․ Regularly practice match scenarios and review penalties to avoid violations․ Embrace Gracious Professionalism by fostering teamwork and respect․ Continuous improvement and strategic planning will enhance your competitive edge in the FTC season․

Open post

dave ramsey zero based budget pdf

A zero-based budget is a financial strategy where income minus expenses equals zero, ensuring every dollar is allocated. It involves assigning roles to all income, leaving no money unassigned. This method helps prioritize spending and manage finances effectively, offering clarity and control over monetary decisions.

Dave Ramsey’s 7 Baby Steps

Dave Ramsey’s 7 Baby Steps provide a structured approach to achieving financial stability and independence. The plan is designed to guide individuals through manageable phases, ensuring progress toward long-term goals. The steps include: saving $1,000 as a starter emergency fund, paying off all debt using the Debt Snowball method, and building a more substantial emergency fund of 3-6 months of expenses. Later steps focus on investing for retirement, saving for college funds, paying off a mortgage, and building wealth. These steps emphasize discipline, prioritization, and the importance of living below one’s means. By following this plan, individuals can systematically eliminate debt and build a secure financial future. The zero-based budget plays a crucial role in this system, as it ensures every dollar is allocated toward these goals. Ramsey’s approach has helped millions transform their financial lives, making it a cornerstone of personal finance strategies.

Budgeting Templates and Worksheets

Budgeting templates and worksheets are essential tools for effectively managing finances, particularly when implementing a zero-based budget. These resources provide a structured framework for tracking income, expenses, and savings goals. Dave Ramsey offers a variety of budgeting forms and worksheets that align with his financial philosophy, helping users allocate every dollar intentionally. Templates often include categories for income, fixed expenses, discretionary spending, and savings. They also allow for regular reviews and adjustments, ensuring financial plans remain on track. Worksheets can be customized to suit individual or household needs, making them versatile for different financial situations. By using these tools, individuals can gain clarity on their spending habits, identify areas for improvement, and make progress toward financial goals. Regularly updating and reviewing budget templates helps maintain accountability and ensures that financial priorities remain aligned with long-term objectives. These practical resources are integral to achieving financial stability and success.

Debt Elimination Strategies

Dave Ramsey’s approach to debt elimination emphasizes a structured and disciplined method to achieve financial freedom. His strategies, often paired with zero-based budgeting, focus on tackling debt systematically. The Debt Snowball method, popularized by Ramsey, involves paying off debts starting with the smallest balances first, while making minimum payments on larger ones. This approach builds momentum and motivation as debts are eliminated one by one. Another strategy is the Debt Avalanche, which prioritizes debts with the highest interest rates to save money over time. Ramsey also advocates for listing all debts, separating them into categories like credit cards, loans, and medical bills, and attacking them aggressively. A key principle is to stop adding new debt while focusing on repayment. By using a zero-based budget, individuals can allocate extra funds toward debt, accelerating the payoff process. Ramsey’s strategies also emphasize the importance of an emergency fund to prevent future debt. His methods are designed to create lasting financial change, helping individuals break free from debt and build a secure financial future.

Tracking and Managing Expenses

Tracking and managing expenses is a cornerstone of effective financial management, especially when paired with a zero-based budget. By monitoring every dollar spent, individuals can identify areas for improvement and ensure alignment with their financial goals. Dave Ramsey emphasizes the importance of categorizing expenses, such as housing, utilities, food, and entertainment, to maintain clarity. Using tools like budget templates or expense tracking apps can simplify this process. Regularly reviewing expenses helps uncover unnecessary spending and promotes disciplined financial habits. Ramsey also suggests implementing the envelope system, where cash is allocated to specific categories, preventing overspending. This method, combined with zero-based budgeting, ensures that every expense is intentional and accounted for. By consistently tracking expenses, individuals can make informed decisions, reduce waste, and allocate resources more efficiently. This disciplined approach not only enhances financial stability but also fosters long-term prosperity. The key is to stay vigilant and regularly assess spending patterns to maintain control over finances.

Savings and Emergency Funds

Savings and emergency funds are essential components of financial stability, as emphasized in Dave Ramsey’s zero-based budget approach. An emergency fund acts as a safety net, covering unexpected expenses to prevent debt accumulation. Ramsey recommends saving $1,000 as a starter emergency fund before focusing on debt elimination. This fund should be easily accessible and separate from regular savings. Allocating a portion of income to savings ensures long-term financial security. Budgeting tools and templates can help track progress toward savings goals, making it easier to stay consistent. Consistent saving habits, combined with disciplined expense management, create a solid foundation for financial health. By prioritizing savings, individuals can avoid financial pitfalls and build a secure future.

Avoiding Common Budgeting Mistakes

When implementing a zero-based budget, it’s crucial to avoid common pitfalls that can derail financial progress. One major mistake is failing to track expenses, which can lead to overspending and budget leaks. Many individuals overlook small, recurring purchases, such as subscriptions or dining out, which can accumulate and disrupt financial goals. Another error is not prioritizing needs over wants, leading to misallocation of funds. Dave Ramsey emphasizes the importance of distinguishing between essential expenses and discretionary spending. Additionally, neglecting to review and adjust the budget regularly can result in outdated financial plans that no longer align with current needs or income changes. To avoid these mistakes, consistent monitoring and adjustments are necessary. Using budgeting templates or tools can help maintain accountability and ensure every dollar is intentionally allocated. By staying vigilant and proactive, individuals can avoid common budgeting errors and achieve long-term financial success.

Case Studies and Success Stories

Many individuals have achieved financial freedom by following Dave Ramsey’s zero-based budgeting principles. For instance, a 35-year-old married individual with previous financial challenges transformed their financial situation by adhering to the 7 Baby Steps. Initially struggling with budgeting, they adopted a zero-based approach, meticulously assigning every dollar to specific categories. This method allowed them to prioritize needs over wants and systematically eliminate debt. Over time, they managed to pay off significant credit card balances and built a substantial emergency fund. Another success story involves a 65-year-old retiree who, despite initial doubts about financial adequacy, utilized Ramsey’s budgeting techniques to ensure a secure retirement. These real-life examples highlight the effectiveness of zero-based budgeting in achieving financial stability and peace of mind. The key to their success was consistent tracking, regular budget reviews, and a commitment to staying disciplined. These stories serve as inspiration for others embarking on their financial journeys, proving that with dedication, anyone can overcome financial challenges and build a secure future.

Automating Your Budget

Automating your budget is a key step in maintaining financial discipline and ensuring that your money is allocated according to your priorities. With the help of budgeting apps like EveryDollar, you can set up automatic transfers to different budget categories, such as savings, rent, utilities, and groceries, as soon as you receive your paycheck. This eliminates the need for manual tracking and reduces the risk of overspending.

For irregular expenses, such as car maintenance or property taxes, you can set aside a fixed amount each month in a separate savings account. This way, when the expense arises, you already have the funds available. Many apps also offer features like alerts and notifications to remind you when you’re approaching spending limits in specific categories, helping you stay on track without constant monitoring.

Integrating your budgeting app with your bank accounts allows for automatic transaction tracking, saving time and reducing errors from manual entry. You can then categorize these transactions within the app to ensure they align with your zero-based budget. Additionally, having an emergency fund in place is crucial for handling unexpected expenses, such as car repairs, without disrupting your budget.

Overall, automating your budget with the right tools and initial setup can make managing your finances less of a hassle and more sustainable in the long run. By leveraging technology and maintaining disciplined habits, you can effectively implement Dave Ramsey’s zero-based budgeting method and achieve your financial goals.

Long-Term Financial Planning

Long-term financial planning is essential for achieving lasting stability and security. It involves setting clear financial goals, such as retirement savings, purchasing a home, or funding your children’s education. By using a zero-based budget, you can allocate your income toward these objectives, ensuring that every dollar works toward your future.

Dave Ramsey emphasizes the importance of creating a sustainable plan that aligns with your values and priorities. This includes investing in retirement accounts, such as 401(k)s or IRAs, and building wealth over time. A key aspect of long-term planning is avoiding lifestyle inflation, where income increases are spent on luxuries rather than saved or invested.

Regularly reviewing and adjusting your budget ensures that you stay on track with your goals. Consider setting aside a portion of your income for unexpected expenses or long-term investments. By maintaining discipline and consistency, you can secure your financial future and achieve the freedom to pursue your aspirations without debt or financial strain.

Ultimately, long-term financial planning is about creating a roadmap for your money, ensuring that every decision today contributes to a prosperous tomorrow.

Recommended Resources

For those looking to implement Dave Ramsey’s zero-based budget, several resources are available to guide you. The Dave Ramsey Zero-Based Budget PDF is a comprehensive tool that outlines the framework for allocating every dollar. Additionally, Ramsey’s book, The Total Money Makeover, provides a step-by-step plan for financial freedom, including budgeting strategies.

Users can also access budgeting templates and worksheets from Ramsey’s website, such as the Household Budget Form and Debt Repayment Plan. These resources help track expenses and stay disciplined with zero-based budgeting. For visual learners, Ramsey’s YouTube channel offers video tutorials on creating and managing budgets effectively.

Moreover, Ramsey’s The Financial Peace University is a program designed to educate individuals on budgeting, saving, and investing. It includes lessons on zero-based budgeting and practical tips for avoiding common financial pitfalls. Fans of audio content can tune into The Dave Ramsey Show podcast, where experts answer questions and share success stories.

These resources provide a holistic approach to financial planning, ensuring that users can apply zero-based budgeting principles successfully and achieve their long-term financial goals.

The zero-based budgeting system emphasizes intentionality with money, ensuring no income goes unassigned. This approach not only helps in tracking expenses but also fosters accountability and discipline. For those seeking practical tools, resources like the Dave Ramsey Zero-Based Budget PDF and his budgeting templates are invaluable for creating a customized financial plan.

Ultimately, zero-based budgeting is more than just a financial strategy—it’s a mindset shift. By prioritizing needs over wants and staying committed to long-term goals, individuals can achieve financial stability and peace of mind. Dave Ramsey’s proven methods have empowered millions, and his zero-based budget remains a cornerstone of his teachings.

Open post

soap bible study method pdf

The SOAP Bible Study Method is a simple, effective approach to deeper Scripture engagement. It stands for Scripture, Observation, Application, and Prayer, guiding believers to transform Bible reading into a meaningful, life-changing habit. Available as PDF templates, this method provides structure for reflection, helping individuals or groups connect with God’s Word more intentionally.

What is the SOAP Method?

The SOAP Bible Study Method is an acronym standing for Scripture, Observation, Application, and Prayer. It provides a structured approach to engaging deeply with the Bible, making it ideal for both individual and group studies. The method encourages active engagement with the text, helping believers move beyond passive reading. By focusing on specific steps—reading a passage, noting observations, applying the truths to life, and concluding with prayer—SOAP facilitates a meaningful and transformative study experience. Its simplicity and clarity make it accessible to everyone, regardless of their familiarity with Scripture. Additionally, printable SOAP Bible Study templates and PDF resources are widely available, offering a practical tool for organizing reflections and maintaining consistency in study routines. This method not only enhances personal spiritual growth but also fosters a deeper connection with God’s Word.

Benefits of Using the SOAP Method for Bible Study

The SOAP Bible Study Method offers numerous benefits for those seeking to deepen their understanding of Scripture. It encourages active engagement with the text, helping believers move beyond passive reading and fostering a more intimate connection with God’s Word. By breaking down study into clear steps—Scripture, Observation, Application, and Prayer—SOAP makes Bible study accessible and organized. This method also promotes personal reflection, allowing individuals to identify how biblical truths apply to their lives. Regular use of SOAP can lead to spiritual growth, renewed minds, and life transformation. Additionally, the availability of printable templates and PDF resources makes it easy to maintain consistency in study routines. Whether for individual or group use, SOAP provides a practical and meaningful way to engage with Scripture and apply its teachings effectively.

Understanding the SOAP Acronym

The SOAP acronym stands for Scripture, Observation, Application, and Prayer, providing a structured approach to engage deeply with God’s Word and apply its truths personally.

S ౼ Scripture: How to Select and Read the Passage

The “S” in SOAP stands for Scripture, emphasizing the importance of selecting and thoughtfully reading a Bible passage. Begin by choosing a meaningful verse or passage, either from a reading plan or one that resonates personally. Read the selected text slowly, allowing the words to sink in. Highlight or underline verses that stand out to you, and consider writing them down in a journal or digital notebook. Reflect on the context and historical background of the passage to deepen understanding. Using study Bibles or commentaries can also enhance your engagement with the Scripture. Take your time to absorb the words, letting God speak to you through His Word. This step lays the foundation for the rest of the SOAP method, setting the stage for meaningful reflection and application.

O ౼ Observation: Key Points to Note in the Scripture

The “O” in SOAP stands for Observation, where you carefully analyze the selected Scripture. Begin by reading the passage again, this time with a focus on identifying key themes, repeated words, or phrases that stand out. Note any promises, commands, or truths revealed about God or humanity. Ask questions like, “What is happening in this passage?” or “What does this reveal about God’s character?” Highlight or underline significant verses in your Bible or write them in a journal. Consider the historical context and cultural background to deepen your understanding. Record your observations in a SOAP Bible Study template or PDF, ensuring clarity and conciseness. This step helps you unpack the meaning of the text and prepares your heart for personal application. Observation is about gaining insight and laying a solid foundation for reflection.

A ⎯ Application: How to Apply the Scripture to Daily Life

The “A” in SOAP represents Application, where you connect God’s Word to your personal life. After observing key points, reflect on how the Scripture can transform your thoughts, actions, or attitudes. Ask yourself, “What change does God want me to make?” or “How can I apply this truth today?” Be specific and actionable, such as committing to forgive someone, trusting God in a challenging situation, or practicing humility. This step is about making the Bible relevant and impactful in your daily life. Use a SOAP Bible Study template or PDF to jot down practical steps or prayers. Remember, application is personal and between you and God, aiming to align your life with His teachings. This step bridges observation and prayer, leading to genuine spiritual growth and transformation.

P ⎯ Prayer: Turning Observations into Personal Prayers

The “P” in SOAP stands for Prayer, the final step where you humbly bring your observations and applications before God. This is a moment to engage in heartfelt conversation, seeking His guidance, confessing sins, expressing gratitude, and asking for strength to live out the truths you’ve discovered. Use your observations to craft specific, personal prayers, asking God to help you apply the Scripture in your life. For example, if you noticed a verse about forgiveness, pray for grace to forgive others. Many SOAP Bible Study templates and PDF resources include space for writing prayers, helping you stay focused and intentional. Prayer is not just a ritual but a genuine dialogue with God, allowing His Word to transform your heart and actions. This step deepens your relationship with Him and seals your commitment to living out His truth.

Practical Steps for Implementing the SOAP Method

Start by selecting a Bible passage, reading it carefully, and recording your observations. Use SOAP templates or PDF resources to organize your study and reflections systematically.

Choosing the Right Bible Passage for Study

Selecting the right Bible passage is crucial for effective SOAP study. Begin by praying for guidance to choose a passage that aligns with your current needs or interests. Consider using a structured reading plan or study guide to help you stay focused. For deeper engagement, opt for a shorter passage, such as a few verses, to allow time for reflection. Look for passages that resonate with your life circumstances or questions you’re seeking answers to. You can also explore thematic studies, such as faith, love, or forgiveness, to gain a broader understanding. Highlight or underline key verses that stand out to you during your reading. This intentional approach ensures your study is meaningful and impactful, setting a strong foundation for the SOAP method.

Creating a SOAP Bible Study Schedule

Establishing a consistent SOAP Bible study schedule is essential for fostering spiritual growth and discipline. Start by committing to a regular routine, whether daily or weekly, ensuring it fits seamlessly into your lifestyle. Set specific times and durations for study to maintain accountability. Plan ahead by selecting passages in advance, using resources like quarterly study guides or thematic plans. Create a structured schedule that outlines which books or chapters to explore over a set period. Use a planner, digital calendar, or SOAP Bible study PDF templates to organize your study materials. Track your progress to stay motivated and adjust the schedule as needed to accommodate life’s demands. Consistency is key to making SOAP a transformative habit, enabling deeper engagement with Scripture and its application in daily life.

Enhancing Your SOAP Bible Study Experience

Enhance your SOAP Bible study by using downloadable PDF templates for organized reflection. Incorporate digital tools, group discussions, and personal journaling to deepen engagement and foster spiritual growth.

Using SOAP Bible Study Templates and PDF Resources

SOAP Bible study templates and PDF resources are invaluable tools for organizing your reflections and deepening your engagement with Scripture. These templates guide you through the SOAP method, providing structured spaces to document your journey. Many templates are available as digital downloads, making them easily accessible for personal or group use. They often include sections for writing down the selected Scripture, observations, applications, and prayers, ensuring a consistent and thoughtful approach. Editable PDFs allow customization, enabling users to tailor the format to their study style. By using these resources, you can keep track of your progress, revisit past insights, and maintain a meaningful record of your spiritual growth. These tools are especially helpful for those seeking a systematic yet flexible way to apply the SOAP method effectively.

Incorporating the SOAP Method into Group Bible Studies

The SOAP method can be seamlessly integrated into group Bible studies, fostering deeper engagement and collective spiritual growth. By following the structured approach of Scripture, Observation, Application, and Prayer, groups can explore the Bible together in a meaningful way. Each participant can individually reflect on the passage using SOAP, then share insights and observations with the group. This encourages active participation and diverse perspectives. Leaders can distribute SOAP templates or PDF resources to guide the study, ensuring everyone is on the same page. Group discussions can focus on key observations, practical applications, and heartfelt prayers. This collaborative approach not only enhances understanding but also builds unity and accountability among members. Incorporating SOAP into group studies creates a dynamic and transformative experience for all involved.

The SOAP Bible Study Method is a powerful tool for deeper Scripture engagement, offering a structured approach to transform Bible reading into meaningful, life-changing moments;

Final Thoughts on the Effectiveness of the SOAP Method

The SOAP Bible Study Method has proven to be a transformative approach for engaging deeply with Scripture. Its structured format—Scripture, Observation, Application, and Prayer—encourages intentional reflection and personal growth. By using SOAP, individuals and groups can move beyond surface-level reading, fostering a more meaningful connection with God’s Word. The availability of SOAP Bible Study templates and PDF resources further enhances its accessibility, making it easier for anyone to adopt this method. Whether used individually or in group settings, SOAP’s effectiveness lies in its ability to bridge biblical truths with everyday life, leading to lasting spiritual transformation and a deeper understanding of Scripture. This method remains a valuable tool for anyone seeking to enrich their Bible study experience and apply its teachings practically.

Open post

chrysler pacifica 2017 manual

Welcome to the official 2017 Chrysler Pacifica owner’s manual, your comprehensive guide to understanding and optimizing your vehicle’s operation, features, and safety.

This manual provides detailed insights into the Pacifica’s innovative design, advanced technology, and essential maintenance tips, ensuring a safe and enjoyable driving experience.

Overview of the Chrysler Pacifica 2017

The 2017 Chrysler Pacifica is a modern minivan renowned for its sleek design, advanced technology, and family-friendly features. Introduced in 2017, it offers multiple trim levels, including LX, Touring, Touring-L, Touring-L Plus, and Limited. This vehicle combines comfort, versatility, and innovation, making it a top choice for drivers seeking practicality and style. The Pacifica also features a comprehensive owner’s manual to guide users through its operation and maintenance.

Importance of the Owner’s Manual

The owner’s manual is essential for understanding your Chrysler Pacifica’s features, safety guidelines, and maintenance requirements. It provides critical information to ensure safe operation, prevent accidents, and maintain the vehicle’s performance. Regularly reviewing the manual helps drivers make informed decisions, address potential issues early, and optimize their driving experience. It serves as a comprehensive guide to maximizing safety, efficiency, and overall satisfaction with your vehicle.

Key Features and Specifications

The 2017 Chrysler Pacifica offers advanced features like Adaptive Cruise Control and Automatic Emergency Braking, combined with a stylish, intuitive design and efficient performance capabilities.

Trim Levels: LX, Touring, Touring-L, Touring-L Plus, and Limited

The 2017 Chrysler Pacifica is available in five distinct trim levels: LX, Touring, Touring-L, Touring-L Plus, and Limited. Each trim offers varying levels of features and luxury, starting from the base LX with essential amenities to the top-tier Limited, which includes premium materials, advanced technology, and enhanced comfort for a refined driving experience.

Transmission and Performance

The 2017 Chrysler Pacifica features a smooth-shifting 9-speed automatic transmission, delivering responsive acceleration and seamless gear transitions. Its intuitive dial-a-gear control on the center dash enhances driver convenience. The transmission is designed for reliability and efficiency, ensuring optimal performance across various driving conditions, making it a reliable choice for both city commutes and long highway drives.

Interior and Exterior Design

The 2017 Chrysler Pacifica boasts a sleek, modern exterior with aerodynamic lines and a refined stance. Inside, the cabin features premium materials, comfortable seating for up to eight passengers, and innovative storage solutions. The interior design emphasizes functionality and style, with optional upgrades like leather upholstery and a dual-pane sunroof. The manual highlights tips for maintaining both interior and exterior aesthetics, ensuring long-term durability and appeal.

Warnings and Cautions

The manual emphasizes critical safety guidelines to prevent collisions, injuries, and vehicle damage. Adhering to these warnings ensures safe operation and optimal performance of your Chrysler Pacifica.

Safe Operating Practices

Always follow safe driving practices to minimize risks. Ensure all occupants wear seatbelts, keep hands on the wheel, and avoid distractions. Regularly check tire pressure and brakes. Never ignore warning lights or alarms. Maintain a safe distance from other vehicles. Familiarize yourself with adaptive cruise control and emergency braking features to enhance safety on the road.

Collision and Injury Prevention

The 2017 Chrysler Pacifica is equipped with advanced safety features to prevent collisions and reduce injury risk. Adaptive Cruise Control (ACC) maintains a safe distance from other vehicles, while Automatic Emergency Braking (AEB) intervenes to avoid or mitigate impacts. These systems work alongside airbags and seatbelts to protect occupants in case of an accident.

Always stay alert and avoid distractions while driving. Proper use of safety features enhances their effectiveness, ensuring a safer driving experience for everyone on the road.

Vehicle Damage Prevention

Regular inspections of brakes, tires, and fluid levels help prevent damage. Use parking sensors and cameras to avoid collisions during parking. Follow recommended maintenance schedules to ensure optimal performance and longevity of your vehicle.

Proper storage and cleaning practices prevent exterior and interior damage. Address any recalls or software updates promptly to maintain safety and functionality. Regular oil changes and tire rotations are crucial for preventing mechanical issues.

Maintenance and Service

Regular maintenance ensures optimal performance and longevity of your Chrysler Pacifica. Check fluids, filters, and tires routinely for proper function and safety.

Follow the recommended service schedule, including oil changes every 7,500 to 10,000 miles, and tire rotations to maintain your vehicle in top condition.

Routine Maintenance Schedule

Adhere to the recommended maintenance schedule to ensure your Chrysler Pacifica performs optimally. Regular oil changes, tire rotations, and fluid checks are essential. Replace the air filter every 15,000 to 30,000 miles and the cabin filter every 12,000 to 18,000 miles. Check brake pads and rotors for wear, and inspect belts and hoses for cracks or damage. Refer to the manual for specific intervals.

Follow the schedule to prevent premature wear and maintain warranty coverage. Proper maintenance enhances fuel efficiency, safety, and overall vehicle longevity. Always consult your dealer or the manual for customized service plans tailored to your driving conditions.

Oil Change Intervals

The 2017 Chrysler Pacifica recommends oil changes every 5,000 to 7,500 miles for conventional oil and 7,500 to 10,000 miles for synthetic oil. Regular oil changes are crucial for maintaining engine performance and preventing damage. Always refer to your owner’s manual or consult a certified dealer for confirmation.

Following these intervals ensures optimal engine health and prevents premature wear. Proper oil maintenance also supports fuel efficiency and overall vehicle reliability.

Service Requirements and Recommendations

Regular tire rotations, brake inspections, and fluid checks are essential for maintaining your Chrysler Pacifica. Follow the recommended service schedule in your manual to ensure optimal performance and longevity of your vehicle.

Always use genuine parts and consult a certified Chrysler technician for any repairs. Adhering to these guidelines will help prevent issues and keep your Pacifica running smoothly for years to come.

Owner’s Manual Structure and Navigation

The manual features a detailed table of contents and index for easy navigation, with clear sections and symbols to help users quickly locate essential information and guidance.

Table of Contents and Index

The manual begins with a detailed table of contents, organizing information by category for easy access. The index provides an alphabetical listing of topics, ensuring quick reference to specific features, maintenance instructions, and safety guidelines. Page numbers and clear headings guide users seamlessly through the document, making it simple to locate essential information efficiently. This structure ensures that all aspects of the vehicle are covered comprehensively.

Understanding Symbols and Abbreviations

The manual uses specific symbols and abbreviations to convey important information. Common symbols include warnings for Adaptive Cruise Control (ACC) and Automatic Emergency Braking (AEB). Abbreviations like ADAS (Advanced Driver Assistance System) are defined to ensure clarity. A detailed legend explains each symbol, preventing confusion and ensuring safe vehicle operation. This section is crucial for interpreting alerts and maintaining your vehicle effectively. Definitions are provided for all symbols to avoid misunderstandings.

How to Use the Manual Effectively

Start by reviewing the table of contents and index to locate specific topics quickly. Always read warnings and cautions carefully to ensure safe operation. Refer to the troubleshooting section for common issues and solutions. Use the index to find detailed explanations of features and functions. Definitions of symbols and abbreviations are provided for clarity. Regularly review the manual to stay informed about your vehicle’s operation and maintenance.

Safety Features and Advanced Driver Assistance Systems

The 2017 Chrysler Pacifica offers cutting-edge safety technologies, including Adaptive Cruise Control (ACC) and Automatic Emergency Braking (AEB), enhancing driver confidence and vehicle security.

Adaptive Cruise Control (ACC)

The 2017 Chrysler Pacifica features Adaptive Cruise Control (ACC), which enhances safety and convenience by automatically adjusting vehicle speed to maintain a safe distance from the vehicle ahead. Using advanced radar and sensor technology, ACC ensures smooth acceleration and deceleration, reducing driver fatigue during long trips. This system is particularly beneficial in heavy traffic or highway driving conditions, promoting a more relaxed and confident driving experience. Always refer to the manual for proper usage guidelines.

Automatic Emergency Braking (AEB)

The 2017 Chrysler Pacifica is equipped with Automatic Emergency Braking (AEB), a cutting-edge safety feature designed to prevent or mitigate potential collisions. AEB automatically applies the brakes when a frontal collision is detected, reducing the risk of impact severity. This system operates in conjunction with forward sensors and cameras, ensuring rapid response in critical situations. Always consult the manual for specific operation and limitations.

Advanced Driver Assistance System (ADAS)

The 2017 Chrysler Pacifica features the Advanced Driver Assistance System (ADAS), enhancing safety and convenience. ADAS integrates technologies like adaptive cruise control, lane-keep assist, and automatic emergency braking. These systems work together to monitor the driving environment, assist in maintaining control, and prevent potential hazards. Refer to the manual for detailed functionality, operation guidelines, and system limitations to ensure optimal performance and safety on the road.

Technology and Infotainment

The 2017 Chrysler Pacifica features the Uconnect infotainment system, offering a touchscreen display, voice command, and connectivity options like Bluetooth and USB ports. It also includes navigation, Apple CarPlay, and Android Auto compatibility, ensuring seamless integration with your devices for entertainment and navigation needs on the go.

Uconnect System Overview

The Uconnect system in the 2017 Chrysler Pacifica offers an intuitive 8.4-inch touchscreen interface, voice command functionality, and seamless smartphone integration via Apple CarPlay and Android Auto. It supports Bluetooth connectivity, allowing hands-free calls and wireless music streaming. The system also features navigation with voice-guided directions and real-time traffic updates. Additionally, it includes a rear entertainment system with dual screens, enhancing passenger comfort and entertainment on long drives.

Navigation and Voice Command Features

The 2017 Chrysler Pacifica’s Uconnect system offers advanced navigation with voice commands, enabling drivers to input destinations hands-free. The system provides turn-by-turn directions, real-time traffic updates, and points of interest searches. Voice commands also control audio, climate, and phone functions, enhancing convenience and safety by minimizing distractions while driving. This feature ensures a more intuitive and connected driving experience.

Connectivity Options and Bluetooth Integration

The 2017 Chrysler Pacifica features Bluetooth integration, allowing seamless connectivity for hands-free calls and music streaming. The Uconnect system supports voice commands for audio and phone functions, enhancing convenience and safety. Drivers can pair smartphones effortlessly, ensuring a connected driving experience. This feature promotes distraction-free operation, integrating modern technology for a user-friendly and enjoyable ride.

Troubleshooting Common Issues

This section helps identify and resolve common problems, such as dashboard warning lights and transmission shifting issues, ensuring your Chrysler Pacifica operates smoothly and safely.

Diagnosing Dashboard Warning Lights

Dash warning lights indicate potential issues with your Chrysler Pacifica. Symbols like a yellow “A” with an exclamation point signal system malfunctions. Consult your manual to identify meanings and resolve problems promptly. Common causes include faulty sensors or software glitches. Always investigate illuminated warnings to ensure vehicle safety and prevent further damage. If unsure, restart the engine or consult a professional technician.

Resolving Transmission and Shifting Problems

Address transmission issues promptly to ensure smooth operation. Common problems include hesitant shifting or refusal to engage gears. Restart the engine, check transmission fluid levels, and inspect for software updates. If issues persist, consult your owner’s manual or a certified technician. Regular maintenance and updates can prevent or resolve many transmission-related concerns effectively.

Addressing Electrical and Lighting Issues

Identify electrical or lighting problems by checking fuses, relays, and wiring connections. Consult the owner’s manual for fuse box locations and diagrams. If issues like dimming lights or faulty switches occur, reset systems or replace components as needed. For complex problems, refer to the manual’s troubleshooting guide or contact a certified technician to ensure proper diagnosis and repair.

Recalls and Software Updates

Regularly check for recalls and software updates to ensure your Chrysler Pacifica operates safely and efficiently. Visit the manufacturer’s website or contact your local dealer for assistance.

Checking for Recalls and Updates

Regularly check for recalls and software updates to ensure your Chrysler Pacifica operates safely and efficiently. Visit the official Chrysler website, enter your Vehicle Identification Number (VIN), or contact your local dealer for assistance. Additionally, you can use the owner’s manual or online portals to verify if any updates or recalls apply to your vehicle.

Understanding the Importance of Compliance

Compliance with recalls and updates is crucial for ensuring your Chrysler Pacifica meets safety and regulatory standards. Addressing recalls promptly protects you and others from potential hazards, while software updates enhance performance and functionality. Compliance also maintains your vehicle’s warranty and resale value, ensuring long-term reliability and safety on the road.

How to Schedule Recall Repairs

To schedule recall repairs for your 2017 Chrysler Pacifica, contact your local authorized Chrysler dealer. Provide your Vehicle Identification Number (VIN) to confirm any outstanding recalls. Dealers will perform repairs free of charge. You can also check recalls online through the official Chrysler website or by calling their customer service at 1-800-247-9753 (U.S.) or 1-800-387-1143 (Canada). Schedule promptly to ensure safety and compliance.

The Chrysler Pacifica 2017 manual is your ultimate guide for optimal vehicle performance and safety. Refer back regularly to ensure you maximize its features and maintain reliability.

Final Tips for Optimal Vehicle Performance

Regularly check fluid levels, tire pressure, and battery health to ensure peak performance. Follow the recommended maintenance schedule and address any warning lights promptly. Utilize advanced features like Adaptive Cruise Control and Automatic Emergency Braking for enhanced safety. Keep your vehicle software updated for optimal functionality. By adhering to these tips, you’ll enjoy a safe, efficient, and enjoyable driving experience with your Chrysler Pacifica.

Encouragement to Refer Back to the Manual

Referencing your Chrysler Pacifica 2017 manual regularly ensures you maximize your vehicle’s potential. It provides valuable insights into operating procedures, safety guidelines, and maintenance schedules. Familiarize yourself with its content to troubleshoot issues, understand advanced features, and maintain optimal performance. By revisiting the manual, you’ll enhance your driving experience and ensure long-term reliability and safety for years to come.

Open post

40 authors of the bible pdf

The Bible, composed by 40 diverse authors over centuries, offers profound insights into faith, history, and wisdom. Explore their contributions through PDF guides and scholarly resources.

1.1 Historical Background of the Bible’s Authorship

The Bible’s authorship spans over 1,500 years, involving 40 writers from diverse backgrounds, including prophets, kings, poets, and apostles. These authors, inspired by God, penned texts in various genres—history, poetry, prophecies, and letters. The process of compilation and canonization ensured the preservation of sacred texts, forming the foundational scriptures of Judaism and Christianity, guiding millions through centuries.

1.2 Significance of Understanding the Authors

Understanding the 40 authors of the Bible provides deeper insights into their unique perspectives, cultural contexts, and divine inspiration. Recognizing their contributions enriches biblical study, revealing how their diverse backgrounds shaped sacred texts. This knowledge enhances appreciation for the scripture’s complexity and timeless relevance, offering readers a fuller grasp of its teachings and historical significance across generations.

Old Testament Authors

The Old Testament features authors like Moses, David, and Solomon, along with major and minor prophets. Their writings form the foundation of biblical teachings and history, with resources like PDF guides offering deeper insights into their contributions.

2.1 Moses: Author of the Pentateuch

Moses, a central figure in biblical history, is traditionally credited with authoring the Pentateuch, the first five books of the Bible: Genesis, Exodus, Leviticus, Numbers, and Deuteronomy. These texts recount the creation, the Exodus, and the giving of the Law, including the Ten Commandments. Moses’ writings laid the theological and historical foundation for Judaism, Christianity, and Islam, shaping their understanding of God and humanity. His leadership and prophetic role are deeply intertwined with the narrative of Israel’s origins, making the Pentateuch a cornerstone of religious tradition.

2.2 David: Author of Psalms

David, the second king of Israel, is renowned as the primary author of the Psalms, a collection of poetic and musical compositions. His writings reflect deep emotional and spiritual experiences, capturing joy, sorrow, and faith. Many Psalms are attributed to David, who used his musical talents to express worship and devotion. His contributions remain central to Jewish and Christian worship, offering timeless wisdom and comfort to believers across generations.

2.3 Solomon: Author of Proverbs, Ecclesiastes, and Song of Solomon

Solomon, the wise king of Israel, authored Proverbs, Ecclesiastes, and the Song of Solomon. His writings emphasize wisdom, reflections on life’s meaning, and poetic expressions of love. Proverbs offers practical wisdom, Ecclesiastes explores existential themes, and the Song of Solomon celebrates romantic love. Solomon’s contributions provide timeless insights into human experience and divine wisdom, enriching biblical literature with depth and diversity.

2.4 Major Prophets: Isaiah, Jeremiah, Ezekiel, and Daniel

Isaiah, Jeremiah, Ezekiel, and Daniel are renowned as Major Prophets, delivering profound messages of redemption, repentance, and divine judgment. Their writings, rich in symbolic visions and moral guidance, shaped Israel’s spiritual trajectory. Isaiah foretold redemption, Jeremiah emphasized repentance, Ezekiel offered hope through restoration, and Daniel unveiled apocalyptic visions. Their works remain central to biblical prophecy, inspiring faith and reflection across generations through detailed PDF resources and scholarly commentaries.

2.5 Minor Prophets: Hosea, Joel, Amos, Obadiah, Jonah, Micah, Nahum, Habakkuk, Zephaniah, Haggai, Zechariah, and Malachi

The Minor Prophets, despite their shorter writings, deliver significant messages of repentance and divine justice. Hosea emphasized faithfulness, Jonah highlighted mercy, and Micah championed justice. Their collective teachings, though concise, profoundly impacted Israel’s spiritual journey. PDF resources and scholarly works provide deeper insights into their prophetic visions and historical contexts, enriching biblical study and reflection for modern readers seeking timeless wisdom.

New Testament Authors

The New Testament features authors like Matthew, Mark, Luke, John, Paul, and others who shared the life of Christ and early Christian teachings through Gospels and epistles.

3.1 Matthew, Mark, Luke, and John: Authors of the Gospels

Matthew, a tax collector, Mark, a companion of Peter, Luke, a physician and historian, and John, a close disciple of Jesus, authored the four Gospels. Their unique perspectives—Matthew’s attention to detail, Mark’s fast-paced narrative, Luke’s compassionate focus, and John’s theological depth—provide a rich tapestry of Jesus’ life, teachings, death, and resurrection, forming the cornerstone of the New Testament.

3.2 Paul the Apostle: Author of Epistles

Paul, a former Pharisee, became Christianity’s most influential apostle after his dramatic conversion. He authored 13 epistles, including Romans, Corinthians, Galatians, Ephesians, Philippians, and others, addressing theological truths, church unity, and moral guidance. His writings, rooted in Jewish tradition and Greek philosophy, profoundly shaped Christian doctrine and remain central to faith and practice, offering timeless wisdom for believers across centuries.

3.3 Other New Testament Writers: James, Peter, Jude, and John

James, Peter, Jude, and John, prominent figures in early Christianity, contributed uniquely to the New Testament. James emphasized practical faith in his epistle; Peter, a key apostle, wrote on perseverance and leadership. Jude addressed warnings against false teachings, while John, the beloved apostle, authored the Gospel, epistles, and Revelation, highlighting divine love and end-time visions, enriching the tapestry of Christian thought and devotion.

Key Contributions of the Authors

The 40 authors contributed laws, wisdom, and prophecies in the Old Testament, while New Testament writers shared teachings, gospel narratives, and epistles guiding faith communities.

4.1 Moses: Foundational Teachings of the Law

Moses, a central figure in the Old Testament, authored the Pentateuch, including Genesis, Exodus, Leviticus, Numbers, and Deuteronomy. His writings established the moral and legal framework of the Israelites, introducing the Ten Commandments and ceremonial laws. These teachings laid the foundation for Jewish, Christian, and Islamic traditions, emphasizing obedience, justice, and divine covenant. Moses’s contributions remain pivotal in understanding biblical law and its enduring relevance today.

4.2 David: Psalms as Worship and Wisdom Literature

David, a renowned king and musician, authored many Psalms, blending worship with profound wisdom. His compositions express deep emotional and spiritual insights, serving as a cornerstone of Jewish and Christian worship. Through poetic expressions of praise, lament, and trust, David’s Psalms continue to inspire devotion and provide guidance for navigating life’s challenges, making them timeless treasures of spiritual literature.

4.3 Solomon: Wisdom and Philosophical Reflections

Solomon, known for his wisdom, authored Proverbs, Ecclesiastes, and the Song of Solomon. His writings explore moral teachings, the fleeting nature of life, and the search for meaning. Proverbs offers practical wisdom, while Ecclesiastes reflects on life’s vanities, emphasizing the importance of fearing God. Solomon’s contributions remain foundational for ethical and philosophical discussions, guiding believers in seeking divine wisdom and understanding life’s purpose.

4.4 Prophets: Calls to Repentance and Divine Judgment

The prophets, including Isaiah, Jeremiah, Ezekiel, and the minor prophets, delivered God’s messages, calling people to repentance and warning of divine judgment for disobedience. Their writings emphasized moral accountability, urging Israel to return to faithfulness. Through vivid imagery and dire predictions, they highlighted the consequences of sin while offering hope for restoration and redemption, making their teachings timeless and profoundly impactful.

The Process of Biblical Authorship

The Bible’s authorship involved divine inspiration, blending human personalities with sacred messages. Written across centuries, texts were compiled and canonized to form the authoritative scriptures we know today.

5.1 Inspiration and Divine Guidance

The process of biblical authorship is rooted in divine inspiration, where God guided human writers to convey sacred truths. Despite varied styles and personalities, the authors maintained consistency, ensuring the text’s authority and timeless relevance. This divine oversight is a cornerstone of the Bible’s credibility, reflecting God’s superintendence over the human writers.

5.2 Historical and Cultural Contexts

The Bible’s authors wrote within specific historical and cultural settings, reflecting their unique contexts. From ancient Near Eastern traditions to 1st-century Jewish practices, these backgrounds shaped the content and themes. Understanding these contexts enriches interpretation, revealing how divine messages were tailored to diverse audiences. Resources like PDF guides and scholarly works provide deeper insights into these influences and their significance.

5.3 Compilation and Canonization

The Bible’s compilation involved councils and criteria to determine authoritative texts. Canonization, spanning centuries, ensured books aligned with divine inspiration and communal beliefs. Early church leaders and scholars played key roles in recognizing sacred texts. PDF resources and scholarly works detail this process, offering insights into how the Bible became the revered collection of scriptures we know today.

Resources for Studying the Authors

Explore PDF guides, scholarly commentaries, and online tools for in-depth study of the Bible’s authors. Resources include detailed analyses, historical contexts, and practical study tips for deeper understanding.

6.1 PDF Guides and Study Materials

Download free PDF guides listing all 40 Bible authors and their works. These resources include study plans, printable charts, and detailed analyses. Websites like OverviewBible.com and MaryAndMarthaTeachSundaySchool.com offer comprehensive materials for deeper understanding. PDFs provide historical context, writing styles, and thematic insights, making them invaluable for both personal and group Bible studies. Explore these tools to enhance your biblical knowledge effectively.

6.2 Online Tools for Biblical Research

Utilize online platforms like OverviewBible.com for detailed lists of the 40 Bible authors and their works. These tools offer downloadable PDF guides, interactive timelines, and verse-by-verse analysis. They provide insights into the authors’ backgrounds, writing styles, and cultural contexts. Such resources enable in-depth research, helping to uncover the historical and theological significance of each author’s contributions to the Bible.

6.3 Recommended Commentaries and Scholarly Works

Explore scholarly works like those by E.G. Пржиялковская and Jeffrey Kranz for in-depth analysis. PDF guides and commentaries provide insights into the 40 authors’ styles and historical contexts. These resources, available online, enhance understanding of the Bible’s composition and theological significance, offering a rich foundation for academic and personal study of its authors and their contributions.

The 40 authors of the Bible left an enduring legacy, shaping faith and culture. Their writings remain relevant, offering wisdom and guidance supported by scholarly resources and PDF guides.

7.1 The Legacy of the 40 Authors

The 40 authors of the Bible left a profound legacy, shaping religious, cultural, and literary traditions. Their writings, spanning genres like law, poetry, and prophecy, remain central to faith and scholarship. Resources such as PDF guides and scholarly works continue to illuminate their contributions, ensuring their enduring relevance in modern times.

7.2 Continued Relevance in Modern Times

The teachings and writings of the Bible’s 40 authors remain highly relevant today, offering timeless wisdom on ethics, faith, and human nature. Modern tools like PDF guides and online resources make their works easily accessible, ensuring their enduring impact on spirituality, education, and cultural discourse across generations.

Posts navigation

1 2
Scroll to top