Open post

tennant t1 parts manual

The Tennant T1 Parts Manual is a comprehensive guide for maintaining and repairing your Tennant T1 floor scrubber. It provides detailed diagrams‚ part numbers‚ and essential information to ensure proper functionality. This manual is crucial for routine maintenance‚ troubleshooting‚ and identifying the right replacement parts. By following the guidelines‚ users can extend the lifespan of their equipment and maintain optimal performance. Key sections include an overview of the scrubber‚ parts identification‚ and ordering procedures.

  • Overview of the Tennant T1 Floor Scrubber
  • Importance of Using the Parts Manual

1.1 Overview of the Tennant T1 Floor Scrubber

The Tennant T1 is a high-performance‚ cord-electric walk-behind floor scrubber designed for efficient cleaning in both small and large spaces. It combines maneuverability with versatility‚ making it suitable for various floor types. The T1 features advanced cleaning technology‚ including adjustable scrubbing pressure and a robust design for durability. Its eco-friendly operation minimizes chemical and water usage‚ while its quiet motor ensures minimal disruption. This scrubber is ideal for commercial and industrial environments‚ offering reliability and consistent results.

  • Designed for versatility and efficiency
  • Adjustable scrubbing pressure for tailored cleaning
  • Eco-friendly operation with reduced water and chemical use

1.2 Importance of Using the Parts Manual

The Tennant T1 Parts Manual is essential for ensuring proper maintenance‚ repairs‚ and operation of the floor scrubber. It provides detailed diagrams‚ part numbers‚ and instructions to help users identify and replace components accurately. Using the manual reduces the risk of installing incorrect parts‚ which can damage the machine or void warranties. It also enhances safety by guiding users through proper maintenance and repair procedures‚ ensuring the equipment runs efficiently and effectively.

  • Ensures accurate identification of parts and components
  • Prevents installation of incorrect or incompatible parts
  • Provides step-by-step guidance for safe maintenance and repairs

Understanding the Tennant T1 Parts Manual

The Tennant T1 Parts Manual is structured to help users quickly locate and identify parts. It features detailed diagrams‚ part numbers‚ and descriptions‚ ensuring clarity and precision.

  • Logical organization for easy navigation
  • Visual aids like diagrams and charts
  • Standardized terminology for consistency

2.1 Structure and Organization of the Manual

The Tennant T1 Parts Manual is meticulously organized to enhance user experience. It begins with an introduction‚ followed by detailed sections on parts identification‚ ordering‚ and maintenance; Each chapter is clearly labeled‚ with subsections providing in-depth information. Diagrams and charts are strategically placed to aid visual understanding. The manual also includes an index for quick access to specific topics‚ ensuring that users can efficiently locate the information they need without unnecessary delays. This logical structure makes it an invaluable resource for both routine maintenance and complex repairs.

2.2 Key Symbols and Terminology Used

The Tennant T1 Parts Manual incorporates essential symbols and terminology to ensure clarity. Common symbols include checkmarks for correct parts and X’s for incompatible ones. Terms like “OEM” (Original Equipment Manufacturer) highlight authentic Tennant components. The manual defines these symbols and terms to help users understand and identify parts accurately. Familiarizing oneself with these elements is crucial for safe and effective maintenance‚ ensuring the correct parts are selected and installed without errors.

Identifying Parts for the Tennant T1

Identifying parts for the Tennant T1 involves using serial numbers and detailed diagrams. These tools help locate specific components efficiently‚ ensuring accuracy and ease of maintenance.

3.1 How to Locate Parts by Serial Number

To locate parts for the Tennant T1‚ start by identifying the machine’s serial number‚ usually found on the data label. Cross-reference this number with the parts manual or online system. The manual provides a detailed index‚ allowing you to search by serial number for specific components. This ensures accurate identification and compatibility. Use the diagrams provided to visually confirm the part’s location and description before ordering. Always verify the serial number to avoid mismatches.

  • Check the data label for the serial number.
  • Reference the parts manual or online system.
  • Use diagrams for visual confirmation.

3.2 Using Diagrams for Accurate Identification

Diagrams in the Tennant T1 Parts Manual provide a visual guide for identifying components. They illustrate the assembly and location of each part‚ making it easier to pinpoint what you need. By referencing these diagrams‚ you can match the part number with its position on the machine. This method ensures accuracy and prevents ordering incorrect parts. Use the diagrams alongside the parts list for cross-referencing and efficient identification.

  • Refer to detailed diagrams for visual clarity.
  • Match part numbers with their locations.
  • Use diagrams to avoid ordering errors.

Ordering Parts for the Tennant T1

Ordering parts for the Tennant T1 is straightforward using the manual’s diagrams and part numbers. Ensure accurate orders by referencing the serial number and approved suppliers.

  • Use diagrams to identify part numbers.
  • Reference the machine’s serial number.
  • Order online‚ by phone‚ or via fax.
  • Only use Tennant-approved or equivalent parts.

4.1 Step-by-Step Guide to Placing an Order

To place an order for Tennant T1 parts‚ follow these steps:

  • Identify the required part using the manual’s diagrams and part numbers.
  • Locate the machine’s serial number for accuracy.
  • Choose your preferred ordering method: online‚ phone‚ or fax.
  • Submit your order with the correct part numbers and quantities.
  • Review and confirm the order details before finalizing.
  • Track your shipment using the provided tracking information.

Ensure all parts are Tennant-approved or equivalent for safety and compatibility.

4.2 Approved Suppliers and Equivalent Parts

When ordering parts for your Tennant T1‚ ensure you purchase from approved suppliers to maintain quality and safety. Tennant-approved suppliers guarantee parts meet original specifications. Equivalent parts must also comply with Tennant’s standards to avoid compatibility issues. Always verify the authenticity of parts before installation. Using unauthorized parts may void warranties or lead to operational problems. Refer to the manual for a list of authorized suppliers and guidelines for equivalent parts.

  • Only use Tennant-approved or equivalent parts.
  • Verify supplier authenticity to avoid counterfeit parts.

Maintenance and Replacement Guidelines

Regular maintenance ensures optimal performance and longevity of your Tennant T1. Replace worn or damaged parts promptly to prevent further damage. Always use genuine Tennant parts or approved equivalents for safety and reliability. Refer to the manual for specific replacement intervals and procedures. Proper maintenance can enhance efficiency and reduce downtime‚ ensuring your equipment runs smoothly.

  • Conduct routine checks for wear and tear.
  • Replace parts as recommended in the manual.

5.1 Routine Maintenance Parts to Check

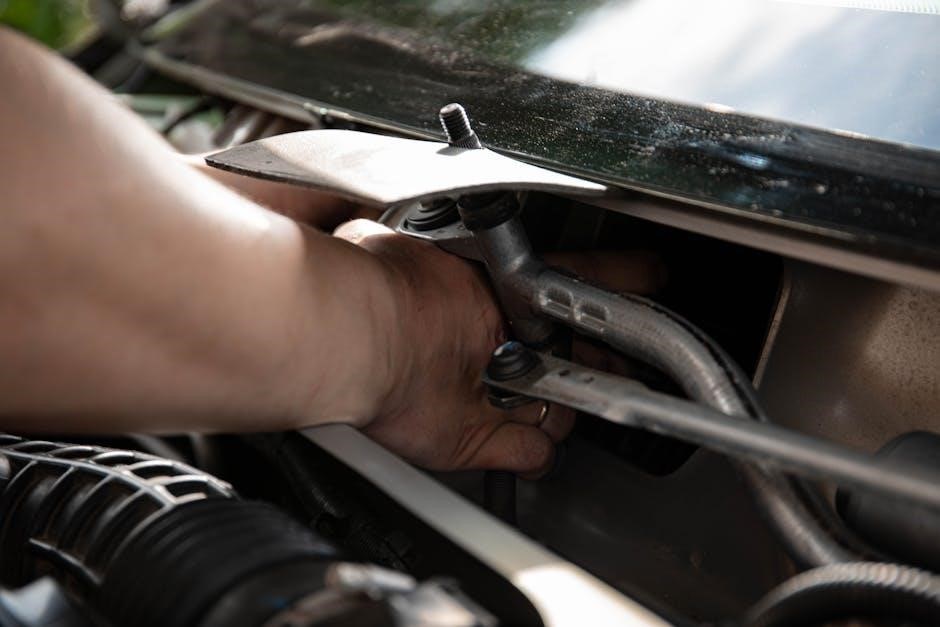
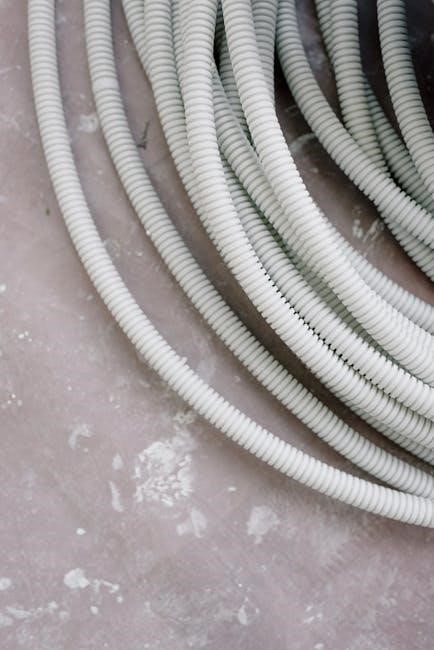
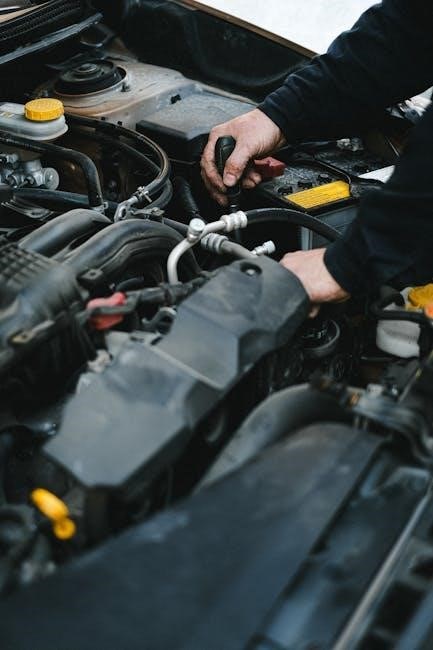
Regular inspection of key components ensures the Tennant T1 operates efficiently. Check the brushes‚ squeegee blades‚ and water filters for wear. Inspect the battery terminals for corrosion and ensure proper fluid levels. Verify the condition of drive belts and hoses for any signs of damage or leakage. Replace these parts as needed to maintain performance and prevent unexpected downtime. Always refer to the manual for specific maintenance schedules and part replacement guidelines.

  • Brushes and squeegee blades for wear and tear.
  • Battery terminals for corrosion and secure connections.
  • Fluid levels and filters for cleanliness.

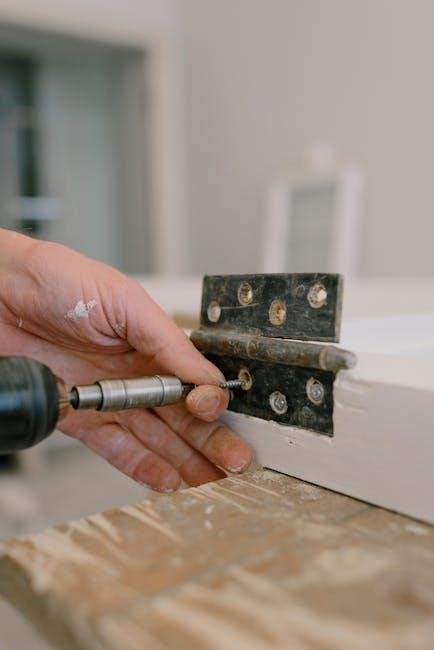
5.2 Tools and Safety Precautions for Replacements

When replacing parts on the Tennant T1‚ ensure you have the correct tools‚ such as wrenches‚ screwdrivers‚ and pliers. Always disconnect the battery and wear protective gear like gloves and goggles. Turn off the machine and allow it to cool before starting work. Proper ventilation is essential‚ especially when handling chemicals. Follow the manual’s guidelines to avoid accidents and ensure safe repairs. Never bypass safety features or skip precautions to maintain operator and equipment safety.

  • Disconnect the battery before starting repairs.
  • Wear protective gear‚ including gloves and goggles.
  • Ensure proper ventilation when handling chemicals.

Troubleshooting Common Issues

Troubleshooting the Tennant T1 involves identifying symptoms like unusual noise or reduced cleaning performance. Refer to the manual’s diagnostic guides to pinpoint faulty parts. Use diagrams to trace issues and ensure proper maintenance. Addressing problems early prevents major repairs and extends equipment lifespan. Always consult the manual for specific solutions and safety guidelines.

6.1 Identifying Faulty Parts Through Symptoms

Identifying faulty parts on the Tennant T1 begins with recognizing symptoms such as unusual noise‚ reduced cleaning performance‚ or malfunctioning controls. These indicators often point to specific components needing attention. For example‚ excessive noise may suggest worn brushes or a faulty motor‚ while poor cleaning results could indicate issues with the solution system. Always consult the parts manual to match symptoms with the correct diagrams and part numbers for accurate diagnosis.

By addressing symptoms early‚ you can prevent minor issues from escalating into major repairs. Regularly inspecting and maintaining your Tennant T1 ensures optimal performance and extends its operational lifespan. Use the manual’s troubleshooting section to guide your diagnostic process and ensure all replacements align with manufacturer specifications.

6.2 Using the Manual for Diagnostic Procedures

The Tennant T1 Parts Manual is an essential tool for diagnosing issues with your floor scrubber. By referencing the manual‚ you can identify symptoms‚ locate faulty parts‚ and follow step-by-step instructions for repairs. Detailed diagrams and part numbers guide you to the root cause of problems‚ ensuring accurate fixes. Always consult the troubleshooting section for specific procedures and solutions tailored to your Tennant T1 model. This approach helps maintain efficiency and prevents further damage to the equipment.

Safety and Compliance

Safety is critical when working with the Tennant T1. Always use approved parts and follow manufacturer guidelines to ensure compliance and prevent accidents. The manual highlights essential safety protocols and accessories to maintain operational integrity. Adhering to these standards ensures both user safety and equipment longevity‚ aligning with regulatory requirements and best practices for industrial equipment maintenance.

7.1 Safety Parts and Accessories Overview

The Tennant T1 manual emphasizes the importance of safety parts and accessories to protect both the operator and the equipment. These include protective covers‚ emergency stop switches‚ and warning decals. Using genuine Tennant parts ensures compliance with safety standards and prevents potential hazards. The manual provides detailed descriptions and diagrams to help identify and install these critical components. Regular inspection and replacement of safety parts are essential for maintaining a safe working environment and preventing accidents.

7.2 Compliance with Manufacturer Guidelines

Adhering to Tennant T1 manufacturer guidelines ensures safety‚ efficiency‚ and longevity of the equipment. The manual outlines specific standards for parts replacement and maintenance; Using only approved parts guarantees compliance with safety regulations and prevents voiding warranties. Regular inspections and adherence to recommended maintenance schedules are crucial. Always refer to the manual for precise instructions and contact Tennant experts for clarification on any compliance-related queries to ensure proper adherence to guidelines.

Additional Resources

Explore online support‚ diagrams‚ and expert assistance for the Tennant T1; Access manuals‚ part lists‚ and troubleshooting guides through Tennant’s official website or authorized dealers.

  • Online manuals and part diagrams
  • Customer support contact information
  • Authorized dealer networks

8.1 Online Support and Manuals

Tennant provides extensive online resources for the T1 parts manual‚ including downloadable PDF versions‚ interactive diagrams‚ and troubleshooting guides. Users can access these materials through the official Tennant website or authorized dealer portals. Additionally‚ online FAQs and technical bulletins offer solutions to common issues‚ ensuring quick resolution without needing direct contact. These resources are available 24/7‚ making it convenient for users to find the information they need at any time.

  • Downloadable PDF manuals
  • Interactive part diagrams
  • Online troubleshooting guides
  • Technical FAQs and bulletins

8.2 Contacting Tennant T1 Experts

For personalized assistance‚ users can contact Tennant T1 experts directly through various channels. Phone and email support are available for immediate inquiries‚ while live chat options provide real-time solutions. Tennant also offers regional support centers‚ ensuring local expertise is accessible. Additionally‚ users can schedule consultations with certified technicians for complex issues. These experts are trained to address specific needs‚ ensuring efficient and accurate support for parts-related queries and maintenance challenges.

  • Phone and email support
  • Live chat for real-time assistance
  • Regional support centers
  • Consultations with certified technicians

The Tennant T1 Parts Manual is an essential resource for efficient maintenance and repair. It ensures safety‚ longevity‚ and optimal performance of your equipment. Always reference it for accurate parts identification and troubleshooting‚ maximizing your investment in the Tennant T1 floor scrubber. Regular use of the manual will enhance operational efficiency and prolong machine life.

9.1 Summary of Key Points

The Tennant T1 Parts Manual is a vital tool for maintaining and repairing your floor scrubber efficiently. It provides detailed diagrams‚ part numbers‚ and troubleshooting guidance‚ ensuring optimal performance; Regular use of the manual helps identify worn or faulty components‚ streamline ordering processes‚ and maintain safety standards. By following the manual’s instructions‚ users can extend equipment lifespan‚ reduce downtime‚ and ensure compliance with manufacturer guidelines. It also highlights the importance of using genuine or approved parts for reliability and safety.

  • Essential for maintenance and repair
  • Includes detailed diagrams and part numbers
  • Guides troubleshooting and parts replacement
  • Emphasizes safety and compliance

9.2 Final Tips for Effective Use of the Parts Manual

To maximize the benefits of the Tennant T1 Parts Manual‚ always reference the diagrams for accurate part identification. Ensure you use genuine or approved parts to maintain performance and safety. Cross-reference parts with your serial number for compatibility. Double-check orders before submission and consult experts if unsure. Regularly review the manual for updates and familiarize yourself with troubleshooting sections to address issues promptly. This approach ensures efficient maintenance and extends the lifespan of your equipment.

  • Reference diagrams for precise identification
  • Use genuine or approved parts only
  • Regularly review for updates
  • Consult experts when uncertain
Open post

art portfolio examples pdf

An art portfolio PDF is a essential tool for artists to showcase their creative work professionally. It allows artists to present their best pieces in a organized, visually appealing format, making it easy to share with galleries, schools, or potential employers. PDF portfolios are widely used due to their universality and high-quality display. They can include various types of artwork, from paintings and photographs to fashion designs and mixed media. By using tools like Adobe InDesign or Canva, artists can create polished, cohesive portfolios that highlight their skills and style. A well-crafted PDF portfolio is crucial for standing out in the competitive art world.

1.1 What is an Art Portfolio and Its Importance

An art portfolio is a curated compilation of an artist’s best works, showcasing their skills, creativity, and personal style. It typically includes paintings, photographs, designs, or other artistic pieces that highlight the artist’s versatility and expertise. The importance of an art portfolio lies in its ability to open doors to opportunities such as exhibitions, educational programs, and professional collaborations. It serves as a visual representation of an artist’s journey, allowing galleries, schools, and potential employers to assess their talent and suitability for specific roles. A well-crafted portfolio not only demonstrates technical proficiency but also communicates the artist’s unique vision and creative approach. It is an essential tool for artists aiming to stand out in the competitive art world.

1.2 Why PDF Format is Popular for Art Portfolios

The PDF format has become the preferred choice for art portfolios due to its versatility and reliability. It ensures that the layout, colors, and overall design remain consistent across different devices and platforms, preserving the artist’s intent. Unlike other formats, PDFs are universally accessible and do not require specialized software, making them easy to share via email or online platforms. Additionally, PDFs allow for high-quality image compression, maintaining the integrity of artwork while keeping file sizes manageable. This makes them ideal for submitting to galleries, schools, or employers. The ability to password-protect PDFs also adds a layer of security, safeguarding sensitive content. Overall, PDFs strike the perfect balance between professionalism, accessibility, and practicality for artists.

Types of Art Portfolios

Art portfolios vary widely, encompassing fine arts, fashion design, graphic art, photography, and mixed media. Each type highlights specific artistic skills and creative expressions.

2.1 Fine Arts and Painting Portfolios

Fine arts and painting portfolios showcase an artist’s technical skills and creative expression through various mediums like oil, acrylic, or mixed media. These portfolios often highlight a range of styles, from realistic to abstract, and may include sketches, finished pieces, and conceptual works. Artists use PDF formats to present their paintings in high-resolution, ensuring vibrant colors and precise details. Many portfolios also provide context, such as the inspiration behind the work or the artistic process. This format allows for easy sharing and professional presentation, making it ideal for galleries, exhibitions, or educational applications. A strong fine arts portfolio demonstrates an artist’s versatility and mastery of their craft.

2.2 Fashion Design and Graphic Art Portfolios

Fashion design and graphic art portfolios in PDF format are essential for showcasing creativity and technical skills. These portfolios typically include sketches, mood boards, and final designs, demonstrating an artist’s ability to translate ideas into tangible creations. High-quality images and minimal text allow the artwork to speak for itself. Graphic art portfolios often feature branding elements, typography, and digital illustrations, while fashion portfolios highlight textiles, patterns, and garment designs. Tools like Canva or Adobe InDesign are commonly used to create these portfolios, ensuring a professional and cohesive presentation. A well-organized PDF portfolio helps fashion and graphic artists attract clients, employers, or collaborators by presenting their work in a polished and accessible format. It’s a vital tool for standing out in competitive industries.

2.3 Photography and Mixed Media Portfolios

Photography and mixed media portfolios in PDF format are ideal for showcasing visual storytelling and creative experimentation. Photographers often include high-quality images that demonstrate their mastery of lighting, composition, and subject matter. Mixed media portfolios, on the other hand, combine photography with elements like paint, textiles, or digital art, creating unique and layered pieces. These portfolios highlight an artist’s ability to blend techniques and push boundaries. PDFs are particularly effective for presenting these works, as they maintain image quality and allow for seamless navigation. Whether focusing on documentary, fine art, or experimental styles, a photography and mixed media portfolio in PDF format offers a professional and engaging way to share artistic vision and versatility.

How to Create an Art Portfolio PDF

Creating an art portfolio PDF involves selecting your best work, organizing it logically, and designing it with professional tools like Adobe InDesign or Canva. Ensure high-quality images, consistent layout, and clear navigation for a polished presentation that showcases your artistic skills and style effectively.

3.1 Steps to Design a Professional Art Portfolio

Designing a professional art portfolio involves several key steps. First, curate your best and most relevant work, ensuring it aligns with your artistic goals. Next, organize the content logically, starting with a cover page and table of contents. Use design tools like Adobe InDesign or Canva to create a cohesive layout. Include high-quality images, with captions for context. Optimize the PDF for different devices, ensuring fast loading times. Finally, proofread and test the portfolio before sharing. These steps ensure your portfolio is polished, professional, and showcases your artistic talent effectively.

3.2 Tips for Organizing and Presenting Your Work

Organizing and presenting your work effectively is crucial for a professional art portfolio. Start by selecting your strongest pieces that showcase your artistic range and style. Use consistent layouts, fonts, and colors to maintain a cohesive look. Include high-quality images optimized for digital viewing, ensuring they are clear and well-lit. Add captions or descriptions to provide context for each piece, such as inspiration, medium, or date. Consider starting with your most impactful work to grab attention. Use a contents page for easy navigation and ensure the PDF is mobile-friendly. Regularly update your portfolio to reflect your artistic growth and tailor it to the audience or opportunity you’re targeting.

Tools for Designing an Art Portfolio PDF

Popular tools include Adobe InDesign for professional layouts, Canva for templates, and Microsoft Word for simple designs. These tools support PDF exports and offer customization options.
They also provide drag-and-drop features and compatibility with various file formats like PDF, DOCX, and INDD, making portfolio creation efficient and accessible for artists.

4.1 Adobe InDesign and Canva for Portfolio Creation

Adobe InDesign and Canva are top choices for creating art portfolio PDFs. InDesign offers advanced layout control, perfect for professionals needing precise design customization. Canva provides user-friendly templates and drag-and-drop functionality, ideal for those with less design experience. Both tools support high-quality image imports and allow artists to organize their work cohesively. InDesign’s compatibility with PDF exports ensures professional-grade output, while Canva’s intuitive interface makes it accessible for quick portfolio assembly. These platforms cater to different skill levels, enabling artists to present their work in a polished, visually appealing manner. They are widely recommended for portfolio creation due to their versatility and ease of use.

4.2 Using Microsoft Word for Simple PDF Portfolios

Microsoft Word is a practical tool for creating simple art portfolio PDFs. Its user-friendly interface allows artists to easily arrange text and images. While it may not offer the advanced design features of InDesign, Word is ideal for those seeking a straightforward approach. Artists can insert high-quality images, format text, and organize pages efficiently. Word’s compatibility with PDF conversion ensures that portfolios are exported in a professional format. It’s a cost-effective solution, especially for students or emerging artists, providing a clean and professional presentation of their work without requiring specialized design skills. This makes Word a viable option for artists looking to create a simple yet effective portfolio quickly.

Best Practices for an Art Portfolio PDF

Ensure consistency in layout and design throughout your portfolio. Optimize image quality while keeping file sizes manageable for smooth viewing. Organize work logically, with clear headings and captions. Use high-resolution images and maintain a professional appearance. Keep the portfolio concise, focusing on your best pieces. Include a contents page for easy navigation. Proofread thoroughly to avoid errors. Ensure compatibility across devices and platforms. Regularly update your portfolio to reflect new work and artistic growth.

5.1 Consistency in Layout and Design

Consistency is key to a professional art portfolio. Use a uniform layout, font style, and color scheme throughout the document. Ensure margins and spacing are uniform across pages. Maintain a cohesive visual flow by aligning images and text consistently. Use page numbers or a table of contents for easy navigation. Apply consistent formatting to headings and captions. Avoid overly elaborate designs that distract from the artwork. Instead, focus on a clean, minimalist aesthetic that allows your art to shine. Consistency reinforces your brand and professionalism, making your portfolio more engaging and polished for reviewers.

5.2 Optimizing Image Quality and File Size

Optimizing image quality and file size is crucial for a professional art portfolio. Use high-resolution images to showcase details, but compress them to keep the PDF file size manageable. Aim for a balance between quality and file size, ensuring fast loading times without compromising visual clarity. Use tools like Adobe Acrobat or Canva to optimize images and reduce file size. Convert images to appropriate formats like JPEG or PNG and adjust resolutions based on digital viewing needs. Avoid overly large files that may be difficult to share or download. Ensure your portfolio is accessible and efficient while maintaining professional image standards. Proper optimization enhances both aesthetics and usability, making your portfolio more appealing to reviewers.

Open post

statistics project examples pdf

Statistics project examples, such as analyzing Skittles colors or job satisfaction during remote work, provide hands-on experience with data collection and statistical analysis techniques.

Importance of Statistics in Real-World Applications

Statistics plays a vital role in solving real-world problems by enabling data-driven decision-making. It is widely used in healthcare, education, engineering, and environmental studies to analyze trends and patterns. For instance, evaluating plastic use or comparing e-books to conventional books demonstrates its practical applications. By applying statistical methods, professionals can make informed decisions, optimize processes, and address societal challenges effectively. Its versatility makes it indispensable across industries.

Types of Statistics Projects

Statistics projects are categorized into descriptive, inferential, and applied types. Descriptive projects summarize data, while inferential projects draw conclusions from samples. Applied projects solve real-world problems using statistical methods.

3.1. Descriptive Statistics Projects

Descriptive statistics projects involve summarizing and describing datasets to understand their basic features. Common examples include analyzing the distribution of Skittles candy colors, evaluating transportation data, or summarizing survey results. These projects often use measures of central tendency and variability, such as mean, median, and standard deviation, to provide clear and concise insights into the data. Visual representations like bar charts and histograms are frequently employed to enhance understanding.

3.2. Inferential Statistics Projects

Inferential statistics projects focus on making predictions or drawing conclusions about a population based on sample data. Examples include hypothesis testing to evaluate claims, such as whether e-books are better than conventional books, or analyzing the impact of plastic use. These projects often involve t-tests, confidence intervals, and regression analysis to determine the significance of findings and make informed decisions. They emphasize critical thinking and data-driven reasoning.

3.3. Applied Statistics Projects

Applied statistics projects involve practical applications of statistical methods to real-world problems. Examples include analyzing traffic patterns to improve road safety, evaluating the environmental impact of plastic use, or assessing the effectiveness of public health interventions. These projects often use tools like regression analysis, data visualization, and hypothesis testing to provide actionable insights, making them valuable for decision-making in fields like engineering, healthcare, and environmental science.

Popular Topics for Statistics Projects

Popular topics include evaluating plastic use, comparing e-books to conventional books, and analyzing transportation data. These subjects offer practical insights and are ideal for student projects.

4.1. Evaluating the Effect of Plastic Use

This project involves analyzing the impact of plastic use on the environment and society. Students formulate statistical questions, collect data through surveys or experiments, and apply hypothesis testing to determine significant effects. Regression analysis can explore relationships between plastic consumption and waste levels. The project encourages critical thinking about sustainability and provides practical insights into reducing environmental impact. It is a relevant topic for real-world applications of statistics.

4.2. Comparing E-books and Conventional Books

This project involves comparing e-books and conventional books to evaluate preferences and reading habits. Students collect data through surveys, applying descriptive statistics to summarize responses and inferential statistics to compare groups. They explore factors like convenience, readability, and satisfaction. This study provides insights into reading preferences and the impact of technology on education, making it a valuable real-world application of statistical analysis.

4.3. Analyzing Transportation Data

This project involves analyzing transportation data to evaluate trends, efficiency, and environmental impact. Students collect data on road, rail, and intermodal transport, applying statistical methods to identify patterns and correlations. The study assesses key indicators like usage rates and carbon emissions, providing insights into transportation systems’ performance. This real-world application of statistics helps in understanding and improving transportation networks.

Tools and Software for Statistics Projects

Popular tools like R, Python, and Jupyter Notebook enable data analysis and visualization, while Excel supports basic statistical tasks. These tools enhance project execution and presentation.

5.1. Using R for Data Analysis

R is a powerful tool for statistical computing and graphics, offering extensive libraries for data manipulation, hypothesis testing, and visualization. Its flexibility allows students to perform complex analyses, from regression to time series, making it ideal for academic projects. R’s integration with Jupyter Notebook enhances collaborative workflows, enabling users to transform raw data into actionable insights efficiently.

5.2. Jupyter Notebook for Visualization

Jupyter Notebook is an interactive computing environment ideal for data visualization in statistics projects. It supports libraries like Matplotlib and Seaborn, enabling the creation of dynamic, high-quality visualizations. Its collaborative features allow real-time sharing and editing, making it a versatile tool for presenting complex data analysis in an engaging and accessible format for both educators and students.

Steps to Create a Statistics Project

Creating a statistics project involves formulating a research question, collecting and organizing data, and analyzing and interpreting results to draw meaningful conclusions.

6.1. Formulating a Research Question

Formulating a clear and focused research question is the foundation of any successful statistics project. It guides data collection and analysis, ensuring the study remains relevant and targeted. Examples include investigating the impact of plastic use or comparing e-books to conventional books. A well-crafted question should be specific, measurable, and aligned with the project’s objectives to yield meaningful insights and conclusions.

6.2. Collecting and Organizing Data

Data collection involves gathering relevant information through surveys, experiments, or existing sources. It is crucial to ensure data quality and representativeness. Organizing data systematically, often in tables or spreadsheets, facilitates analysis. A clear description of the data collection method and sample is essential for transparency and reliability. Proper organization ensures accuracy and ease of interpretation, forming a solid foundation for subsequent statistical analysis.

6.3. Analyzing and Interpreting Results

Analysis involves applying statistical methods to draw meaningful insights from the data. Tools like R or Python are often used for calculations and visualizations. Interpretation connects findings to the research question, explaining their significance. Clear conclusions are drawn, highlighting trends, patterns, or relationships. This step ensures the project’s results are understandable and relevant, providing a solid foundation for decision-making or further investigation.

Examples of Successful Student Projects

Prominent examples include the Skittles color distribution analysis and studies on remote work job satisfaction. These projects demonstrate practical applications of statistical concepts and methodologies effectively.

7.1. Skittles Candy Color Analysis

This project involves analyzing the distribution of Skittles candy colors in a bag. Students collect data, calculate descriptive statistics, and visualize results. It teaches hypothesis testing, comparing expected vs. actual distributions, and data interpretation. The hands-on approach makes complex statistical concepts engaging and accessible for learners, fostering a deeper understanding of probability and variability in real-world scenarios.

7.2. Job Satisfaction During Remote Work

This project examines job satisfaction and work-life balance among professionals working remotely. Students collect survey data, apply descriptive and inferential statistics, and interpret results. The study highlights factors influencing satisfaction, such as productivity and workload. It demonstrates the practical application of statistical methods to real-world issues, providing insights into remote work trends and their impact on employee well-being.

Case Studies in Statistics Education

Case studies in statistics education highlight practical applications of statistical methods in real-world scenarios, enabling students to connect theoretical concepts with hands-on data analysis and interpretation.

8.1. Engineering Applications of Statistics

Statistics plays a crucial role in engineering, enabling data-driven decision-making and process optimization. Engineers use statistical methods for quality control, predictive modeling, and reliability analysis. Projects often involve analyzing failure rates, material properties, or system performance. Statistical tools like hypothesis testing and regression help in understanding relationships between variables. Real-world applications include improving manufacturing processes, designing experiments, and ensuring product safety. These projects highlight how statistical techniques solve complex engineering challenges effectively.

8.2. Environmental Statistics Projects

Environmental statistics projects focus on analyzing data to address ecological issues. Common topics include air quality assessment, water contamination analysis, and biodiversity trends. Students often collect data on pollution levels, carbon emissions, or deforestation rates. Statistical methods like regression and hypothesis testing help identify patterns and correlations. These projects provide insights for sustainable solutions, emphasizing the role of data in environmental conservation and policy-making. They equip students with practical skills to tackle real-world ecological challenges.

Best Practices for Project Submission

Ensure clear research justification, proper data sampling, and accurate analysis. Present results logically with visual aids like graphs and charts for better understanding and clarity.

9.1. Clear Research Justification

A clear research justification is essential for a strong statistics project. It involves stating the problem, explaining its significance, and providing background context. This ensures the project addresses a relevant issue, aligns objectives with the research question, and demonstrates its importance to the field. A well-justified study guides data collection and analysis, ensuring logical flow and credibility.

9.2. Proper Data Sampling Methods

Proper data sampling methods are crucial for valid and reliable results. Techniques like random sampling ensure unbiased data collection, while stratified sampling targets specific subgroups. Clear descriptions of sampling processes and justification of their use are necessary. This ensures data representativeness and enhances the study’s credibility, providing a solid foundation for accurate statistical analysis and meaningful conclusions in the project.

Resources for Statistics Project Ideas

Accessible resources include PDF documents, research materials, and online courses. These provide comprehensive guides, examples, and tools for developing and executing statistics projects effectively.

10.1. PDF Documents and Research Materials

PDF documents and research materials offer comprehensive guides for statistics projects, including examples, case studies, and detailed methodologies. These resources provide clear guidelines for project proposals, data collection, and analysis, ensuring students meet academic requirements. They also include sample projects and templates, making it easier for learners to structure their work effectively. Additionally, these materials often cover emerging trends and applications in statistics, fostering deeper understanding and practical skills.

10.2. Online Courses and Tutorials

Online courses and tutorials provide structured learning paths for statistics, offering interactive lessons and practical exercises. They cover topics from basic descriptive statistics to advanced inferential methods, often including assignments and real-world datasets. These resources are designed to help students apply statistical concepts effectively, with tools like Jupyter Notebook for visualization and R for analysis. Many courses also include case studies and project examples, bridging the gap between theory and application.

Common Challenges in Statistics Projects

Common challenges in statistics projects include data collection limitations, such as sampling bias and incomplete datasets, as well as interpreting complex results accurately and effectively.

11.1. Data Collection Limitations

Data collection limitations often arise from factors like time constraints, budget restrictions, and accessibility of target populations. Ensuring a representative sample size and avoiding bias are critical challenges. Additionally, reliance on self-reported data or tools with measurement errors can impact accuracy. Addressing these limitations is essential to maintain the validity and reliability of statistical analysis in projects, such as those analyzing Skittles colors or job satisfaction.

11.2. Interpreting Complex Results

Interpreting complex statistical results can be challenging, especially when dealing with large datasets or unexpected trends. Tools like graphs and statistical software aid in understanding correlations and causations. Clear communication of findings is crucial to avoid misinterpretation. For example, in projects analyzing Skittles colors or job satisfaction, ensuring accurate conclusions requires careful analysis and validation. Best practices include using visualization tools and seeking expert feedback to simplify complex results effectively.

Final Project Evaluation Criteria

Projects are evaluated based on clarity of research questions, accuracy of data analysis, proper methodology, and clear presentation of findings, ensuring logical conclusions are drawn effectively.

12.1. Clarity and Relevance of the Question

A clear and relevant research question is essential for a successful project. It must be focused, specific, and aligned with real-world applications or theoretical frameworks. The question should guide the entire project, ensuring data collection and analysis remain purposeful. Evaluators assess how well the question addresses a meaningful issue and its potential to contribute to broader understanding. A well-defined question enhances project coherence and impact.

12.2. Accuracy of Data Analysis

Accuracy in data analysis ensures reliable and valid results. It involves correct application of statistical methods, proper hypothesis testing, and precise interpretation of findings. Evaluators assess how well data is processed, biases are minimized, and conclusions align with evidence. Attention to detail, use of appropriate tools, and thorough validation enhance accuracy, demonstrating a strong command of statistical techniques and rigorous analytical reasoning.

Statistics projects offer valuable hands-on experience, bridging theory and real-world applications. By exploring diverse topics like environmental studies or job satisfaction, students develop critical thinking and analytical skills. Future directions include integrating advanced tools like AI and big data, fostering interdisciplinary collaborations, and addressing emerging challenges. Continuous learning and innovation will ensure statistics remains a vital tool for solving complex problems and driving informed decision-making across industries.

Open post

6 week hiit workout plan pdf

6 Week HIIT Workout Plan PDF: A Comprehensive Guide

This guide offers a detailed 6-week HIIT program, perfect for improving endurance, boosting metabolism, and shedding fat. With flexible scheduling and progressive intensity, it targets all major muscle groups, ensuring a well-rounded fitness transformation. Rest days are incorporated for recovery, and the plan is designed to accommodate various fitness levels, making it accessible to both beginners and experienced individuals. The PDF includes structured workouts, nutritional advice, and tips for maintaining motivation throughout the program.

High-Intensity Interval Training (HIIT) is a powerful and time-efficient workout method that combines short bursts of intense exercise with brief periods of rest. This training style has gained popularity due to its ability to deliver significant health benefits in a shorter duration compared to traditional workouts. HIIT improves cardiovascular health, increases metabolism, and enhances muscular endurance. One of the key advantages of HIIT is its ability to promote excess post-exercise oxygen consumption (EPOC), meaning your body burns calories even after the workout is completed. This makes HIIT an effective way to shed fat and improve overall fitness. Additionally, HIIT workouts are versatile and can be adapted to suit different fitness levels, from beginners to advanced athletes. The 6-week HIIT workout plan PDF is designed to maximize these benefits, providing a structured approach to help you achieve your fitness goals. By incorporating HIIT into your routine, you can expect improved stamina, enhanced coordination, and a stronger, leaner physique.

Understanding the 6-Week HIIT Workout Structure

The 6-week HIIT workout plan is strategically designed to maximize fitness gains through a structured and progressive approach. The program is divided into six phases, each lasting one week, with three HIIT sessions per week. Each session typically includes a warm-up routine, followed by a series of high-intensity exercises and intervals, and concludes with a cool-down stretch. The workouts are carefully balanced to target different muscle groups and improve cardiovascular endurance. The plan incorporates a mix of bodyweight exercises, plyometrics, and dynamic movements, ensuring variety and preventing plateaus. As the weeks progress, the intensity and duration of the workouts gradually increase, challenging the body to adapt and improve. Rest days are included to allow for recovery and muscle repair, which are crucial for optimal results. The structure of the program ensures that participants can track their progress and stay motivated throughout the six-week journey. This scientific approach to HIIT training guarantees a balanced and effective path to achieving fitness goals.

Key Components of the 6 Week HIIT Workout Plan

The plan includes structured HIIT sessions, progressive intensity, and targeted exercises. It combines bodyweight movements, plyometrics, and strength training, with clear schedules and nutritional advice to optimize results and ensure a balanced fitness approach for all levels.

Weekly Progression and Intensity Increase

The 6-week HIIT workout plan is designed to gradually increase in intensity, ensuring continuous progress and adaptation. Each week introduces more challenging exercises, reduced rest periods, or additional reps to push your limits. For example, Week 1 focuses on foundational movements like jumping jacks and mountain climbers, while Week 3 incorporates more dynamic exercises such as burpees and jump squats. By Week 6, the workouts include advanced techniques like plyometric drills and AMRAP (As Many Reps As Possible) challenges to test endurance and strength. The progression ensures that your body is consistently challenged, preventing plateaus and maximizing results. Rest periods are strategically shortened, and work intervals are extended to enhance cardiovascular endurance and muscular stamina. This structured approach ensures that each week builds on the previous one, preparing you for the final intense workouts in Week 6. The gradual increase in intensity makes the program suitable for both beginners and intermediate fitness enthusiasts, allowing everyone to progress at their own pace while achieving significant improvements in overall fitness.

Specific Exercises and Routines for Each Week

The 6-week HIIT workout plan includes a variety of exercises tailored to each week, ensuring a balanced and progressive approach to fitness. Week 1 focuses on foundational movements such as jumping jacks, mountain climbers, and bodyweight squats, designed to build endurance and coordination. By Week 3, the routines incorporate more dynamic exercises like burpees, jump squats, and plank hip dips, which target strength and agility. In Week 6, the program introduces advanced movements such as plyometric exercises, max rep pull-ups, and vertical jumps, pushing participants to their limits. Each workout is structured with timed intervals, such as 45 seconds of intense exercise followed by 15 seconds of rest, with 4 sets per exercise. Specific routines include exercises like dumbbell push press, reverse crunches, and side plank hip dips, ensuring full-body engagement. The plan also includes AMRAP (As Many Reps As Possible) challenges to test endurance and strength. With clear instructions and video guides provided in the PDF, participants can follow along confidently, ensuring proper form and maximum results.

Additional Elements for Maximum Results

The plan includes essential elements like warm-up routines, cool-down stretches, and nutrition tips to optimize performance. Tracking progress and staying motivated are emphasized, with guided videos and printable schedules to ensure consistency and success throughout the program.

Warm-Up and Cool-Down Routines

A proper warm-up is essential to prepare your body for HIIT workouts, reducing injury risk and improving performance. Begin with 5-10 minutes of light cardio, such as jogging in place or cycling, followed by dynamic stretches like arm circles, leg swings, and torso twists. Incorporate high knees, butt kicks, and side lunges to activate your muscles. For the cool-down, focus on static stretches to improve flexibility and reduce muscle tension. Target major muscle groups like hamstrings, quads, and chest with deep, controlled stretches. Include deep breathing exercises to promote relaxation and aid recovery. Avoid skipping the cool-down, as it helps lower your heart rate gradually and prevents post-workout soreness. The PDF provides detailed warm-up and cool-down routines, ensuring a safe and effective transition into and out of each session. Proper hydration and foam rolling are also emphasized to enhance recovery and maintain mobility throughout the program.

Nutrition and Recovery Tips

Nutrition and recovery are crucial for maximizing the benefits of your 6-week HIIT workout plan. Fuel your body with a balanced diet rich in lean proteins, complex carbohydrates, and healthy fats to support energy levels and muscle repair. Hydration is key—aim to drink at least 8 glasses of water daily, increasing intake on workout days. Post-workout, refuel with a mix of protein and carbs within 30-60 minutes to aid recovery and replenish glycogen stores. Include foods high in antioxidants, such as berries and leafy greens, to combat oxidative stress caused by intense training. Rest days are vital for muscle recovery, so ensure you’re getting 7-9 hours of quality sleep each night. Consider incorporating recovery techniques like foam rolling, stretching, or light yoga to reduce muscle soreness. Avoid overtraining by listening to your body and adjusting your nutrition and rest based on your progress. The PDF includes meal ideas and recovery strategies to help you stay on track and optimize your results throughout the program.

Tracking Progress and Staying Motivated

Tracking progress during your 6-week HIIT journey is essential to see improvements and stay motivated. Use the workout plan PDF to monitor your daily and weekly achievements, ensuring consistency and gradual intensity increases. Celebrate small victories like completing challenging circuits or increasing the number of reps. Setting personal records, such as max pull-ups or vertical jumps in Week 6, provides clear milestones of your progress. Stay motivated by sharing your journey on social media or joining fitness communities for support. Remember, rest days are crucial for recovery and preventing burnout, so maintain a balance between intense training and adequate rest. The structured schedule in the PDF helps keep you accountable, while the guided workout videos offer a sense of accomplishment as you progress. By focusing on both physical achievements and mental resilience, you’ll stay motivated throughout the program and achieve your fitness goals by the end of the sixth week. This comprehensive approach ensures you not only meet but exceed your expectations for a healthier, stronger you after six weeks of dedicated effort.

Open post

slash chords piano pdf

Slash chords on piano involve a triad played over a bass note, enabling smooth transitions and enriching harmonies. They are vital in jazz, pop, and worship music, adding depth and complexity.

What Are Slash Chords?

A slash chord is a musical notation where a chord is played over a specific bass note, indicated by a slash. For example, C/Bb means a C major triad played over a Bb bass note. This creates a rich, layered sound. Slash chords are often used to add complexity and depth to music, allowing for smoother transitions between chords. They are particularly common in jazz, pop, and worship music. Unlike traditional chords, slash chords separate the harmony and bass, providing flexibility for pianists to explore new harmonic possibilities while maintaining a steady foundation.

Importance of Slash Chords in Piano Music

Slash chords are essential in piano music for enhancing musicality and expression. They allow pianists to create seamless transitions between chords, preventing abrupt changes in harmony. By specifying a bass note, slash chords add depth and complexity to compositions, making them particularly valuable in jazz and contemporary styles. They also offer flexibility, enabling pianists to experiment with different harmonic structures while maintaining a steady foundation. This versatility makes slash chords a powerful tool for adding emotion and sophistication to musical performances, elevating both simple melodies and intricate arrangements to new heights.

Understanding Slash Chord Notation

Slash chords are notated with a slash, such as C/Bb, indicating the chord and bass note. They are also called compound or inverted chords.

Basic Structure of Slash Chords (e.g., C/Bb, F/A)

A slash chord consists of a chord symbol with a slash and a bass note, such as C/Bb or F/A. The portion before the slash indicates the chord, while the part after specifies the bass note. This structure allows for varied harmonic interpretations, as the same chord can be played over different bass notes, creating unique textures. For instance, C/Bb means a C major triad with a Bb in the bass, while F/A involves an F chord with an A in the bass. This flexibility enhances musicality and provides smooth transitions in compositions.

How to Interpret Slash Chords in Sheet Music

When encountering slash chords in sheet music, the left side of the slash indicates the chord to play, while the right side specifies the bass note. For example, in C/Bb, play a C major triad with a Bb in the bass. This notation guides the pianist to create a specific harmonic and rhythmic effect. The bass note often comes from a scale or chord tone related to the key, ensuring a cohesive sound. Proper interpretation requires understanding the chord structure and its role in the musical context, enhancing the overall performance’s depth and expression.

Benefits of Using Slash Chords in Piano Playing

Slash chords enhance musicality by adding depth and complexity. They allow for smoother transitions between harmonies, creating a richer, more dynamic sound in piano performances.

Creating Smooth Transitions Between Chords

Slash chords are invaluable for creating seamless transitions between chords. By altering the bass note while maintaining the same chord shape, they bridge harmonic gaps, ensuring a smooth flow.

For example, moving from C major to G7 can feel abrupt, but using C/G or G7/C smooths the progression. This technique is widely used in jazz and pop music to enhance continuity.

Enhancing Musicality and Expression

Slash chords add depth and emotional richness to music, allowing pianists to explore nuanced harmonies. By changing the bass note, musicians can alter the feel of a chord, creating intricate layers of sound that elevate a piece beyond basic triads.

This technique is particularly effective in jazz and contemporary music, where expression and complexity are valued. Slash chords enable dynamic shifts in tone, making melodies more engaging and emotionally resonant. They also provide flexibility for creative interpretation, allowing pianists to personalize their performances.

How to Play Slash Chords on the Piano

Playing slash chords involves using the left hand for the bass note and the right hand for the chord, creating a harmonically rich sound.

Left-Hand and Right-Hand Techniques

Mastering slash chords requires coordinating both hands. The left hand plays the bass note, while the right hand plays the chord above it. This technique enhances balance and harmony in music. Regular practice strengthens finger independence and dexterity. Starting with simpler chords like C/Bb and gradually moving to more complex ones ensures a smooth learning curve. Proper hand positioning and finger placement are crucial for clear sound production. Over time, this method becomes second nature, allowing for expressive and dynamic performances.

Practical Exercises for Mastering Slash Chords

Start with warm-up exercises like scales and arpeggios to build finger dexterity. Practice simple slash chords (e.g., C/Bb, G/B) in slow tempos, focusing on clarity. Gradually incorporate these into familiar songs, such as hymns or pop tunes. Experiment with transitions between chords to develop smoothness. Record yourself to track progress and identify areas for improvement. For advanced practice, try seventh and extended slash chords (e.g., G7/F, Am7/D) to expand your harmonic palette. Consistent practice ensures mastery and enhances your ability to play complex piano pieces with confidence.

Common Slash Chords and Their Applications

Slash chords like G/B, C/A, and Am7/D are widely used in jazz and pop music to create rich, layered harmonies and seamless transitions between chord progressions.

Major and Minor Slash Chords (e.g., G/B, C/A)

Major and minor slash chords combine a triad with a bass note, creating rich, layered harmonies. For example, G/B features a G major triad over a B bass, while C/A uses a C major triad over an A bass. Minor slash chords, like Am7/D, blend a minor triad with a bass note, adding emotional depth. These chords are widely used in jazz, pop, and worship music to enhance transitions and harmonic interest. They offer flexibility, allowing pianists to explore complex sounds while maintaining musicality and expression in their playing.

Seventh and Extended Slash Chords (e.g., G7/F, Am7/D)

Seventh and extended slash chords add color and complexity to music. For instance, G7/F combines a G dominant 7th triad with an F bass, while Am7/D blends an A minor 7th triad over a D bass. Extended chords like Cmaj9/G or D11/E expand further, incorporating additional tones. These chords are especially popular in jazz and contemporary music, offering rich, nuanced harmonies. They allow pianists to create intricate, layered sounds while maintaining smooth transitions. Seventh and extended slash chords are versatile, enhancing both accompaniment and solos with depth and musicality.

Resources for Learning Slash Chords

Explore comprehensive guides, tutorials, and lessons to master slash chords. Utilize PDF resources, video tutorials, and interactive tools to deepen your understanding and improve your technique effectively.

Recommended PDF Guides and Tutorials

Discover a wealth of detailed PDF guides and tutorials that offer step-by-step lessons on mastering slash chords. These resources provide in-depth explanations, practical exercises, and real-world examples to help pianists of all levels. From understanding basic triads to advanced harmonic applications, these guides cover it all. Many PDFs include chord charts, progressions, and tips for incorporating slash chords into various musical genres. Ideal for both beginners and advanced players, these materials are designed to enhance your skills and inspire creativity. They often include video accompaniments for a comprehensive learning experience.

Online Lessons and Video Tutorials

Enhance your piano skills with online lessons and video tutorials dedicated to slash chords. Platforms like YouTube, Piano Nanny, and Jazz Piano Lessons offer structured courses. Channels such as HDpiano and Piano Lessons On The Web provide clear demonstrations. These resources often include step-by-step guides, practical exercises, and real-time feedback. Many tutorials focus on applying slash chords in popular songs, worship music, and jazz standards. Whether you’re a beginner or an advanced player, these videos offer a dynamic way to learn and master slash chords in a visually engaging format. They are accessible anytime, making learning flexible and convenient.

Slash chords are a powerful tool for pianists, enhancing musicality and creating smooth transitions. They add depth to chord progressions, making music more engaging. By mastering slash chords, pianists can explore new harmonic possibilities across genres like jazz, pop, and worship. Regular practice, combined with the use of PDF guides and online tutorials, can help refine these skills. Embrace the versatility of slash chords to elevate your playing and bring richness to your performances. Keep exploring and experimenting to unlock their full potential in your musical journey.

Open post

100 million dollar offers pdf

100 Million Dollar Offers by Alex Hormozi is a guide to crafting irresistible offers that convert advertising dollars into massive profits. It teaches entrepreneurs how to create high-value offers, maximize ROI, and scale businesses effectively. The book provides proven strategies for pricing, customer psychology, and demand creation, making it essential for business growth.

1.1 Overview of the Book and Its Author

100 Million Dollar Offers is authored by Alex Hormozi, a renowned entrepreneur and business strategist. The book serves as a comprehensive guide to creating profitable offers that drive business growth. Hormozi shares insights into transforming advertising investments into significant revenue, offering actionable strategies for entrepreneurs and business leaders to scale their ventures effectively.

1.2 Key Concepts and Objectives of the Book

100 Million Dollar Offers focuses on strategies for creating high-value offers that drive business growth. It emphasizes transforming advertising dollars into profits, understanding customer psychology, and maximizing ROI. The book aims to equip entrepreneurs with actionable insights to scale their businesses, craft irresistible offers, and achieve significant revenue growth through proven marketing and sales techniques.

Core Principles of Crafting Irresistible Offers

Crafting irresistible offers revolves around understanding customer psychology, presenting unmatched value, and creating urgency. These principles ensure offers that drive significant conversions and revenue growth.

2.1 The Psychology Behind High-Value Offers

The psychology behind high-value offers lies in understanding customer motivations and pain points. By aligning your offer with their desires and fears, you create irresistible value. Pricing strategies, scarcity, and exclusivity play crucial roles in influencing purchasing decisions. Crafting offers that resonate emotionally ensures customers perceive undeniable worth, driving conversions and loyalty. This approach transforms advertising into profitable outcomes.

2.2 Understanding Customer Needs and Pain Points

Understanding customer needs and pain points is foundational to crafting irresistible offers. By identifying what drives their decisions and addressing their problems, you create solutions that resonate deeply. This insight allows you to tailor your offers to fulfill desires and alleviate frustrations, building trust and ensuring your propositions stand out as essential and valuable.

Turning Advertising Dollars into Profit

100 Million Dollar Offers reveals how to transform advertising investments into significant revenue by aligning campaigns with customer needs and leveraging high-value propositions effectively.

3.1 The Role of Advertising in Creating Demand

Advertising plays a crucial role in creating demand by aligning campaigns with customer needs and pain points. 100 Million Dollar Offers emphasizes using high-value offers to capture attention and drive engagement. By understanding consumer psychology, businesses can craft messages that resonate, ensuring ads not only attract but also convert, maximizing ROI and fostering sustainable growth.

3.2 Strategies for Maximizing ROI on Ad Spend

Maximizing ROI on ad spend requires precision and alignment with customer needs. 100 Million Dollar Offers highlights strategies like targeting high-intent audiences, optimizing ad copy, and leveraging data analytics. By focusing on relevance and value, businesses can ensure each dollar spent generates measurable returns, driving profitability and scalability in their marketing efforts effectively.

The Million-Dollar Offer Formula

100 Million Dollar Offers reveals a proven formula for creating irresistible deals. It focuses on combining high value, strategic pricing, and compelling guarantees to drive sales success.

4.1 The Four Key Components of a Successful Offer

A successful offer requires four essential elements: value, pricing strategy, messaging, and guarantees. Value addresses customer needs, pricing maximizes revenue, messaging aligns with demand, and guarantees reduce risk. Together, these components create irresistible offers that drive conversions and scalability, as detailed in Alex Hormozi’s strategies for crafting million-dollar deals.

4.2 Pricing Strategies That Drive Revenue Growth

Effective pricing strategies are crucial for maximizing revenue. Alex Hormozi emphasizes

Extracting Maximum Value from Your Offers

Maximizing offer value involves leveraging research, customer insights, and strategic refinement. This ensures your offers resonate deeply, driving sustained growth and profitability for your business.

5.1 Leveraging Research and Development for Offer Creation

Research and development are crucial for creating compelling offers. By analyzing market trends, customer preferences, and competitors, businesses can design offers that meet real needs. R&D helps identify gaps in the market, enabling the creation of unique value propositions that stand out. This process ensures offers are innovative, relevant, and aligned with customer demands, driving higher engagement and conversion rates.

5.2 Using Customer Insights to Refine Your Offer

Customer insights are the backbone of refining offers. By analyzing customer preferences, pain points, and behaviors, businesses can tailor their offers to meet specific needs. Feedback loops and A/B testing help validate assumptions, ensuring offers resonate deeply. This data-driven approach aligns offers with customer demands, enhancing perceived value and driving higher profitability; Continuous iteration based on insights ensures long-term relevance and success.

Common Mistakes to Avoid When Making Offers

Avoid overcomplicating offers, as simplicity drives clarity. Additionally, never underestimate customer perceptions, ensuring alignment with their needs and expectations for maximum impact and acceptance.

6.1 Overcomplicating the Offer

Overcomplicating offers often leads to confusion and reduced conversions. Simplify by focusing on core benefits and clear value propositions. Avoid unnecessary jargon or excessive options that overwhelm customers. Ensure the offer is easy to understand and directly addresses their needs. Clarity and simplicity are key to making offers irresistible and driving results, as emphasized in Alex Hormozi’s strategies for creating high-value, customer-centric offers.

6.2 Underestimating Customer Perceptions

Underestimating customer perceptions is a costly mistake. Many businesses fail to recognize how customers truly view pricing, value, and packaging. Misaligned perceptions can lead to rejected offers, regardless of their objective value. Conducting thorough research ensures alignment with customer expectations, avoiding misunderstandings that derail sales. Addressing these insights is crucial for creating offers that resonate and drive long-term success, as highlighted in Hormozi’s strategies for customer-centric offers.

Implementing the Strategies in Your Business

Implementing strategies from 100 Million Dollar Offers requires a mindset shift and practical tools. Focus on customer insights, optimize pricing, and streamline processes to maximize ROI and growth.

7.1 Building the Right Mindset for Success

Success starts with a customer-centric mindset, focusing on value creation. Confidence in your offers is key, as hesitation can undermine potential deals. Embrace calculated risks and continuously refine your approach based on feedback. Cultivate resilience to setbacks and stay adaptable in a dynamic market. Surround yourself with mentors and peers who inspire growth and accountability, fostering a culture of continuous improvement and innovation.

7.2 Tools and Resources for Creating Million-Dollar Offers

Utilize tools like offer templates, market research software, and CRM systems to streamline creation. Leverage resources such as eBooks, webinars, and online courses to refine strategies. The 100 Million Offers eBook and audiobook provide actionable insights and proven frameworks. These tools empower entrepreneurs to craft compelling offers, optimize pricing, and maximize profitability, ensuring long-term business success and scalability.

100 Million Dollar Offers revolutionizes business strategies, empowering entrepreneurs to craft irresistible offers and scale profits. Alex Hormozi’s insights are a must-apply roadmap for sustainable growth and success.

8.1 The Impact of “100 Million Dollar Offers” on Modern Business

100 Million Dollar Offers has reshaped modern business strategies, offering practical tools for entrepreneurs to convert advertising into profits. By focusing on customer psychology and pricing, it enables businesses to scale efficiently. The book’s insights have become essential for driving growth and staying competitive in today’s fast-paced market landscape, making it a cornerstone for business success.

8.2 Encouragement to Apply the Strategies

100 Million Dollar Offers empowers entrepreneurs to transform their businesses with actionable strategies. By applying its principles, businesses can reliably convert advertising dollars into profits and scale effectively. The book’s proven methods inspire confidence and encourage entrepreneurs to take bold steps toward achieving their financial goals, making it a must-apply guide for business growth and success.

Additional Resources and Next Steps

100 Million Dollar Offers is available in PDF, ePub, MOBI, and more. Join communities like The Millionaires Club for support and further insights to accelerate your business growth.

9.1 Where to Find the Full eBook or Audiobook

The full eBook and audiobook of 100 Million Dollar Offers are available on platforms like Amazon, Audible, and Litres. Download the PDF or ePub version for free or purchase directly from the author’s website. Additionally, communities like The Millionaires Club offer exclusive access to resources and support for entrepreneurs looking to scale their businesses. Start your journey to crafting million-dollar offers today!

9.2 Community and Support for Entrepreneurs

Join communities like The Millionaires Club for exclusive support and resources. Connect with fellow entrepreneurs, share insights, and gain access to tools and mentorship. These networks provide valuable feedback and help refine your offers. Engage in forums and groups dedicated to scaling businesses and creating high-value offers. Leverage collective knowledge to accelerate your success and stay updated on the latest strategies. Community support is key to sustained growth.

Open post

honeywell th5220d1029 installation manual

This guide provides detailed instructions for installing the Honeywell FocusPRO TH5220D1029 thermostat, ensuring proper setup and optimal performance for heating and cooling systems․

It offers step-by-step directions for mounting, wiring, and configuring settings, making it easy for users to achieve efficient temperature control in their homes or businesses․

The manual is designed to be user-friendly, helping installers and homeowners navigate the installation process smoothly and avoid common mistakes․

By following the instructions, users can ensure their thermostat operates correctly, providing consistent comfort and energy efficiency throughout the year․

Always refer to this manual for specific requirements and troubleshooting tips to maintain the thermostat’s functionality and longevity․

Overview of the Honeywell FocusPRO TH5220D Thermostat

The Honeywell FocusPRO TH5220D is a non-programmable digital thermostat designed for simplicity and efficiency․ It offers precise temperature control and is compatible with a wide range of heating and cooling systems․ This thermostat features a clear, backlit display for easy readability and straightforward button controls for adjusting settings․ It is ideal for homeowners seeking a reliable, user-friendly solution for managing their home’s climate․ The FocusPRO series is known for its durability and energy efficiency, making it a popular choice for residential installations․ This model is particularly suited for systems requiring basic temperature management without advanced scheduling needs․

Importance of Proper Installation

Proper installation of the Honeywell FocusPRO TH5220D thermostat is crucial for ensuring optimal performance, efficiency, and safety․ Incorrect wiring or setup can lead to system malfunctions, increased energy consumption, or even damage to the thermostat or HVAC equipment․ By following the installation manual carefully, users can avoid common issues and ensure the thermostat operates as intended․ Proper installation also guarantees accurate temperature control, maintaining comfort and reducing energy costs․ Additionally, it prevents potential safety hazards and extends the lifespan of both the thermostat and the heating/cooling system․ Adhering to the guidelines ensures a seamless and reliable operation for years to come․

Pre-Installation Requirements

Before installing, ensure compatibility with your HVAC system, gather necessary tools, and verify system type settings to proceed smoothly with the installation process․

Compatibility Check for Heating and Cooling Systems

Ensure the Honeywell TH5220D1029 is compatible with your HVAC system․ It supports conventional 2-heat/2-cool systems and works with emergency heat setups․ Verify system type in Installer Setup (Function 1) matches your equipment, such as 2Heat/2Cool conventional systems․ Check for emergency heat compatibility and wiring requirements․ Proper system matching ensures optimal performance and avoids installation issues․ Refer to page 11 of the manual for detailed system type settings and configurations․ Always confirm compatibility before proceeding to guarantee efficient operation and prevent potential malfunctions․

Tools and Materials Needed for Installation

To install the Honeywell TH5220D1029 thermostat, gather the necessary tools and materials․ You will need a screwdriver for mounting the wallplate and thermostat, wire strippers for connecting wires, and pliers for securing connections․ A level ensures the thermostat is straight, and a drill may be required for wall holes․ Additionally, have a pencil for marking wire locations and a voltage tester to verify power levels․ Ensure all materials, like screws and wall anchors, are included in the packaging․ Proper tools and preparation are essential for a smooth and successful installation process․

Installation Steps

Mount the thermostat on the wall, connect the wiring according to the diagram, and configure the installer settings for optimal performance and system compatibility․

Mounting the Thermostat on the Wall

Begin by removing the wallplate from the thermostat and taking out the battery holder․ Follow the provided mounting directions to secure the wallplate to the wall using screws․

Ensure the thermostat is level and firmly attached to the wallplate․ Once mounted, insert the batteries and replace the battery holder; Press and hold the “s” and “FAN” buttons until the display changes to confirm proper installation․

Verify that the thermostat is properly seated on the wallplate and that all connections are secure․ Check the display for any error messages or setup prompts;

This step ensures the thermostat is correctly installed and ready for wiring and configuration․

Connecting the Wiring to the Thermostat

Identify the appropriate wires from your heating and cooling system and connect them to the corresponding terminals on the thermostat․ Refer to the wiring diagram in the manual for specific connections․

Ensure all wires are securely attached to avoid loose connections, which can cause malfunctions․ If your system includes emergency heat, connect the relevant wires to the designated terminals․

Double-check the wiring configuration against the diagram to confirm accuracy․ Once connected, restore power to the system and test the thermostat’s functionality․

Proper wiring is crucial for the thermostat to control your heating and cooling system effectively․

Configuring the Installer Setup Settings

Access the Installer Setup menu by pressing and holding the “s” and “FAN” buttons until the display changes․ Navigate through settings using the “s” or “t” buttons to adjust configurations․

Set Function 1 (System Type) to match your heating and cooling equipment, such as 2Heat/2Cool conventional, as outlined on page 11 of the manual․

Ensure all settings align with your system requirements for proper operation․ After configuring, review and save the settings to complete the installation process․

Correct configuration ensures optimal performance and compatibility with your HVAC system․ Refer to the manual for detailed instructions on each setting․

Wiring Diagrams and Connections

Refer to the wiring diagram in the manual for precise connections, ensuring compatibility with your HVAC system․ Correct wiring is crucial for optimal thermostat performance and safety․

Understanding the Wiring Diagram for TH5220D1029

The wiring diagram provides a clear visual guide for connecting the thermostat to your HVAC system․ Each terminal (R, W, Y, G, C, etc․) is labeled to ensure proper connections․

  • The R terminal connects to the 24V power supply from the heating/cooling system․
  • The W terminal controls the heating system, while Y controls the cooling system․
  • The G terminal powers the fan, and C connects to the common wire for 24V power․

Refer to the diagram to match your system’s wiring configuration․ Correct connections are essential for safe and efficient operation․ If unsure, consult a professional or the manual for specific guidance․

Connecting to Emergency Heat (if applicable)

Connecting the Honeywell TH5220D1029 to an emergency heat system involves specific wiring steps․ Locate the emergency heat terminal (E) on the thermostat and connect it to the corresponding wire from your HVAC system․ If your system does not have an emergency heat relay, install a field jumper between the Aux and E terminals to enable this feature․ Refer to the wiring diagram in the manual for accurate connections․ Ensure all wires are securely attached to prevent loose connections, which can cause malfunctions․ Double-check the wiring configuration to match your system’s requirements before powering it on․ Proper setup ensures reliable emergency heat operation during extreme cold conditions․ Always follow safety guidelines and consult a professional if unsure․

Post-Installation Setup

After installation, configure the thermostat settings, including system type and temperature preferences, to ensure optimal performance and energy efficiency for your heating and cooling system․

Setting Up the System Type in Installer Settings

To ensure proper operation, access the Installer Settings and select the correct system type that matches your heating and cooling equipment․ Press and hold the s and FAN buttons to enter the Installer Setup menu․ Use the s or t buttons to navigate to Function 1 (System Type) and select the appropriate option, such as 2 Heat/2 Cool conventional, based on your system configuration․ Refer to page 11 of the manual for detailed instructions․ Correct system type setup ensures accurate temperature control and energy efficiency․ If unsure, consult the installation guide or contact a professional for assistance․

Programming the Thermostat for Optimal Performance

While the Honeywell TH5220D1029 is a non-programmable thermostat, it allows basic scheduling and temperature adjustments for efficient operation․ Press and hold the s and FAN buttons to access Installer Settings․ Use the s or t buttons to navigate and configure settings like temperature range and differential․ Ensure the system type matches your equipment for accurate performance․ Refer to page 11 of the manual for detailed guidance․ Proper setup ensures consistent comfort and energy efficiency․ If unsure, consult the installation guide or contact Honeywell support for assistance․ This step is crucial for maximizing the thermostat’s functionality and longevity․

Troubleshooting Common Issues

Troubleshooting involves checking wiring connections, verifying system type settings, and ensuring proper battery installation․ Refer to the manual for specific error codes and resolution steps․

Resolving Wiring and Connection Problems

Wiring issues are common during installation․ Ensure all connections match the wiring diagram in the manual․ Verify that wires are securely attached to the correct terminals․ If the thermostat doesn’t power on, check for loose connections or incorrect wiring․ For systems with emergency heat, confirm the jumper between Aux and E is installed if no emergency heat relay is present․ Refer to the troubleshooting section for specific error codes and step-by-step solutions to resolve connectivity problems effectively․

Addressing Display and Functionality Issues

If the display is blank or unresponsive, check the power source and ensure batteries are installed correctly․ For functionality issues, verify system type settings in Installer Setup․ If the thermostat doesn’t respond to temperature adjustments, ensure proper wiring and connections․ Refer to the wiring diagram for accuracy․ For display malfunctions, restart the thermostat by removing and reinserting batteries․ If issues persist, reset the thermostat to factory settings․ Consult the troubleshooting section for specific solutions to address display and functionality problems effectively, ensuring optimal performance of your Honeywell TH5220D1029 thermostat․

Maintenance and Care

Regular maintenance ensures optimal performance․ Clean the thermostat face and internal components to prevent dust buildup, and replace batteries annually for uninterrupted operation․

Replacing Batteries

To maintain uninterrupted operation, replace the Honeywell TH5220D1029 thermostat batteries annually or when the display indicates low battery levels․ Open the battery compartment, remove the old batteries, and insert two fresh AA alkaline batteries while ensuring correct polarity․ Close the compartment securely․ Proper battery replacement prevents system downtime and ensures accurate temperature control․ Always use high-quality batteries to avoid performance issues․ Refer to page 10 of the installation manual for detailed instructions and diagrams to simplify the process․

Cleaning the Thermostat

Regularly cleaning the Honeywell TH5220D1029 thermostat ensures optimal performance and prevents dust buildup that may interfere with its operation; Power off the thermostat before cleaning to avoid any accidental adjustments․ Use a soft, dry cloth to gently wipe the display and exterior surfaces․ For stubborn spots, lightly dampen the cloth with water, but avoid harsh chemicals or excessive moisture․ Never spray cleaning products directly on the thermostat․ Cleaning the device periodically helps maintain accuracy and extends its lifespan․ Refer to maintenance guidelines in the manual for additional tips on keeping your thermostat in pristine condition․

Successful installation ensures optimal performance and energy efficiency․ Verify all settings and connections for proper functionality․ Refer to the manual for future maintenance and troubleshooting guidance․

Final Checks and Verification

After installation, perform final checks to ensure the Honeywell TH5220D1029 thermostat operates correctly․ Verify that all wiring connections match the provided diagrams and system requirements․

Test the thermostat by running through heating and cooling cycles to confirm proper functionality․ Check that the display accurately reflects the system status and settings․

Ensure the Installer Setup configurations, such as system type and emergency heat settings, are correctly programmed to align with your HVAC equipment․

Review the manual for any additional verification steps specific to your system type․ Proper verification ensures reliable performance and prevents future issues․

Resources for Further Assistance

For additional support, visit Honeywell’s official website to access the complete TH5220D1029 manual or explore troubleshooting guides․

Contact Honeywell customer support directly via phone or email for personalized assistance with installation or operation issues․

Online forums and Honeywell’s resource library offer extensive troubleshooting tips, wiring diagrams, and FAQs for the FocusPRO series․

Refer to the Honeywell Home website for updated software, user guides, and compatibility information to ensure optimal performance of your thermostat․

These resources provide comprehensive support to address any challenges and ensure your Honeywell TH5220D1029 operates efficiently․

Open post

fatty liver diet plan pdf

Fatty liver disease occurs when excess fat accumulates in liver cells, often due to non-alcoholic factors. Diet plays a crucial role in managing the condition, helping reduce liver fat and inflammation while promoting overall health.

1.1 What is Fatty Liver Disease?

Fatty liver disease occurs when excess fat accumulates in liver cells, often unrelated to alcohol consumption. It can progress from simple fat accumulation to inflammation and scarring, potentially leading to severe liver damage if left untreated. Diet and lifestyle changes are critical in managing the condition and preventing progression.

1.2 Importance of Diet in Managing Fatty Liver

Diet plays a pivotal role in managing fatty liver disease by reducing liver fat and inflammation. A balanced diet rich in fruits, vegetables, whole grains, lean proteins, and healthy fats helps improve liver health. Avoiding refined carbs, sugary foods, and processed items is essential to prevent disease progression and support overall well-being.

Understanding the Causes and Risk Factors

Fatty liver disease is often linked to excess fat accumulation in liver cells, primarily due to obesity, insulin resistance, high cholesterol, and metabolic syndrome. Lifestyle factors like poor diet and lack of exercise contribute significantly to its development.

2.1 Non-Alcoholic Fatty Liver Disease (NAFLD)

Non-Alcoholic Fatty Liver Disease (NAFLD) occurs when excess fat builds up in the liver without alcohol use. It ranges from simple fatty liver to Non-Alcoholic Steatohepatitis (NASH), which can progress to cirrhosis. NAFLD is linked to obesity, insulin resistance, and metabolic syndrome, often requiring lifestyle changes and dietary adjustments to manage effectively and prevent complications.

2.2 Role of Diet and Lifestyle in Developing Fatty Liver

A high-fat, high-sugar diet and sedentary lifestyle significantly contribute to fatty liver development. Consuming refined carbs, fried foods, and excessive saturated fats can lead to fat accumulation in the liver. Obesity and insulin resistance, often linked to poor dietary habits, further exacerbate the condition, highlighting the importance of lifestyle modifications in prevention and management.

Key Principles of a Fatty Liver Diet

A fatty liver diet focuses on whole, unprocessed foods, avoiding sugary and high-fat items. It emphasizes balanced nutrition, portion control, and healthy fats to support liver health.

3.1 Mediterranean Diet and Its Benefits

The Mediterranean diet, rich in fruits, vegetables, whole grains, and healthy fats like olive oil, is highly beneficial for fatty liver management. It reduces liver inflammation, improves insulin sensitivity, and promotes weight loss, all of which are crucial for managing fatty liver disease effectively.

3.2 Focus on Whole, Unprocessed Foods

Emphasizing whole, unprocessed foods like vegetables, lean proteins, and whole grains is essential for managing fatty liver. These foods provide essential nutrients, reduce fat accumulation, and minimize inflammation, supporting a healthier liver and overall well-being.

3.3 Portion Control and Balanced Nutrition

Practicing portion control ensures you consume the right amount of nutrients without overloading your liver. A balanced diet includes lean proteins, whole grains, and healthy fats, providing sustained energy and reducing fat accumulation. This approach supports liver function, aids in weight management, and helps maintain overall metabolic health effectively.

Best Foods to Include in Your Diet

Fatty liver diet plans emphasize fruits, vegetables, lean proteins, and healthy fats. These foods support liver health, reduce inflammation, and promote balanced nutrition for optimal well-being.

4.1 Fruits and Vegetables

Fruits and vegetables are rich in antioxidants, fiber, and essential nutrients, making them a cornerstone of a fatty liver diet. They help improve digestion, reduce inflammation, and support liver function. Incorporating a variety of colorful fruits and vegetables daily can enhance overall health and promote sustainable weight management for liver wellness.

4.2 Lean Proteins and Plant-Based Options

Lean proteins, such as poultry, fish, and plant-based options like legumes and tofu, are essential for reducing liver fat and promoting healing. These foods provide essential amino acids and nutrients while minimizing saturated fats, making them a key component of a balanced fatty liver diet to support overall liver health and function.

4.3 Healthy Fats and Omega-3 Rich Foods

Healthy fats, such as avocados, nuts, seeds, and olive oil, support liver health by reducing inflammation. Omega-3-rich foods like fatty fish (salmon, mackerel) help lower liver fat and improve cell repair. Incorporating these into your diet promotes balanced nutrition and supports fatty liver management, aiding in overall liver function and well-being.

Foods to Avoid

Refined carbs, fried foods, processed snacks, and sugary items worsen fatty liver. Limit alcohol, saturated fats, and spicy foods to reduce liver inflammation and promote healing.

5.1 Refined Carbohydrates and Sugary Foods

Refined carbs, like white bread and pasta, and sugary foods can increase liver fat. They cause insulin spikes, promoting fat storage. Limiting these helps reduce liver inflammation and supports recovery. Opt for whole grains and natural sugars from fruits and vegetables instead.

5.2 Fried and High-Fat Foods

Fried and high-fat foods, such as fries and pastries, are rich in saturated fats and calories, contributing to liver inflammation. These foods worsen fatty liver symptoms and should be avoided. Opting for baked or grilled alternatives helps reduce fat intake and supports liver health.

5.3 Processed and Packaged Foods

Processed and packaged foods are high in unhealthy fats, added sugars, and sodium, worsening fatty liver symptoms. These foods often contain trans fats and artificial additives that promote inflammation. Avoiding items like chips, frozen meals, and sugary snacks is crucial. Always read nutrition labels to identify and limit these harmful products, opting for natural, whole foods instead.

Sample 7-Day Meal Plan

This section provides a structured 7-day meal plan, including balanced breakfasts, lunches, dinners, and snacks, tailored to support liver health and manage fatty liver disease effectively.

6.1 Breakfast Ideas

Start your day with nutrient-rich options like oatmeal topped with berries and nuts, Greek yogurt with fresh fruit, or avocado toast on whole-grain bread. Smoothies made with spinach, banana, and almond milk are also excellent. Include scrambled eggs with vegetables or a chia pudding with coconut milk and berries for a balanced start.

6.2 Lunch and Dinner Options

Opt for grilled chicken or fish with steamed vegetables and quinoa. Include baked salmon with asparagus and brown rice, or tofu stir-fries with mixed greens. Add a side of roasted sweet potatoes or whole-grain pasta. Incorporate healthy fats like avocado slices or olive oil. Ensure meals are balanced and rich in nutrients to support liver health and overall well-being.

6.3 Healthy Snacks and Desserts

Choose snacks like fresh fruits, carrot sticks with hummus, or a handful of nuts. For desserts, opt for fruit salads or Greek yogurt with berries. Avoid sugary treats and processed foods. Incorporate omega-3 rich options like chia seeds. Keep portions controlled to maintain a balanced diet and support liver health effectively.

Lifestyle Changes to Support Liver Health

Regular exercise and maintaining a healthy weight are essential. Aim for 150 minutes of moderate activity weekly. This promotes fat loss and improves liver function naturally.

7.1 Importance of Regular Exercise

Regular exercise is crucial for fatty liver management. Aim for 150 minutes of moderate-intensity activity, like brisk walking, cycling, or swimming, weekly. Exercise burns fat, improves insulin sensitivity, and supports weight loss, all of which reduce liver fat and inflammation, promoting overall liver health and well-being. Consistency is key to achieving long-term benefits.

7.2 Managing Weight and Maintaining a Healthy BMI

Maintaining a healthy weight and BMI is essential for managing fatty liver disease. Even a 5-10% reduction in body weight can significantly reduce liver fat and inflammation. Aiming for a BMI of 18.5-24.9 through a combination of diet and exercise helps improve metabolic health and supports liver function. Consult a healthcare provider for personalized weight management strategies.

Monitoring Progress and Adjustments

Regularly tracking liver health markers, such as liver enzymes and imaging tests, helps assess progress. Adjustments to diet and lifestyle should be made based on these results.

8.1 Tracking Liver Health Markers

Monitoring liver health involves regular blood tests for enzymes like ALT and AST, and imaging studies to assess fat accumulation. These markers help gauge the effectiveness of dietary changes and lifestyle modifications, ensuring adjustments are made to support liver recovery and prevent further damage.

8.2 When to Consult a Healthcare Provider

Consult a healthcare provider if you experience symptoms like abdominal pain, fatigue, or jaundice. They can assess liver damage and recommend further testing or treatment. Regular follow-ups ensure personalized dietary adjustments and monitor progress, preventing complications and promoting long-term liver health effectively.

Supplements and Additional Support

Certain supplements like omega-3 fatty acids and vitamin D can support liver health. Probiotics may also aid gut health, enhancing overall digestion and nutrient absorption effectively.

9.1 Omega-3 Fatty Acids and Vitamin D

Omega-3 fatty acids, found in fish and flaxseeds, help reduce liver fat and inflammation. Vitamin D supports liver function and overall health, enhancing the benefits of a fatty liver diet plan.

9.2 Probiotics and Gut Health

Probiotics support gut health, improving digestion and reducing inflammation linked to fatty liver disease. A healthy gut microbiome aids in reducing liver fat accumulation and promoting overall metabolic balance, enhancing the effectiveness of a fatty liver diet plan.

Emotional and Mental Support

Emotional well-being is crucial for managing fatty liver disease. Stress management and a strong support system can enhance motivation and adherence to a healthy diet plan.

10.1 Managing Stress

Managing stress is essential for overall well-being, especially when managing fatty liver disease. Techniques like meditation, yoga, and deep breathing can help reduce stress levels and improve mental clarity. Chronic stress can negatively impact liver health, so incorporating stress-reducing activities into your daily routine is crucial for supporting your fatty liver diet plan and overall health.

10.2 Building a Support System

Building a support system is vital for managing fatty liver disease. Family, friends, and support groups can provide emotional encouragement and practical help. Sharing your journey with others who understand your challenges can foster accountability and motivation. A strong support network can also help you stay committed to your diet plan and lifestyle changes.

Adhering to a balanced diet and healthy lifestyle is crucial for managing fatty liver disease. Stay committed to your plan for long-term liver health and well-being.

11.1 Summary of Key Recommendations

11.2 Encouragement for Long-Term Commitment

Embrace your journey toward better liver health with patience and perseverance. Celebrate small victories and remember, consistency is key. The benefits of a healthy diet and lifestyle far outweigh short-term challenges. Stay committed, and over time, you’ll see improvements in your overall well-being and liver health. Keep going—you’re making a lasting impact on your life!

Open post

hoover max extract 77 owner’s manual

The Hoover Max Extract 77 owner’s manual is an essential guide for understanding and operating your deep cleaner effectively. It covers key features, assembly, and maintenance tips to ensure optimal performance. Refer to this manual for troubleshooting and safety precautions to maximize your cleaning experience.

Key Features and Benefits of the Hoover Max Extract 77

The Hoover Max Extract 77 is a versatile and practical deep cleaner designed for effective carpet and upholstery cleaning. It features the innovative SpinScrub technology, which provides deep agitation to remove embedded dirt and stains. This model is known for its lightweight design, making it easy to maneuver and transport. The cleaner is also budget-friendly, offering excellent value for homeowners seeking a reliable solution for everyday cleaning tasks. Additionally, it is effective at removing allergens such as pollen and pet dander, making it a great choice for households with allergies. With its straightforward controls and efficient cleaning capabilities, the Hoover Max Extract 77 is a popular option for those who want a powerful yet user-friendly deep cleaning experience. Its compact size and versatile features ensure it is suitable for a variety of cleaning needs, from small spills to deep-seated dirt in high-traffic areas.

How to Download the Hoover Max Extract 77 Manual

Downloading the Hoover Max Extract 77 manual is a straightforward process. Visit the official Hoover website and navigate to the “Support” or “Manuals” section. Enter “Hoover Max Extract 77” in the search bar to locate the PDF manual. You can also find it on third-party websites like ManualsLib or ManualsOnline. Ensure you download from a trusted source to avoid malware. Once downloaded, save the PDF for easy access. This manual provides detailed information on assembly, operation, and troubleshooting, ensuring you get the most out of your cleaner. If you encounter issues, refer to the troubleshooting section for solutions. Always follow safety guidelines outlined in the manual for optimal and safe usage. By downloading the manual, you’ll have all the necessary information at your fingertips to maintain and operate your Hoover Max Extract 77 effectively.

Assembly and Installation Guidelines

Assembly of the Hoover Max Extract 77 is a simple process that requires attention to detail. Start by carefully unpacking all components from the box. Attach the handle to the base unit until it clicks securely into place. Next, connect the cleaning tank and ensure it is properly aligned and locked. If your model includes additional accessories, such as the SpinScrub brush or upholstery tool, attach them according to the instructions provided in the manual. Make sure all parts are tightly secured to avoid leaks or poor performance during use. Before first use, inspect the machine for any damage or missing parts. If you encounter difficulty, refer to the visual diagrams in the manual for guidance. Proper assembly ensures optimal functionality and safety. Once assembled, your Hoover Max Extract 77 is ready for operation. Always follow the manufacturer’s instructions to avoid voiding the warranty or causing damage to the device.

Operating Instructions for Effective Cleaning

For effective cleaning with the Hoover Max Extract 77, begin by ensuring the area is clear of debris and large objects. Pre-treat stains or high-traffic areas with a cleaning solution before use. Fill the water tank with warm water and add the recommended cleaning formula. Avoid overfilling to prevent leaks. Select the appropriate cleaning mode based on the surface type—normal for everyday cleaning and deep clean for stubborn stains. Use the SpinScrub brushes for carpets and upholstery, adjusting as needed for different surfaces. Move the cleaner in slow, overlapping passes to ensure thorough coverage. Rinse the area thoroughly to remove detergent residue. After cleaning, empty the dirty water tank and rinse it with clean water. Allow all components to dry to prevent mold or mildew. Regularly clean the filters and check for blockages to maintain performance. Refer to the manual for specific instructions on using additional accessories like the upholstery tool. By following these steps, you can achieve professional-grade results with your Hoover Max Extract 77.

Advanced Features: SpinScrub and Deep Cleaning Modes

The Hoover Max Extract 77 offers advanced features like SpinScrub and Deep Cleaning Modes to tackle tough cleaning tasks. The SpinScrub technology uses rotating brushes to gently yet effectively agitate and remove embedded dirt from carpets and upholstery. This feature is particularly useful for high-traffic areas and pet stains. For deeper cleaning needs, the Deep Cleaning Mode increases suction power and solution flow, penetrating deeper into surfaces to lift stubborn stains and allergens. Both modes are designed to work seamlessly with the cleaner’s built-in water tank and cleaning solutions. To use SpinScrub, simply adjust the brush speed based on the surface type—gentle for delicate fabrics and intense for heavy-duty cleaning. For Deep Cleaning, ensure the tank is filled with the recommended solution and select the mode for a more thorough cleanse. These advanced features make the Hoover Max Extract 77 versatile and efficient for various cleaning challenges, ensuring your home is spotless and free from allergens. By utilizing these modes, you can achieve professional-grade results with minimal effort.

Maintenance and Troubleshooting Tips

Regular maintenance is crucial to ensure the Hoover Max Extract 77 operates at its best. After each use, clean the filter and check for blockages in the hoses or nozzles. Empty the water tank and rinse it thoroughly to prevent mold and odors. For optimal performance, use only Hoover-approved cleaning solutions, as other products may damage the machine or void the warranty. If the cleaner is not turning on, ensure it is properly plugged in and the power button is functioning. Low suction power could indicate a clogged pre-filter or an empty solution tank. For persistent issues, refer to the manual or contact Hoover customer support. Proper care and troubleshooting will extend the life of your Hoover Max Extract 77 and ensure it continues to deliver deep cleaning results.

Safety Precautions and Usage Guidelines

For safe and effective use of the Hoover Max Extract 77, follow these essential precautions. Always read the manual before operation and ensure the cleaner is used only for its intended purpose. Avoid using the device on hot or sharp surfaces, as this may damage the machine or cause injury. Never leave the cleaner unattended while in operation, especially around children or pets. Do not use the cleaner as a dry vacuum; it is specifically designed for wet cleaning tasks. When cleaning upholstery, always check the fabric’s cleaning code to avoid damage. Keep the device away from flammable materials and ensure good ventilation in the cleaning area. After use, store the cleaner in a dry, cool place to prevent mold growth. Regularly inspect hoses and cords for damage and avoid overloading the machine with excessive water or cleaning solution. By adhering to these guidelines, you can ensure a safe and efficient cleaning experience with your Hoover Max Extract 77.

Common Issues and Solutions

Like any appliance, the Hoover Max Extract 77 may encounter occasional issues. One common problem is low suction power, which can be resolved by ensuring the tank is not full and the filters are clean. If the brush roll stops spinning, check for blockages or hair tangles and clean as needed. Another issue is leaking water, often caused by improper assembly of the water tank or damaged gaskets, which should be replaced if worn. If the machine is not turning on, verify that it is properly plugged in and that no fuses or circuit breakers have tripped. For odor or mold, ensure the machine is thoroughly dried after use and clean the tank regularly. If the cleaning solution is not dispensing correctly, check the solution tank for blockages or kinks in the tubing. Always refer to the manual for specific guidance, and if issues persist, contact Hoover customer support for assistance. Regular maintenance can help prevent many of these problems and ensure optimal performance.

By following the guidelines in the Hoover Max Extract 77 owner’s manual, you can ensure a satisfying and effective cleaning experience. This deep cleaner is designed to tackle tough stains and allergens, providing a professional-grade clean in the comfort of your home. Regular maintenance, such as cleaning filters and checking for blockages, will extend the life of your machine and maintain its performance. Troubleshooting common issues, like low suction or leaking water, can be easily addressed with the solutions outlined in this guide. Always prioritize safety precautions, such as avoiding the use of the cleaner as a dry vacuum, to protect both yourself and the device. With proper care and usage, the Hoover Max Extract 77 will remain a reliable and efficient cleaning companion for years. Refer back to the manual whenever you need a refresher, and enjoy the benefits of a cleaner, healthier home.

Open post

fundamentals of nursing 11th edition pdf

The 11th Edition of Fundamentals of Nursing provides a comprehensive foundation for nursing education, focusing on critical thinking, clinical judgment, and evidence-based practice. Designed for entry-level nursing students, it aligns with the 2019 NCLEX-RN Test Plan and incorporates illustrated procedures and online resources like My Nursing Lab for enhanced learning.

1.1 Overview of the 11th Edition

The 11th Edition of Fundamentals of Nursing is a comprehensive resource for entry-level nursing students. It aligns with the 2019 NCLEX-RN and PN test plans, ensuring effectiveness in preparing for licensure. The edition features step-by-step procedures, visual aids for skill mastery, and emphasizes patient-centered care and cultural competence. Contributors Audrey Berman, Shirlee Snyder, and Geralyn Frandsen bring vast expertise in nursing education, enhancing the textbook’s practical foundation with updated content and online resources.

1.2 Key Features and Updates

The 11th Edition of Fundamentals of Nursing includes updated content aligned with the 2019 NCLEX-RN and PN test plans. It features enhanced focus on clinical judgment, evidence-based practice, and patient-centered care. New chapters address contemporary nursing issues, while step-by-step procedures and visual aids support skill mastery. Online resources like My Nursing Lab and Ready Point provide interactive learning tools, making this edition a comprehensive and practical resource for nursing education.

Critical Thinking and Clinical Judgment in Nursing

Critical thinking and clinical judgment are essential skills in professional nursing, enabling nurses to make sound decisions. The 11th edition emphasizes these competencies, helping students master them through real-world examples and case studies.

2.1 Importance of Critical Thinking in Nursing Practice

Critical thinking is vital in nursing practice, enabling nurses to analyze patient data, identify patterns, and make informed decisions. It promotes patient safety, effective care, and positive outcomes; By fostering autonomy and professionalism, critical thinking empowers nurses to adapt to dynamic healthcare environments. The 11th edition emphasizes this skill, providing case studies and real-world scenarios to enhance problem-solving and decision-making abilities. This aligns with professional standards and prepares students for the complexities of modern nursing.

2.2 Developing Clinical Judgment Skills

Clinical judgment is a cornerstone of nursing practice, enabling nurses to make sound decisions in complex situations. The 11th edition emphasizes the development of these skills through case studies, real-world scenarios, and reflective exercises. By integrating knowledge, experience, and critical thinking, nurses can improve patient outcomes and adapt to dynamic healthcare environments. The text aligns with professional standards, ensuring students are well-prepared for the challenges of clinical practice and the 2019 NCLEX-RN Test Plan.

Nursing Theories and Evidence-Based Practice

This section explores major nursing theories and their application in practice, emphasizing evidence-based approaches to deliver high-quality, patient-centered care. The 11th edition integrates research and theory to promote effective decision-making and improve outcomes.

3;1 Major Nursing Theories

The 11th edition explores foundational nursing theories, including those by Audrey Berman, Shirlee Snyder, and Geralyn Frandsen. These theories emphasize holistic patient care, environmental adaptation, and the nurse-patient relationship. They provide frameworks for understanding nursing practices, guiding evidence-based care, and promoting professionalism. The text aligns with the Wisconsin Technical College System’s nursing curriculum, ensuring a strong theoretical foundation for students. Key theories include self-care deficit, health promotion, and cultural care, all vital for modern nursing practice.

3.2 Evidence-Based Practice in Nursing

The 11th edition strongly emphasizes evidence-based practice, integrating research findings into nursing care. It provides a systematic approach to decision-making, ensuring care is grounded in the best available evidence. The text includes examples of how evidence-based practices improve patient outcomes and safety. Resources like My Nursing Lab offer interactive tools to help students apply evidence-based principles in real-world scenarios, preparing them for contemporary nursing challenges. This focus ensures students develop skills to critically evaluate and implement evidence-based interventions effectively.

Patient-Centered Care

Patient-centered care emphasizes understanding and integrating patients’ preferences, values, and needs into care plans, fostering a collaborative approach between patients and healthcare providers for personalized care.

4.1 Principles of Patient-Centered Care

Patient-centered care revolves around respecting patients’ autonomy, dignity, and individual preferences. It emphasizes empathy, communication, and shared decision-making, ensuring care aligns with patients’ values and needs. Nurses prioritize holistic, individualized approaches, addressing physical, emotional, and social aspects of health. This care model fosters trust and collaboration, enhancing patient satisfaction and outcomes. By integratingpatients’ voices, nurses deliver compassionate, personalized care that respects diversity and promotes accessibility. These principles guide ethical, effective, and humanistic nursing practices.

4.2 Cultural Competence in Nursing

Cultural competence in nursing involves understanding and respecting diverse patient backgrounds, beliefs, and values. Nurses must recognize cultural differences in health practices, communication styles, and preferences. By tailoring care to meet these unique needs, nurses ensure effective, sensitive, and patient-centered outcomes. This approach fosters trust, improves communication, and enhances patient satisfaction. Addressing cultural diversity is essential for delivering high-quality, equitable care in today’s global healthcare environment.

Illustrated Guidelines and Procedures

The 11th Edition provides clear, illustrated, step-by-step guidelines for key nursing procedures, enhancing skill mastery through visual aids and detailed instructions for clinical practice.

5.1 Step-by-Step Nursing Procedures

The 11th Edition offers detailed, step-by-step procedures for essential nursing skills, ensuring clarity and accuracy. Each procedure is accompanied by illustrations, making complex tasks easy to follow. This resource is designed to help students master clinical skills efficiently, aligning with real-world nursing practices and educational standards. The visual guidance enhances understanding, making it an invaluable tool for both classroom learning and practical training in healthcare settings.

5.2 Visual Aids for Skill Mastery

The 11th Edition incorporates high-quality visual aids, including photos, illustrations, and videos, to enhance skill mastery. These resources are integrated into the textbook and online supplements, providing students with a clear understanding of complex nursing procedures. Visual learning tools improve retention and comprehension, making it easier for students to apply their knowledge in clinical settings. This emphasis on visual education ensures that learners can confidently perform tasks, aligning with the practical demands of modern nursing.

Contributions of Key Authors

The 11th Edition features contributions from Audrey Berman, Shirlee Snyder, and Geralyn Frandsen, experts in nursing education. They authored key chapters and contributed to online resources like My Nursing Lab, enhancing student learning.

6.1 Audrey Berman, Shirlee Snyder, and Geralyn Frandsen

Audrey Berman, Shirlee Snyder, and Geralyn Frandsen are renowned for their expertise in nursing education. Their contributions to the 11th Edition include chapters on critical thinking, clinical judgment, and evidence-based practice. Berman specialized in safety, diagnostic testing, and medications, while Snyder and Frandsen focused on patient-centered care and cultural competence. Their work in My Nursing Lab and Ready Point provides interactive tools, enhancing student engagement and mastery of nursing concepts. Their dedication has significantly impacted nursing education globally.

6.2 Their Expertise and Impact on Nursing Education

Audrey Berman, Shirlee Snyder, and Geralyn Frandsen have revolutionized nursing education through their comprehensive approach. Their expertise spans critical thinking, clinical judgment, and evidence-based practice, making the 11th Edition a cornerstone for students. By integrating real-world scenarios and interactive tools like My Nursing Lab, they’ve enhanced learning outcomes. Their work aligns with the Wisconsin Nurse Practice Act and NCLEX test plans, ensuring students are well-prepared for professional practice. Their contributions have set a new standard in nursing education.

Updates in the 11th Edition

The 11th Edition features new chapters, expanded content, and enhanced focus on contemporary nursing issues. It includes updated step-by-step guidelines and online resources for better student engagement.

7.1 New Chapters and Expanded Content

The 11th Edition introduces new chapters on contemporary nursing issues, expanding coverage of critical thinking and clinical judgment. Enhanced content includes updated clinical guidelines and evidence-based practices, reflecting current standards in patient care. Additional material addresses emerging topics in nursing education, ensuring students are well-prepared for modern healthcare challenges. These expansions provide a comprehensive foundation, aligning with the latest NCLEX test plans and professional nursing requirements.

7.2 Enhanced Focus on Contemporary Nursing Issues

The 11th Edition places a strong emphasis on addressing current challenges in nursing, such as patient-centered care, cultural competence, and the integration of technology in clinical settings. Updated content reflects advancements in evidence-based practice and aligns with the latest NCLEX test plans, ensuring students are prepared for real-world scenarios. This focus on contemporary issues equips future nurses with the tools to navigate evolving healthcare landscapes effectively and compassionately.

Legal and Ethical Considerations in Nursing

The 11th Edition covers legal and ethical considerations, including the Wisconsin Nurse Practice Act, to prepare students for professional responsibilities and ethical decision-making in clinical practice.

8.1 The Wisconsin Nurse Practice Act

The 11th edition addresses the Wisconsin Nurse Practice Act, outlining the legal framework for nursing practice. It ensures nurses understand their scope of practice, professional conduct, and accountability. This section emphasizes compliance with state laws, ethical standards, and patient rights, preparing students for licensure and practice. Key aspects include definitions of professional nursing, responsibilities, and disciplinary actions, aligning with current regulations to safeguard patient care and nursing professionalism.

8.2 Ethical Decision-Making in Nursing

The 11th edition emphasizes ethical decision-making in nursing, providing frameworks to resolve moral dilemmas. It covers patient rights, informed consent, confidentiality, and end-of-life care. Nurses are guided to apply ethical principles such as autonomy, beneficence, and justice. The text aligns with professional codes like the ANA Code of Ethics, ensuring nurses understand their role in upholding ethical standards while delivering patient-centered care. This section prepares students to navigate complex situations with integrity and compassion.

NCLEX-RN and NCLEX-PN Test Plans

The 11th edition aligns with the 2019 NCLEX-RN and 2020 NCLEX-PN test plans, ensuring students are well-prepared for licensing exams with integrated clinical judgment and critical thinking.

9.1 Alignment with 2019 NCLEX-RN Test Plan

The 11th edition is carefully aligned with the 2019 NCLEX-RN Test Plan, ensuring content reflects the latest exam focus areas. It emphasizes clinical judgment, patient-centered care, and evidence-based practice, mirroring test priorities. Chapters are structured to address key exam categories, such as physiological and psychological integrity, safe and effective care, and health promotion. This alignment helps students prepare effectively for the exam, building confidence and competence in critical nursing skills. Interactive resources further reinforce test readiness.

9.2 Preparation Strategies for Nursing Students

The 11th edition provides robust preparation strategies, including review content, practice exercises, and interactive modules. My Nursing Lab and Ready Point offer personalized study plans, video tutorials, and NCLEX-style questions. Students can assess their readiness and focus on weak areas. The book emphasizes clinical judgment and evidence-based practice, aligning with exam priorities. These tools help build confidence and competence, ensuring students are well-prepared for the NCLEX-RN and real-world nursing challenges.

Online Resources and Supplements

The 11th edition offers My Nursing Lab and Ready Point, providing interactive tools, video tutorials, and practice questions to enhance learning and NCLEX preparation effectively.

10.1 My Nursing Lab and Ready Point

My Nursing Lab and Ready Point offer interactive tools and resources to support nursing education. These platforms provide video tutorials, practice questions, and personalized study plans to reinforce learning. With real-time feedback, students can assess their understanding and improve their clinical skills. Additionally, these resources align with the textbook content, ensuring a comprehensive study experience. They are designed to help nursing students master key concepts and prepare confidently for exams like the NCLEX-RN.

10.2 Additional Study Materials and Tools

The 11th Edition offers a range of additional study materials, including NCLEX preparation strategies, video tutorials, and interactive simulations. These tools help students apply theoretical knowledge to clinical scenarios, enhancing their critical thinking and practical skills. Flashcards, case studies, and review questions further reinforce learning. The resources are designed to support diverse learning styles, ensuring students are well-prepared for both academic success and professional nursing exams. These materials complement the textbook, providing a holistic learning experience.

Downloading the 11th Edition PDF

The 11th Edition PDF is readily available for download on platforms like Scribd, offering convenient access to nursing students for their studies and professional development.

11.1 Availability of the PDF Version

The 11th Edition PDF is widely available for download on platforms like Scribd, My Nursing Lab, and Ready Point, ensuring easy access for nursing students worldwide. This digital version is licensed under CC-BY, making it a flexible resource for educational purposes. Students can download the PDF for free or access it online, enhancing their study experience with interactive tools and visual aids. This format supports self-paced learning and convenient revision, aligning with modern nursing education needs.

11.2 Platforms for Accessing the Digital Version

The 11th Edition of Fundamentals of Nursing is accessible through platforms like My Nursing Lab, Ready Point, and Scribd, offering flexible learning options. These platforms provide interactive tools, visual aids, and step-by-step guides to enhance skill mastery. Additionally, the PDF version is available for download on educational websites, ensuring easy access for students worldwide. This digital accessibility supports self-paced learning and aligns with modern nursing education demands, making it a convenient resource for aspiring nurses.

Posts navigation

1 2
Scroll to top